84
Ź
Ź
Ź
"- LEVEL EXPERT- PELLENC POWER TOOL BATTERY" Workshop document
Issue 11/2016 ref. : DOCUMENT ATELIER_BATTERIE_EXP_OUTILS_PELLENC_V2_2016_ENG
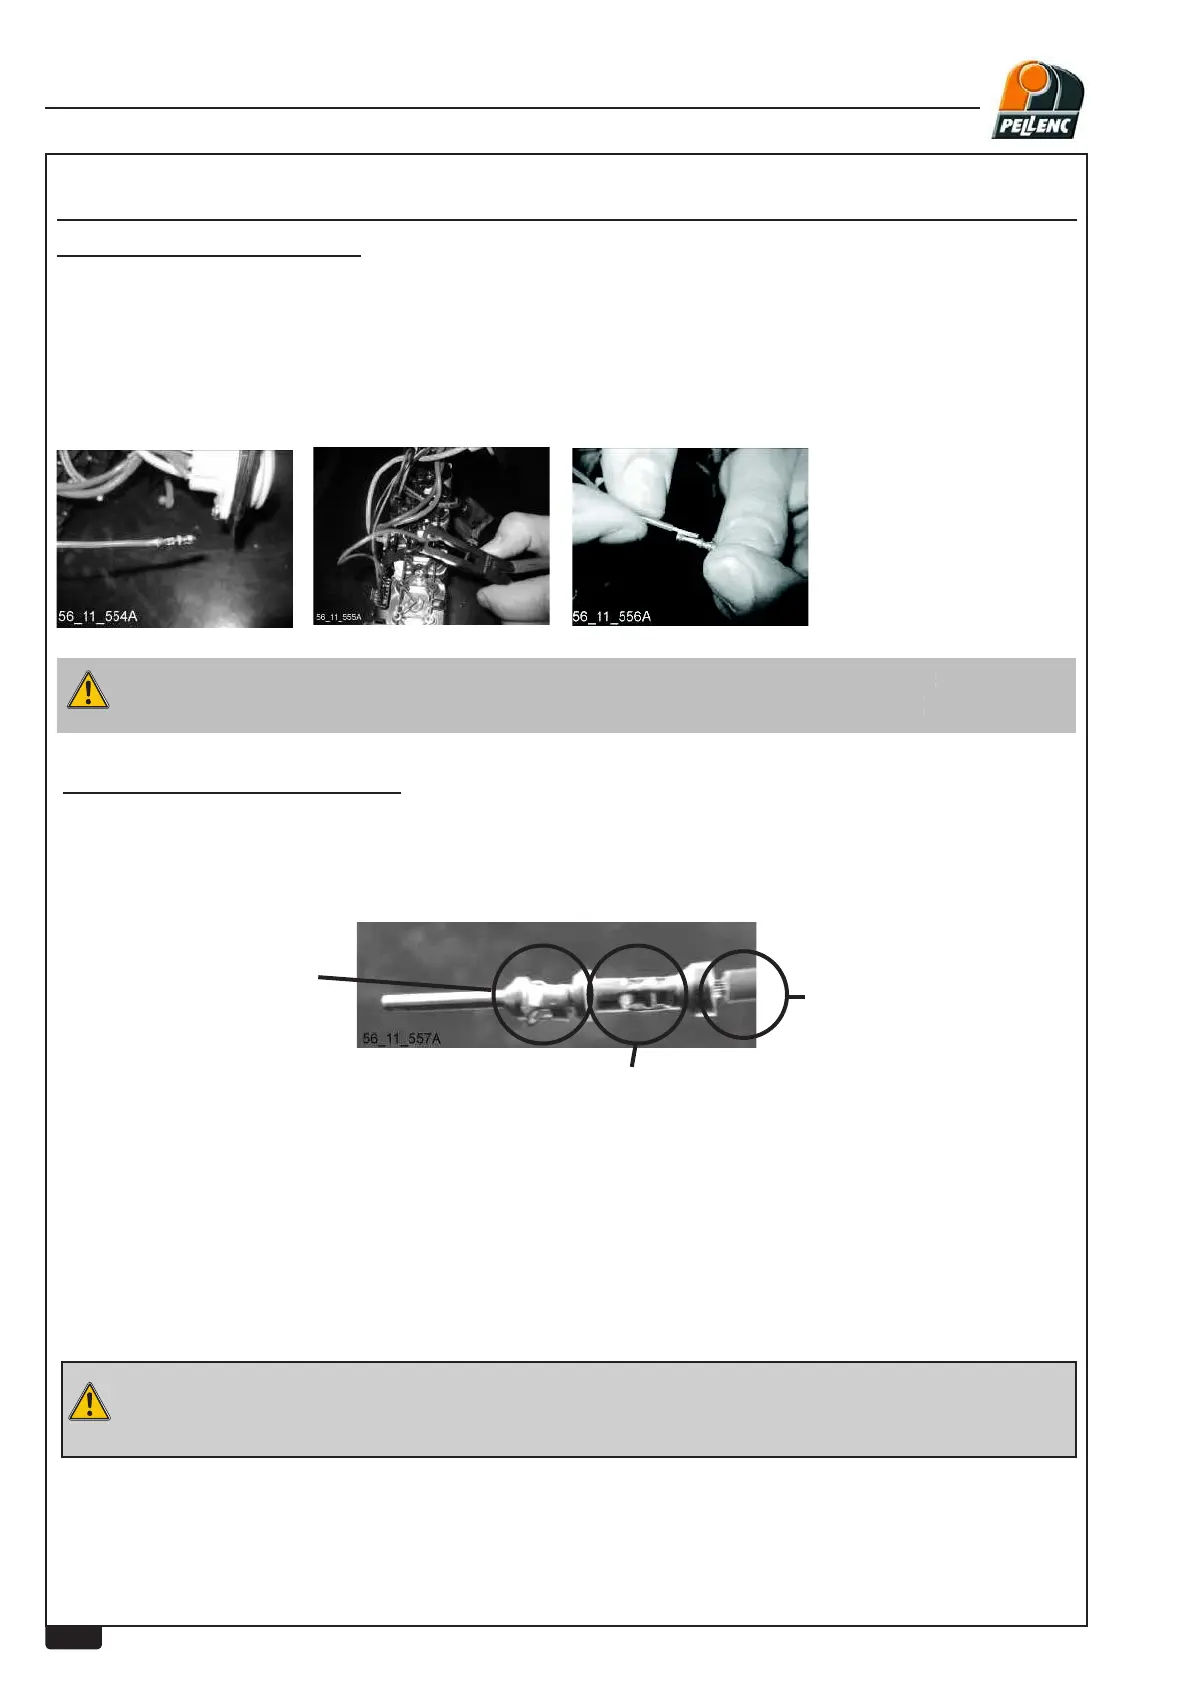
&XWWKHEURNHQFRQWDFWRIIÀXVK then strip the wire to the length necessary for recrimping.
NOTE: as a basis, take a new contact and hold it next to the wire to be stripped to determine the exact
stripping length.
127(GRQRWWZLVWWKHVWUDQGVRIWKHZLUHWRJHWKHURWKHUZLVHWKHZLUHZLOOQRORQJHU¿WLQWRWKH
contactŹleave the strands straight.
$GMXVWPHQWRI'(876&+SOLHUVIRUZLUHLQSXWFURVVVHFWLRQ PPðŹ$:*
$GMXVWPHQWRI'(876&+SOLHUVIRUZLUHLQSXWFURVVVHFWLRQ PPðŹ$:*
Check the quality of your crimping.
Insert the contact into its housing until a locking "click" is heard.
Wire strands visible (1/2
mm) Î to be sure not to
be off-center on the plastic
sheath
Non-return tabs Îto
be opened if they are
ÀDWWHQHGIRUEHWWHU
holding inside the
connector
Crimping Î make sure that the crimping pliers
anvil works in a centered and consistent manner.
If not, check the adjustment of the pliers and
start again.
LEVEL 3 - PELLENC AUTHORISED REPAIRER