83
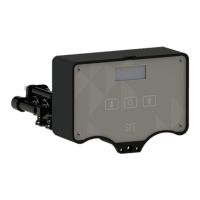
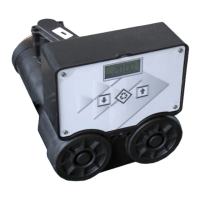
Position Measuring System
16.3. Changing the feedback field - Feedback Field
Mode (FFM)
The size of the feedback fields for sensor positions S1 to S3 can be changed – either using the PC software or
using the "Feedback Field Mode".
Procedure:
→ Open the housing following the instructions in Chapter "8. Opening and Closing the Housing".
→ Supply electrical power so that the position measuring system and the LED display can function.
→ Press down the teach-in buttons T1 and T3 simultaneously for approx. 2.5 s:
Flashing pattern for optical confirmation of this mode: 500 ms ON, 500 ms OFF (LED green+yellow+red)
(more blinking patterns in Chapter "17.2. Blinking pattern & fault signaling")
Teach-In
button
Mode Activation duration Optical feedback
T1 + T3 Feedback Field Mode 2.5 s
green + yellow + red
500 ms ON / 500 ms OFF
→ To select certain settings for the feedback fields, press one of the Teach buttons for 3 s according to the table
below:
the successful change of the feedback field for the three sensor positions is displayed by the following
flashing pattern: 3 s ON, 3 s OFF of one of the LEDs according to the table below
FFM no. Teach-In
button
Optical feedback by LED Feedback
field
S1 [mm]
Feedback
field
S2 [mm]
Feedback
field
S3 [mm]
FFM 1 T1
red: 3 s ON / 3 s OFF
+/- 1.00 +/- 3.00 +/-0.5
FFM 2 T2
green: 3 s ON / 3 s OFF
+/- 5.00 +/- 3.00 +/-1.00
FFM 3
*) T3 *)
yellow: 3 s ON / 3 s OFF
+/- 3.00 +/- 3.00 +/-1.00
FFM 4 T1 + T2
green + red: 3 s ON / 3 s OFF
+ 3.00 /- 12.00 +/- 3.00 +/- 1.00
*) FFM 3 or T3 corresponds to the factory setting or the delivery status
→ The new feedback field is now active and the device will automatically switch back to normal operation.
If no button is pressed for 10 s after activation of the "Feedback Field Mode", the device will automati-
cally exit this mode and switch back to normal operation.
With the commands DeviceReset and FactoryReset, the feedback fields are reset to the factory settings
(see FFM 3).
english
 Loading...