Do you have a question about the Pfaff 3511-2/01 and is the answer not in the manual?
| Buttonhole Styles | 4-step |
|---|---|
| Max Stitch Length | 4 mm |
| Max Stitch Width | 5 mm |
| Built-in Needle Threader | No |
| Free Arm | Yes |
| Type | Mechanical |
| Application | Home Use |
Machine construction in accordance with European regulations and general legal requirements.
Guidelines for operator training, machine use, safety devices, and maintenance personnel.
Explanation of danger and caution symbols used in the manual.
Key instructions for safe operation and manual availability.
Duties of operators regarding safety, working methods, clothing, and reporting issues.
Duties of specialist staff for lubrication, maintenance, and repairs.
Specific warnings about workspace, needle area, and required safety devices.
Defines the machine's purpose and inappropriate uses, emphasizing manufacturer liability.
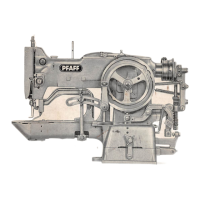
Details stitch type, needle system, dimensions, electrical data, and weight.
Customer responsibility for proper disposal according to pollution control regulations.
Guidelines for transporting the machine to and within customer premises.
Customer responsibility for disposing of packing materials like paper and cardboard.
Instructions for storing the machine to protect against dust, moisture, and corrosion.
Defines symbols used for notes, cleaning, lubrication, and technical work.
Details operation of the main power switch and the presser foot lifting lever.
Explains foot pedal operations and photo sensor status indicators.
Overview of the control panel, screen displays, and associated symbols.
Details key functions like Start/End Backtacks, Edge Trimmer, and Jig Drive.
Explains functions like seam program editing, line selection, and corner programming.
Describes functions for cycle time, edge trimmer aid, piece counter reset, and start inhibitor.
Requirements for installing the machine, including power, lighting, and stability.
Procedure for setting the table height using adjustment screws.
Steps for attaching the spool holder to the table top.
Instructions for connecting plugs to the control box and securing earth cables.
Pre-operation checks including electrical leads, oil, air pressure, and mains voltage.
Guidance on how to turn the machine on and off safely.
Steps to set the basic position of the machine drive unit for proper operation.
Procedure for inserting the needle, including safety precautions and alignment.
Instructions for winding the bobbin and adjusting bobbin thread tension.
Steps for removing, inserting, and adjusting bobbin case and its thread tension.
Steps for threading the needle and adjusting needle thread tension.
Procedure for setting the stitch length using the control panel.
Instructions for setting the number of stitches for start and end backtacks.
Steps for inserting, removing, and managing the write protection of SD cards.
Procedure for placing and clamping the workpiece onto the sewing jig.
Steps to position the sewing jig onto the needle plate for operation.
General safety and prerequisite conditions for operating the sewing machine.
Using manual sewing for installation and checks, with related function keys.
Instructions for programmed sewing using stored seam patterns, with function keys.
Guide to creating new seam patterns by sewing sections step-by-step.
Procedure for making minor corrections to previously created seam patterns.
How to activate the edge trimmer with a delay, useful for waistband extensions.
Steps to enter the program management interface for seam patterns.
How to view seam patterns stored in the machine's internal memory.
How to view seam patterns stored on the inserted SD memory card.
Instructions for transferring specific seam patterns from machine to SD card.
Steps for transferring all seam patterns from machine to SD card.
Instructions for transferring specific seam patterns from SD card to machine.
Steps for transferring all seam patterns from SD card to machine.
Procedure for removing seam patterns stored in the machine's internal memory.
Instructions for removing seam patterns stored on the SD memory card.
Steps to format an SD memory card for use with the machine.
List of error messages related to the sewing motor and their descriptions.
List of error numbers associated with the SD memory card and their meanings.
Table outlining recommended maintenance intervals for cleaning and checks.
Guidelines and safety precautions for cleaning the sewing machine.
Instructions for refilling the machine's oil reservoir.
Procedure for checking and adjusting the working air pressure.
Steps for emptying and cleaning the water bowl of the air filter/regulator.
Important notes for expert staff regarding adjustments and safety precautions.
List of tools, gauges, and materials needed for machine adjustments.
Definitions for abbreviations like TDC and BDC used in adjustment sections.
Guide on using blocking pins and adjustment gauges for specific machine positions.
Procedure for setting the basic position of the machine drive unit.
Steps to set the needle height relative to the needle plate.
Procedure to ensure the needle penetrates the needle hole precisely in the center.
Adjusting the hook shaft bearing and tightening the toothed belt.
Instructions for lubricating the hook mechanism and checking oil application.
Adjusting needle rise, hook-to-needle clearance, and bobbin case finger position.
Adjusting thread check spring stroke and slack thread regulator.
Ensuring reliable engagement of the bobbin winder drive and automatic shut-off.
Setting the presser foot pressure to ensure reliable jig transport.
Adjusting the edge trimmer knife to its zero position without play.
Ensuring the knife is at the bottom of its stroke when the needle bar is at b.d.c.
Setting the correct height for the knife blade relative to the stationary knife.
Adjusting the knife blade position relative to the stationary knife edge.
Setting the knife to touch the stationary knife without pressure and with a slant.
Adjusting the knife's lateral position to rest on the stationary knife with light pressure.
Adjusting the solenoid and control cam for proper thread trimming operation.
Ensuring the thread catcher tip points to the needle center and is horizontal.
Adjusting the knife position relative to the needle and thread catcher.
Setting the thread catcher's front reversal point relative to the bobbin case finger.
Verifying perfect cutting of threads by the thread catcher and knife.
Adjusting magnet lift and clearance between tension discs for thread release.
Ensuring the control cam moves the thread catcher when the take-up lever is at t.d.c.
Setting the clearance for the automatic presser foot lift.
Aligning the jig drive parallel to the bed plate edge at a specific distance.
Ensuring the drive wheel firmly touches the sewing jig at all times.
Adjusting contact pressure for reliable jig transport while keeping it low.
Guiding the sewing jig parallel to the cover plate edge with the support roller.
Setting the retainer distance and ensuring it doesn't touch the edge trimmer.
Setting photo sensor scanning point, adhesive tape, and jig stop position.
Guide to switching between operating, mechanic, and service user levels.
Demonstrates how to select and input values for machine parameters.
Reference table for machine parameters, their descriptions, and settings.
Reference table for machine parameters, their descriptions, and settings.
Reference table for machine parameters, their descriptions, and settings.
Reference table for machine parameters, their descriptions, and settings.
List of error messages related to the sewing motor and their descriptions.
List of error numbers associated with the SD memory card and their meanings.
Steps to initiate the hardware test program for checking components.
Details on checking machine inputs during the hardware test.
Details on checking machine outputs during the hardware test.
Verifying set value and actual value senders for pedal and balance wheel.
Checking photo sensor and thread monitor status during the hardware test.
Instructions for resetting seam parameters, patterns, or performing a cold start.
Guide to updating the machine's software via the internet using PFAFF tools.
Visual list of important wearing parts with part numbers.