7.5.4 Calibration in sniffer test with external calibrated leak
External calibrated leak
The operator must use a calibrated leak containing the tracer gas selected (
4
He, Mass 3 or H
2
).
There are several types of external calibrated leaks, with or without reservoir, with or without valve, cov-
ering several ranges of leaks.
The manufacturer does not provide calibrated leaks in Mass 3 and H
2
.
The choice of external calibrated leak depends on application requirements: use a calibrat-
ed leak from the same leak rate range as the leak to be measured.
Calibration
1. Configure the following settings:
●
test method: sniffer (see chapter “Test method”)
●
calibration type: external (see “Calibration type”)
●
type of calibrated leak: external (see chapter “Calibrated leak”)
●
calibration: operator (see chapter “Calibration function”)
2. Select the tracer gas for the external calibrated leak (see chapter “Tracer gas”).
3. Verify the setting for the external calibrated leak used (see chapter “Calibrated leak”).
Correct the temperature, month and year if necessary.
4. Press the CAL button to start a calibration.
5. Follow the instructions given by the leak detector.
–
Press [Next] to move to the next step.
To stop a calibration, press the CAL button 3 times in under 5 seconds.
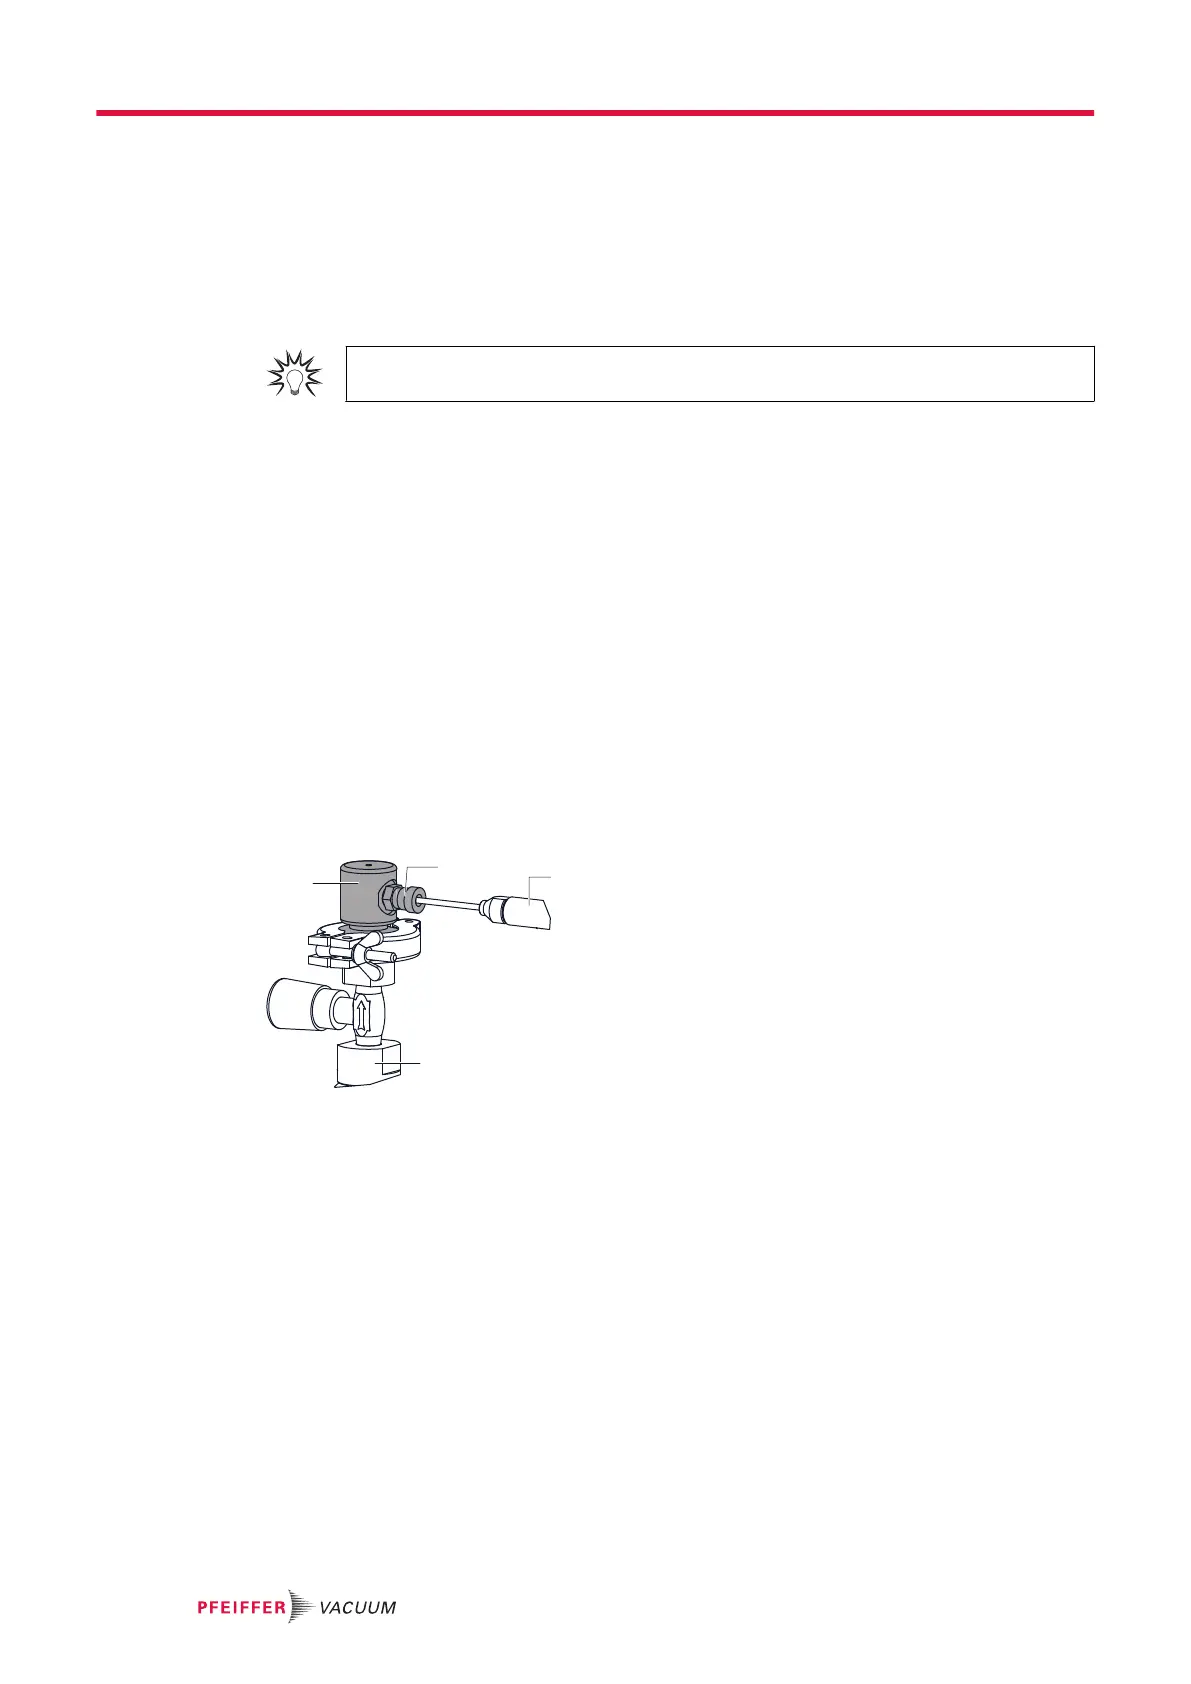
Adaptor for external calibrated leaks
A DN 16 ISO-KF or DN 25 ISO-KF adaptor is used to calibrate the detector with an external calibrated
leak in sniffer test mode (with Standard sniffer probe only).
Adaptor part number (see chapter “Accessories”).
1 DN 16 ISO-KF or DN 25 ISO-KF adapter 3 Sniffer probe
2 Fixing screws 4 Calibrated leak
1. Attach the adaptor to the external calibrated leak used for the calibration with a centering ring and
a clamp.
2. Press the CAL button to start a calibration.
3. Place the sniffer probe in the calibration port.
4. Tighten the fixing screw.
5. Follow the instructions given by the leak detector.
–
Press [Next] to move to the next step.
6. Loosen the fixing screw.
7. Remove the sniffer probe from the calibration port.
8. Follow the instructions given by the leak detector.
–
Press [Next] to move to the next step.
9. Wait 10 s (at least) before reading the leak rate.
7.5.5 Calibration in sniffer test on concentration
Concentration = volume at atmospheric pressure filled with a gas mixture for which the tracer gas con-
tent is known.
Operation
30/98