Calibration on concentration can only be carried out in sniffer test mode, with the detector in ‘Stand-by’
mode.
Before starting this function, make sure that the leak detector is in an environment free of tracer gas
pollution.
1. Configure the following settings:
●
test method: sniffer (see chapter “Test method”)
●
calibration type: Concentration (see “Calibration type”)
●
calibration: calibration (see “Calibration function”)
2. Select the tracer gas for the concentration (see chapter “Tracer gas”).
3. Press the CAL button to start a calibration.
4. Follow the instructions given by the leak detector.
–
Press [Next] to move to the next step.
At the end of the calibration, the detector returns to ‘Stand-by’ mode.
7.6 Zero Function
The zero function helps the user to identify very small leak rate variations in the surrounding back-
ground noise or to dilate small measured leak rate fluctuations on the analog display.
Zeroing
Configuration (see chapter “Zero activation”).
Over time, there may be a deviation in the leak rate display. Zeroing must be performed regularly in the
following cases:
●
when the detector’s background value increases,
●
before performing a precise measurement.
1. Press the ZERO button.
7.7 Touchscreen
The touch screen is interfaced with the detector and is used to:
●
display information about the test,
●
access the available functions,
●
set the detector's parameters.
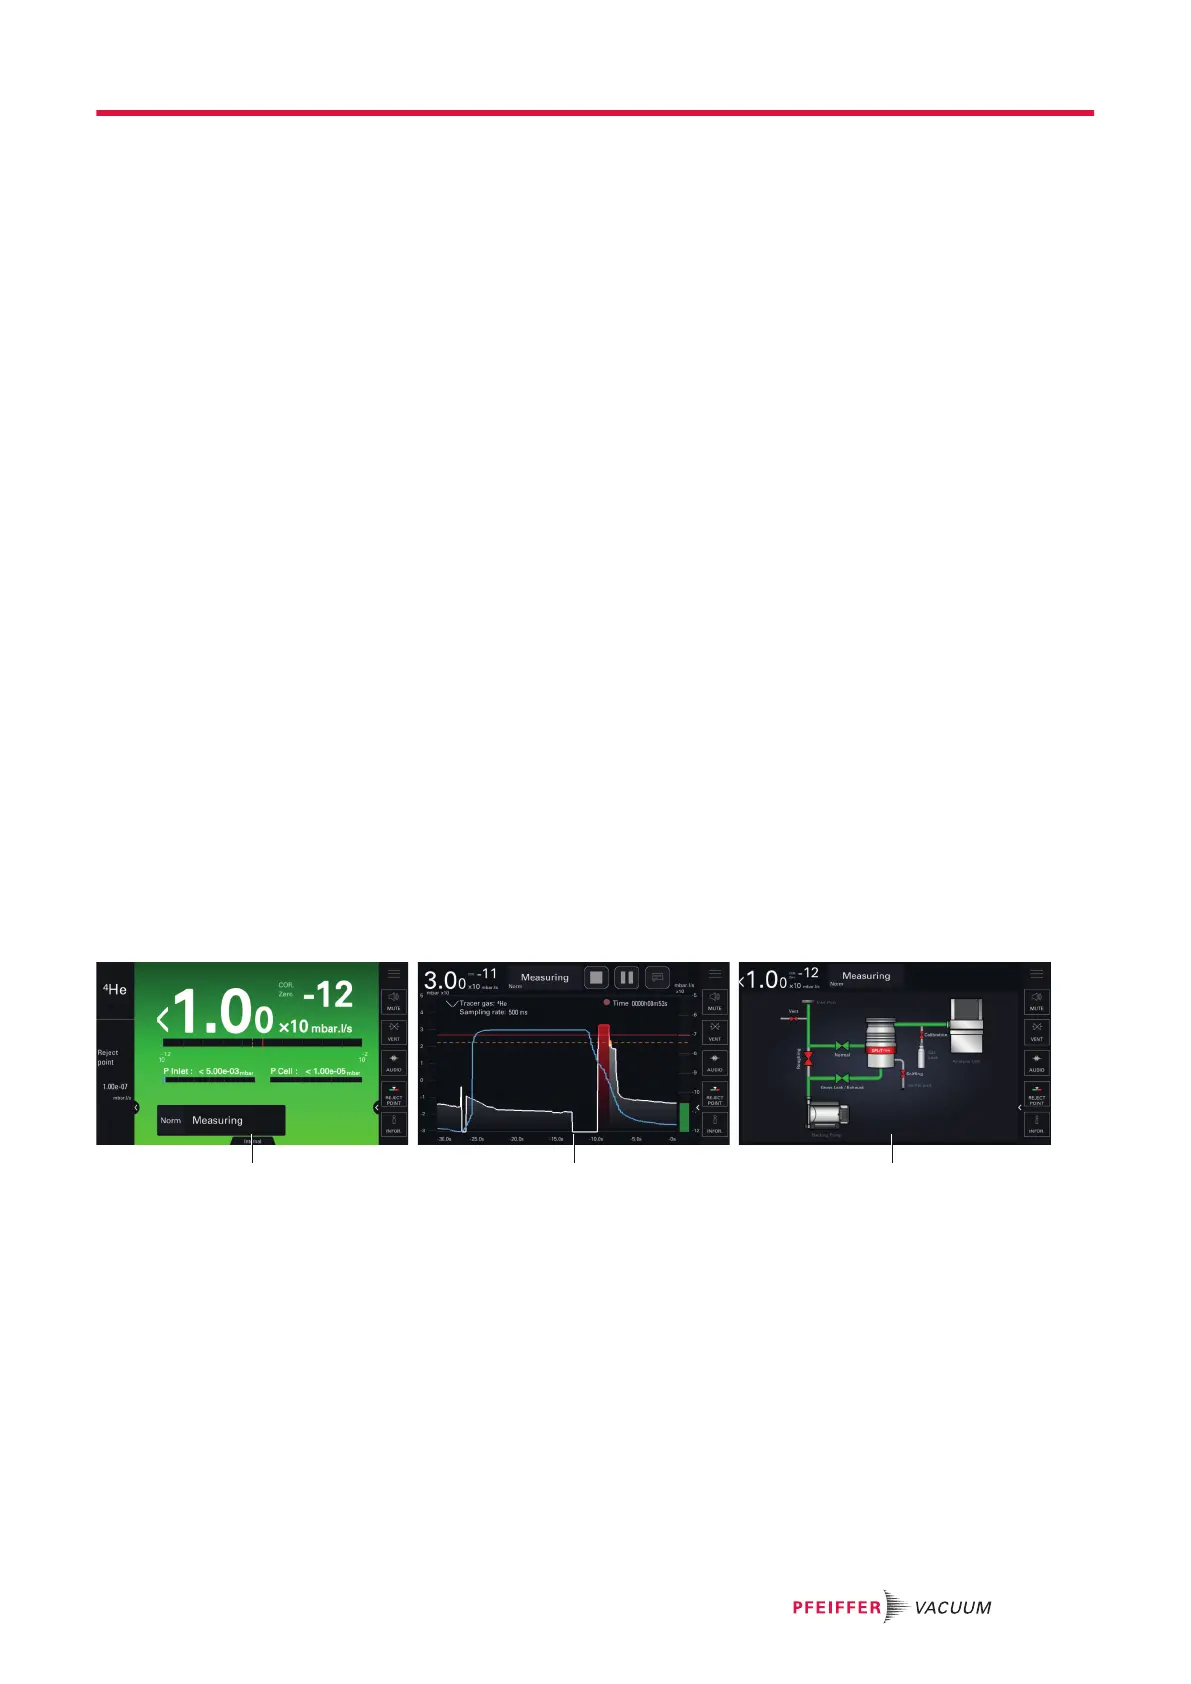
1 Main screen [Home]: Information about the current
test
3 Synoptic: Schematic diagram of the de-
tector and the status of the valves
2 Graph screen: Monitoring and recording of the leak
rate
The contents of the screens are provided as an example: depending on the detector settings, the dis-
play may be different.
►
Remove the film that protects the touch screen upon delivery.
►
Use the touch screen manually without using hard objects such as pens, screwdrivers, etc.
►
Use the RS-232 to control/set the detector if the touch screen is out of service (broken screen).
Operation
31/98