Operation
26
Before each switching on:
All models
Become familiar with the safety instructions (see 2).
Remove the cover before using the product.
Check that all the connections are correct (see 5).
Before use, make sure that the leak detector is in an environment free of tracer gas.
Check that the electrical network is properly attached to the connector using the
power cable.
Model Wet Check that the oil level of the primary pump is between the maximum and minimum
levels (see 5.4).
6.3 Switching the detector on
6.3.1 Switching the detector on
Set the circuit breaker to I (see 4.2).
The various stages for switching the detector on are displayed. The detector is ready for
testing when the Stand-by screen appears.
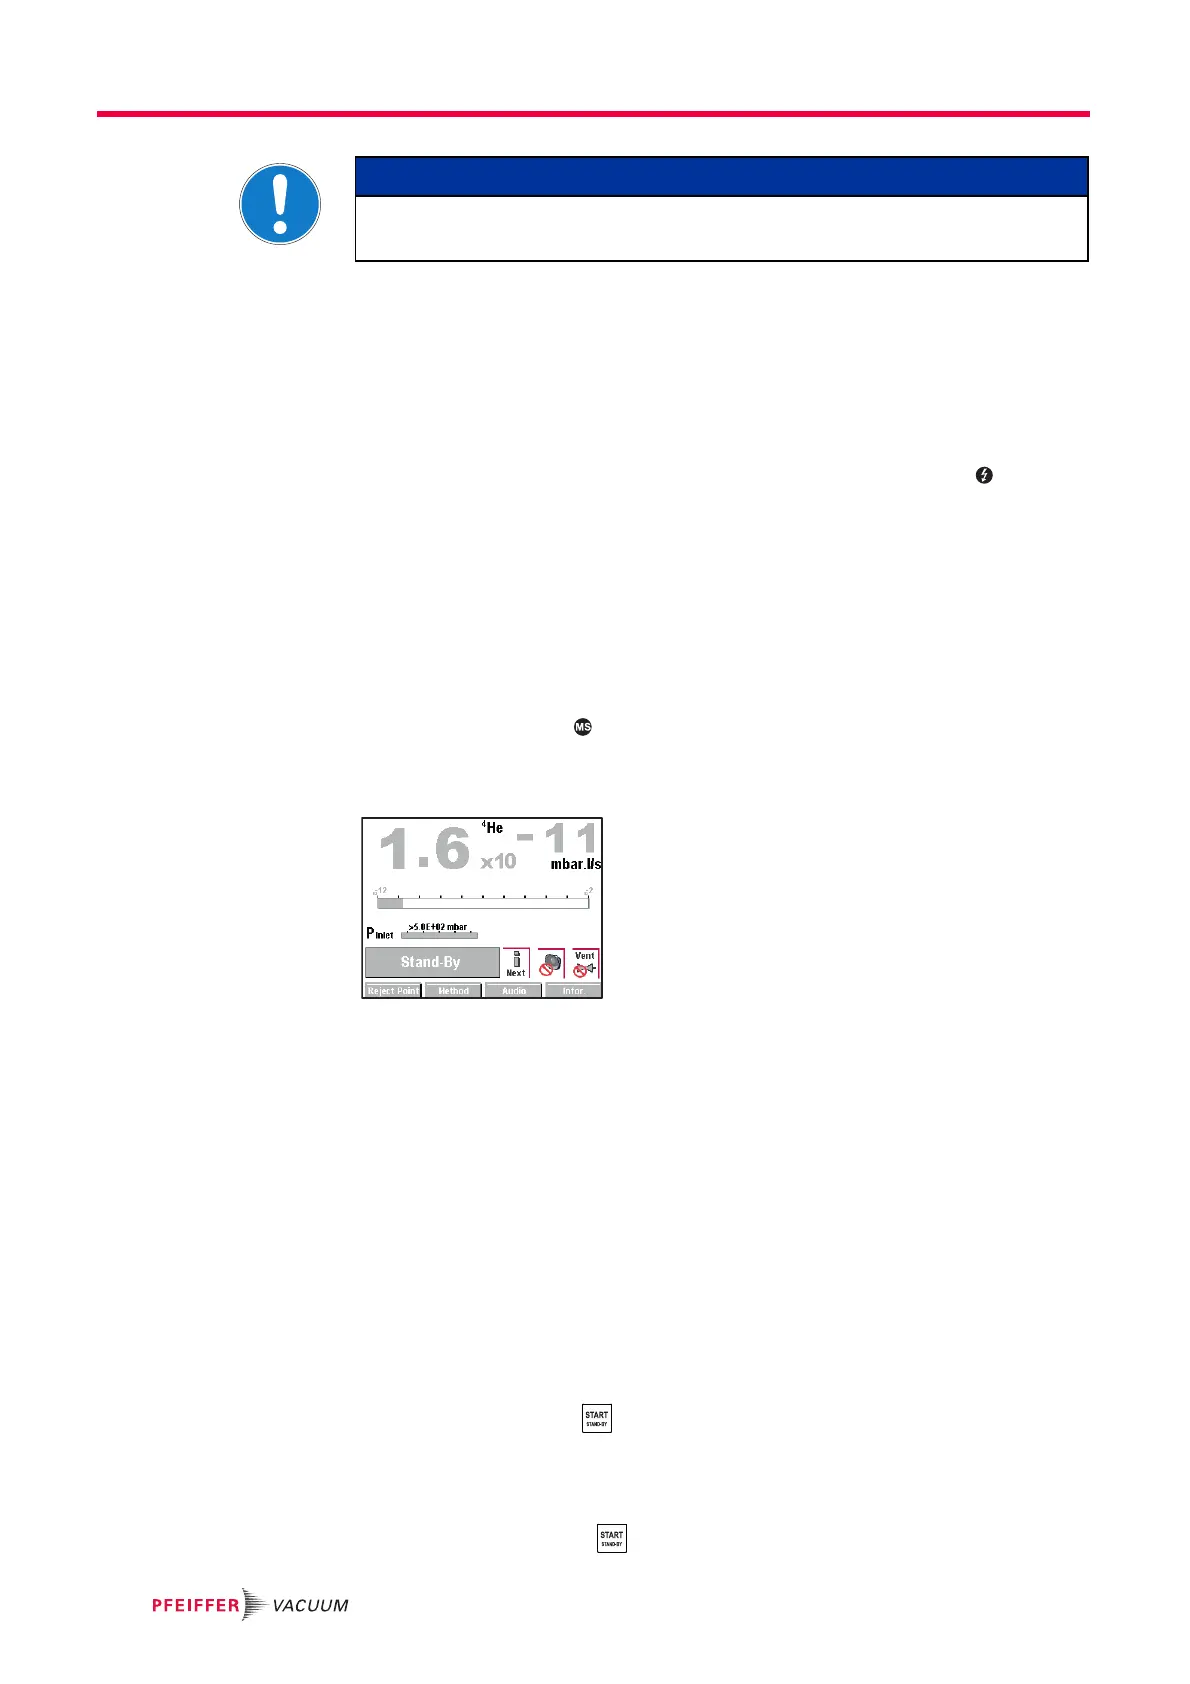
Fig. 9: Stand-by screen
Switching the detector
on for the first time
(see 5.7)
Switching on after
an extended shutdown
If the detector has been stored or has not been used, switching on time will be longer
than if it is in regular use.
6.3.2 Starting a test
There are 2 possible test methods: hard vacuum or sniffing (see 4.3).
Hard vacuum test Select the ’hard vacuum’ test method (see 7.4.1).
Set the detector to Stand-by mode.
In Stand-by mode, the leak rate displayed corresponds to the detector's background.
Connect the part to be tested to the leak detector inlet port or put the part in the test
chamber connected to the leak detector.
Set the reject set point if necessary(see 7.3.3).
Start a test by pressing .
The various test stages are displayed.
When the detector has reached the most sensitive test mode, wait for the measure-
ment to stabilise: the measurement displayed corresponds to the measured leak rate.
Stop the test by pressing .
NOTICE
Risk of seizing
Never move the detector while it is in use, even if it is placed on a trolley.