47Custom White Balance 47XT Camera System Manual |
Custom White Balance
Creating a Custom White Balance
Creating a custom White Balance setting on the IQ4 is achieved from either a
captured image when in the Viewer or from the live view feed in Live View. It
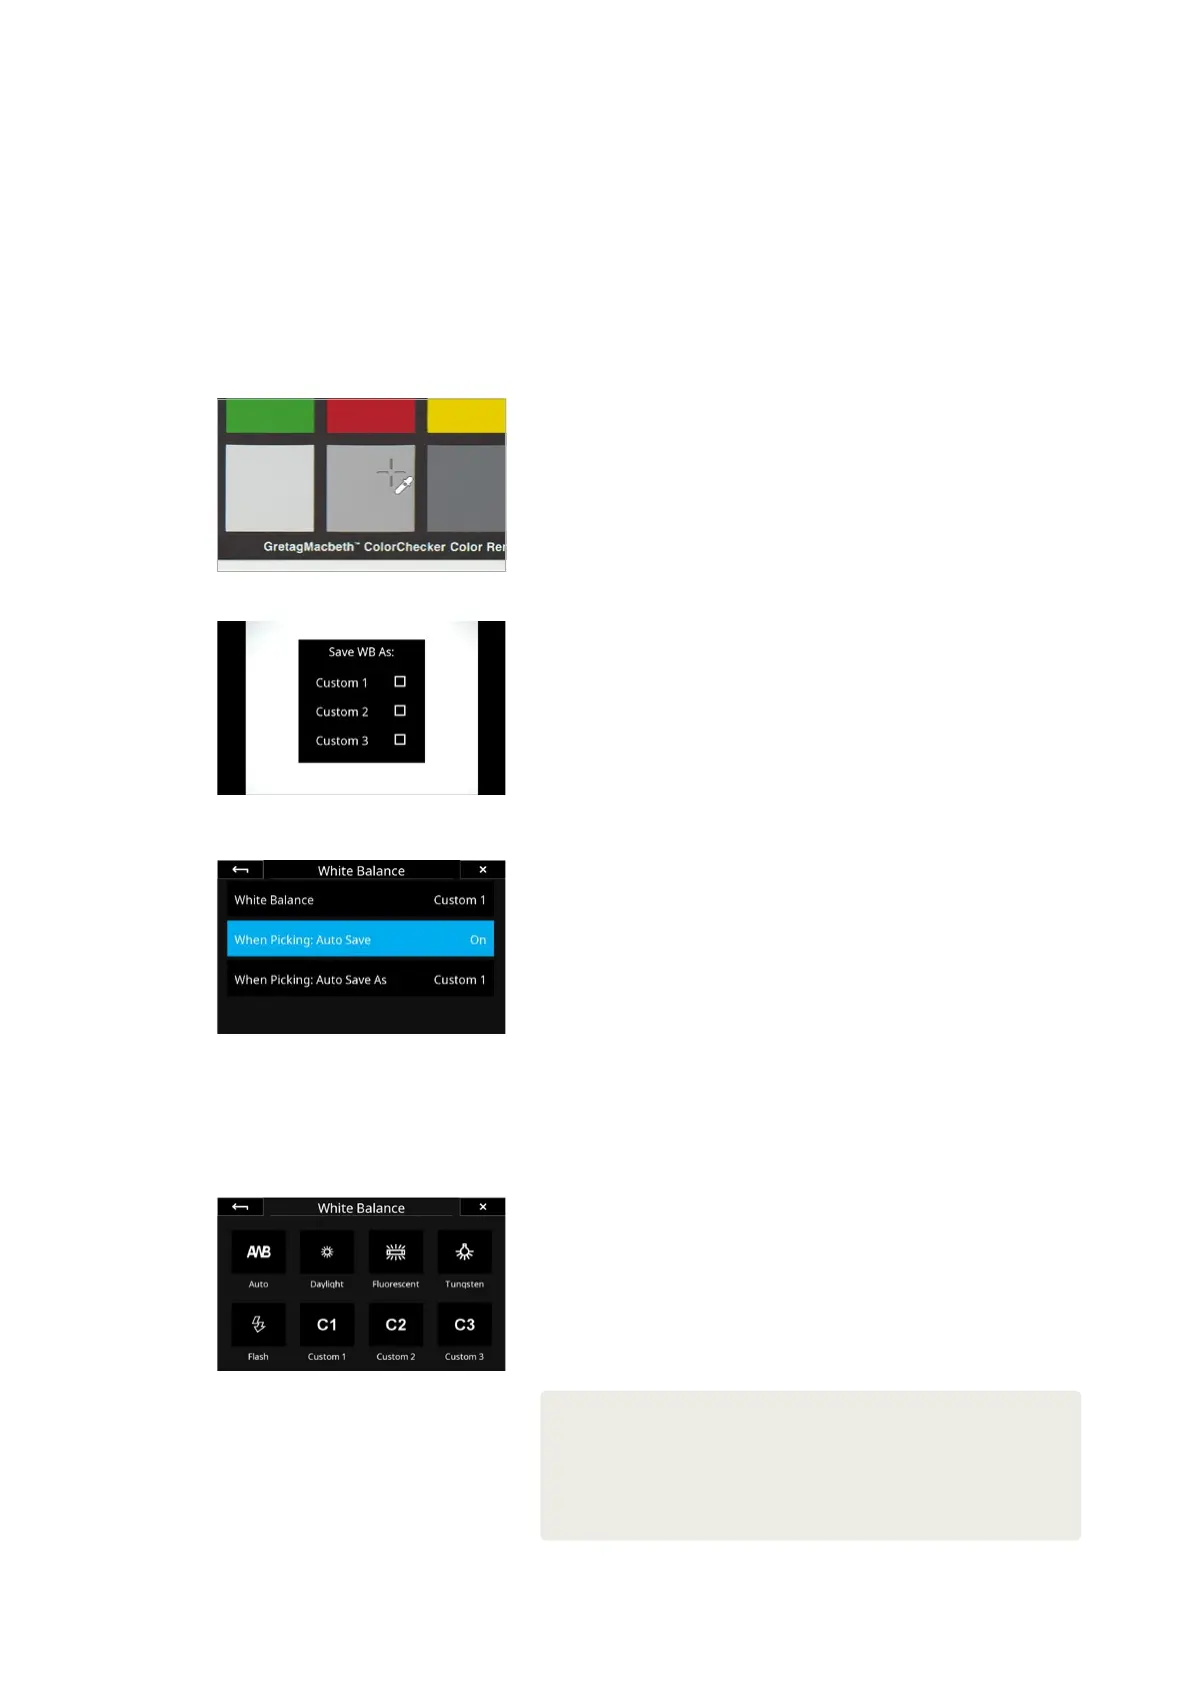
is recommended to capture a reference white balance image like a Gretag
Macbeth Color Checker, or QP-Card displayed in the image under the
intended light source.
Swipe in from the left and tap on the White Balance Picker icon to activate
the tool. Then drag the White Balance Picker icon with your fingertip to the
point on the image that you want to reference as a neutral tone (a gray patch,
or a light gray neutral area in the image). The tool will now automatically
adjust the white balance based on the color cast in that spot.
Next, tap on the White Balance Picker icon on the screen and you will get the
option to save the white balance adjustment as either Custom 1, Custom 2 or
Custom 3.
The setting is automatically saved and all subsequent captures will use this
white balance setting.
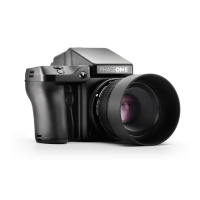
Saving the Custom White Balance automatically
It is possible to save the selected white balance automatically on the IQ4,
saving you the step to select either Custom 1, Custom 2 or Custom 3 (see
above). This is done by going to the IQ4 Menu and selecting IQ Settings >
White Balance > When Picking: Auto Save and then choosing On. The white
balance will now be applied and saved automatically when you deactivate
White Balance Picker tool.
Note that you will not get the option on the screen to select whether the new
white balance setting should be saved as either Custom 1, Custom 2 or Custom
3. This is controlled in the menu setting White Balance > When Picking: Auto
Save As, so ensure that you select the desired white balance custom slot (C1,
C2 or C3) when using the Auto Save feature.
You can also access the additional White Balance settings by long-pressing on
the White Balance icon when in the Viewer or Live View.
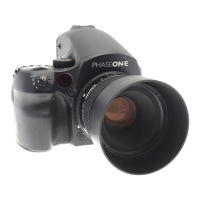
Selecting a Custom White Balance Setting
You select the desired Custom White Balance Setting from the Camera
Controls. Tap on the top right button of the IQ4 until it is selected, then press
the White Balance icon.
Now you can choose the custom white balance by tapping on C1, C2 or C3. If
you have only stored one custom white balance, select C1.
NOTES:
White balance and custom white balance settings are only necessary for a
representative rendering of the color when displayed on the touch screen of the IQ4 or
when saving JPEGs in addition to raw files.
The raw files will contain the white balance settings for correction in Capture One,
so capturing a reference white balance file with a gray card under the intended light
source will speed up the workflow.
White Balance Picker
White Balance preset options
White Balance Custom save
White Balance Auto Save