Fax Option (D433) Installation
D432/D433 8 SM
4. Install the FCU [A] ( x 2; removed in step 3).
5. Write the serial number of the fax unit on the serial number decal, and then attach this
decal to the bracket [B] of the fax unit.
6. Connect the telephone cord to the "LINE" jack.
7. Only for NA models, install the TEL cap in the "TEL" jack if the handset will not be
installed.
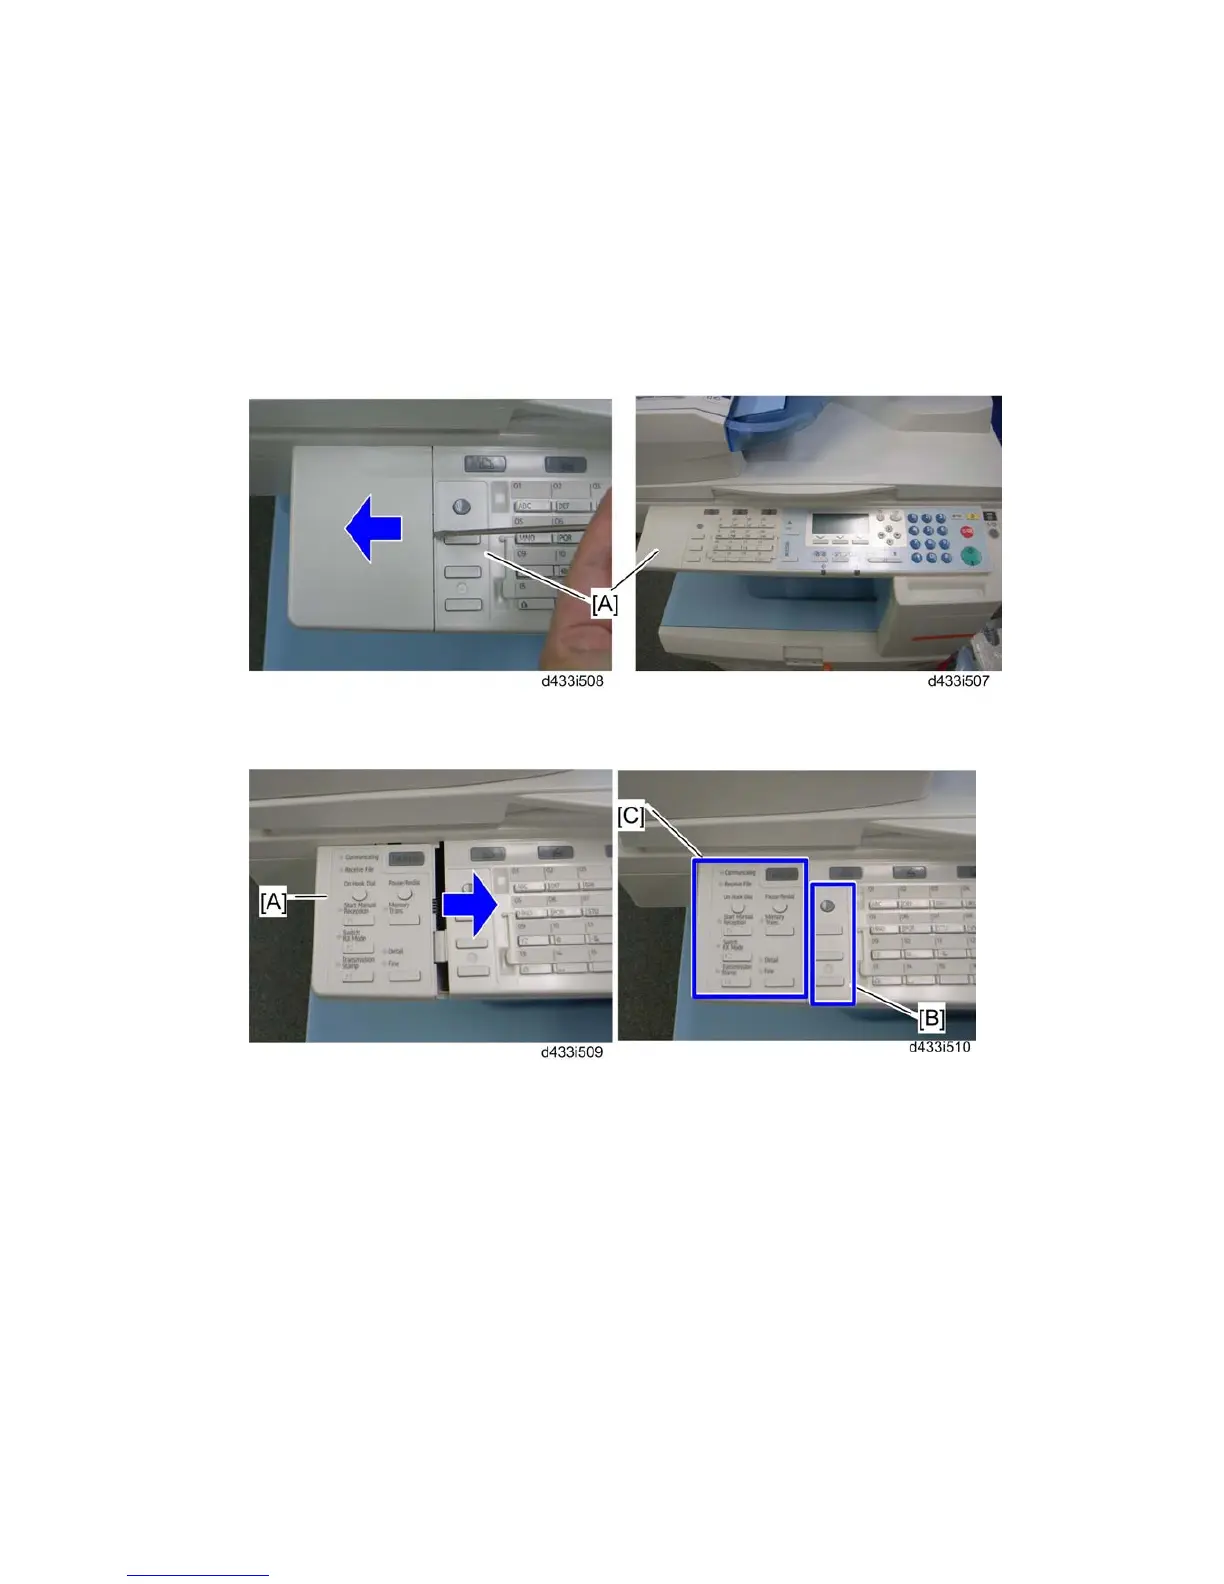
8. Slide the dummy cover [A] to the left side with a flat-head screwdriver, and then
remove it (hooks).
9. Put the fax operation panel [A] on the left edge of the copier's operation panel, and
then slide it to the right side.
10. Attach the fax function decal at the location [B].
11. Attach an appropriate fax operation decal at the location [C].
 Loading...