ROBOTAPE 50 CFA
9. SPARE PARTS REPLACEMENT INFORMATION
9.1. RECOMMENDATIONS FOR REPLACING PARTS
‒ Carr
out the interventions with all the safet
devices enabled and wear the DPI
rovided.
‒ DO NOT carry out any intervention that is not described in the manual but contact an Assistance Service
authorised b
the manufacturer.
‒ DO NOT damp in the environment materials, pollutant liquids and the residues created during the
interventions but dis
ose them accordin
to the standards in force.
|
Important
Before carrying out any replacement activate all safety devices provided for, and assess if it is necessary to
inform o
eratin
ersonnel and the
ersonnel nearb
.
In particular, confine the neighbouring areas to impede access to the devices that could, if activated, produce
unex
ected dan
er conditions
rovokin
hazards to
ersonal safet
and health.
When re
lacin
worn
arts, use onl
ori
inal re
lacement
arts.
The Manufacturer is not responsible for any damage to property or injuries to people caused by the use of non-
enuine s
are
arts or which ma
result from re
airs not authorised b
the Manufacturer.
When orderin
new
arts, follow the instructions
iven in the s
ares catalo
ue.
|
Important
Before
erformin
an
re
lacement o
eration, disconnect the
ower su
l
.
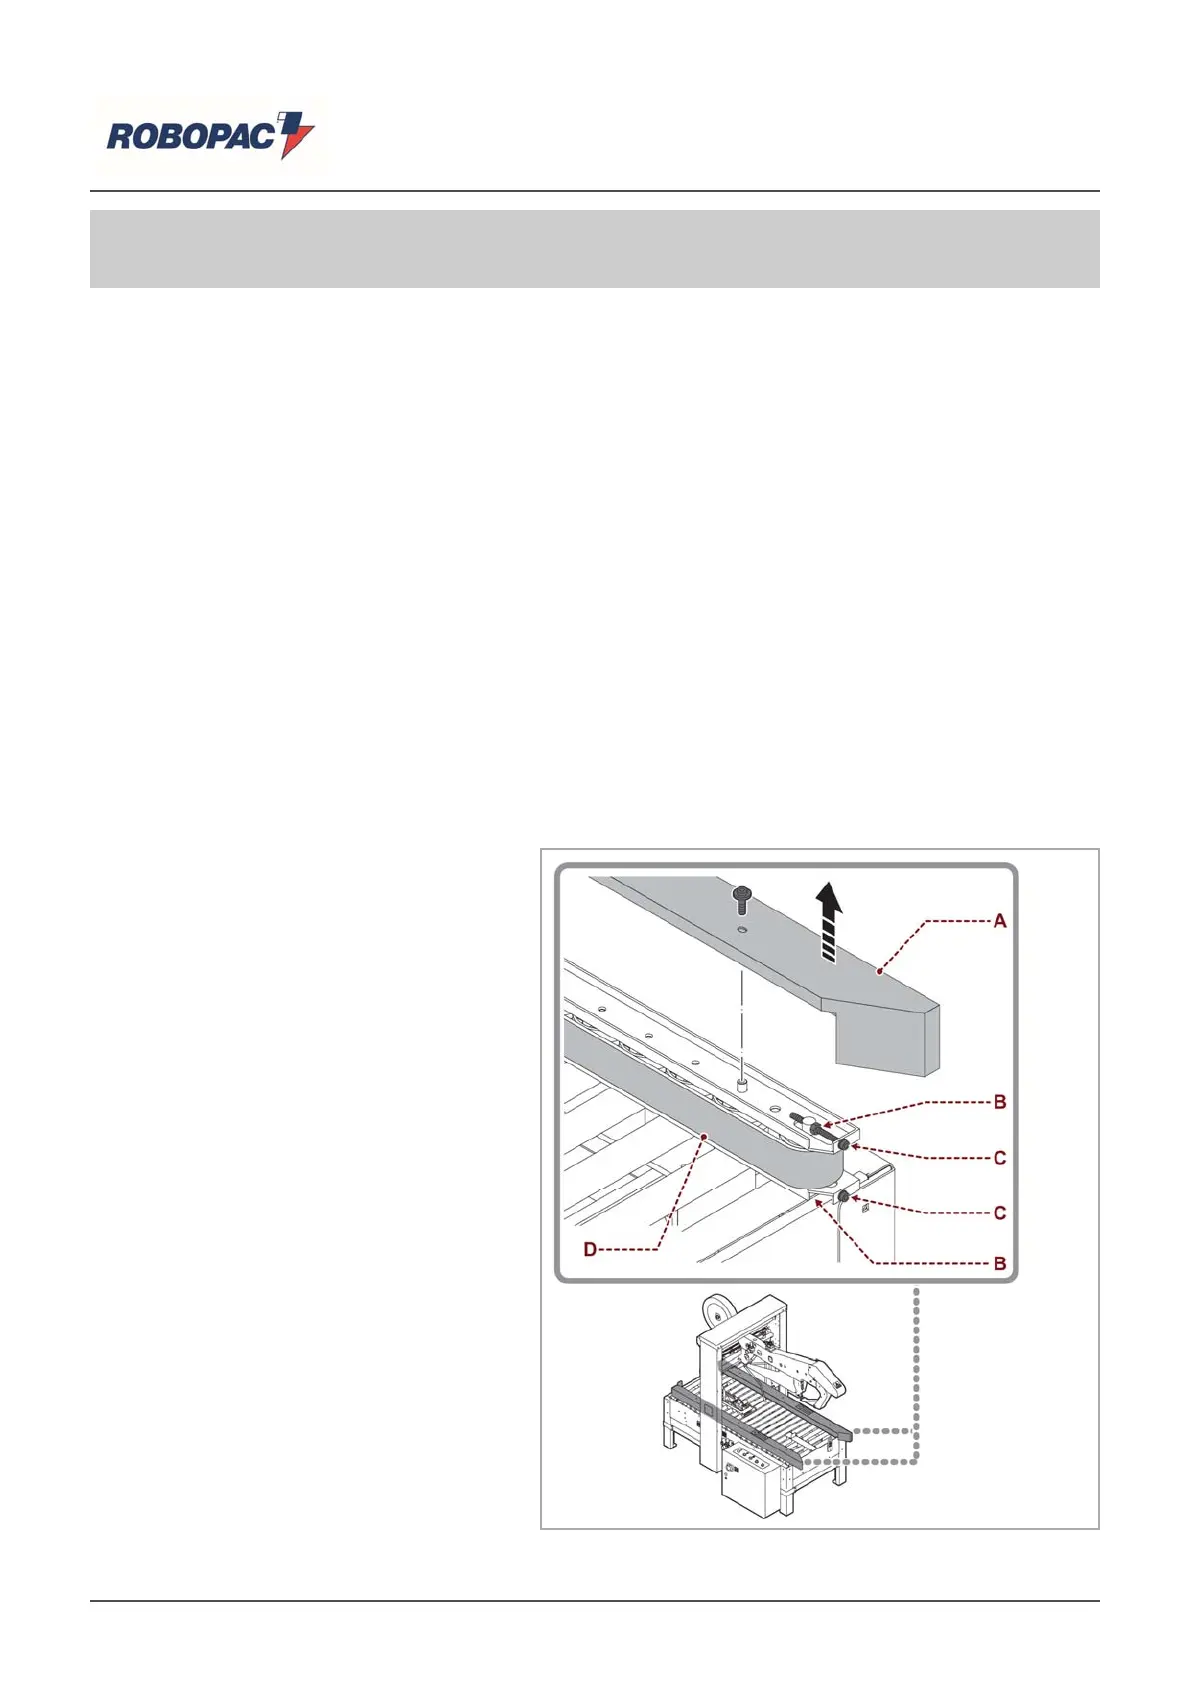
9.2. REPLACEMENT OF
CONVEYOR BELT
Proceed as indicated.
1. Deactivate the main electrical knife to
stop the machine under safe conditions.
2. Remove transmission cover (A).
3. Loosen nut (B).
4. Operate screws (C) to completely loosen
tape (D).
5. Remove tape (D) and replace it.
6. Adjust belt tension.
(See “conveyor belt adjustment”).
7. Repeat the operations described to
replace the other belt.
8. Start conveyor movement to check
correct operations.
9. Re-assemble the casing (A) at the end of
the o
eration.
English