13
Selecting Sounds
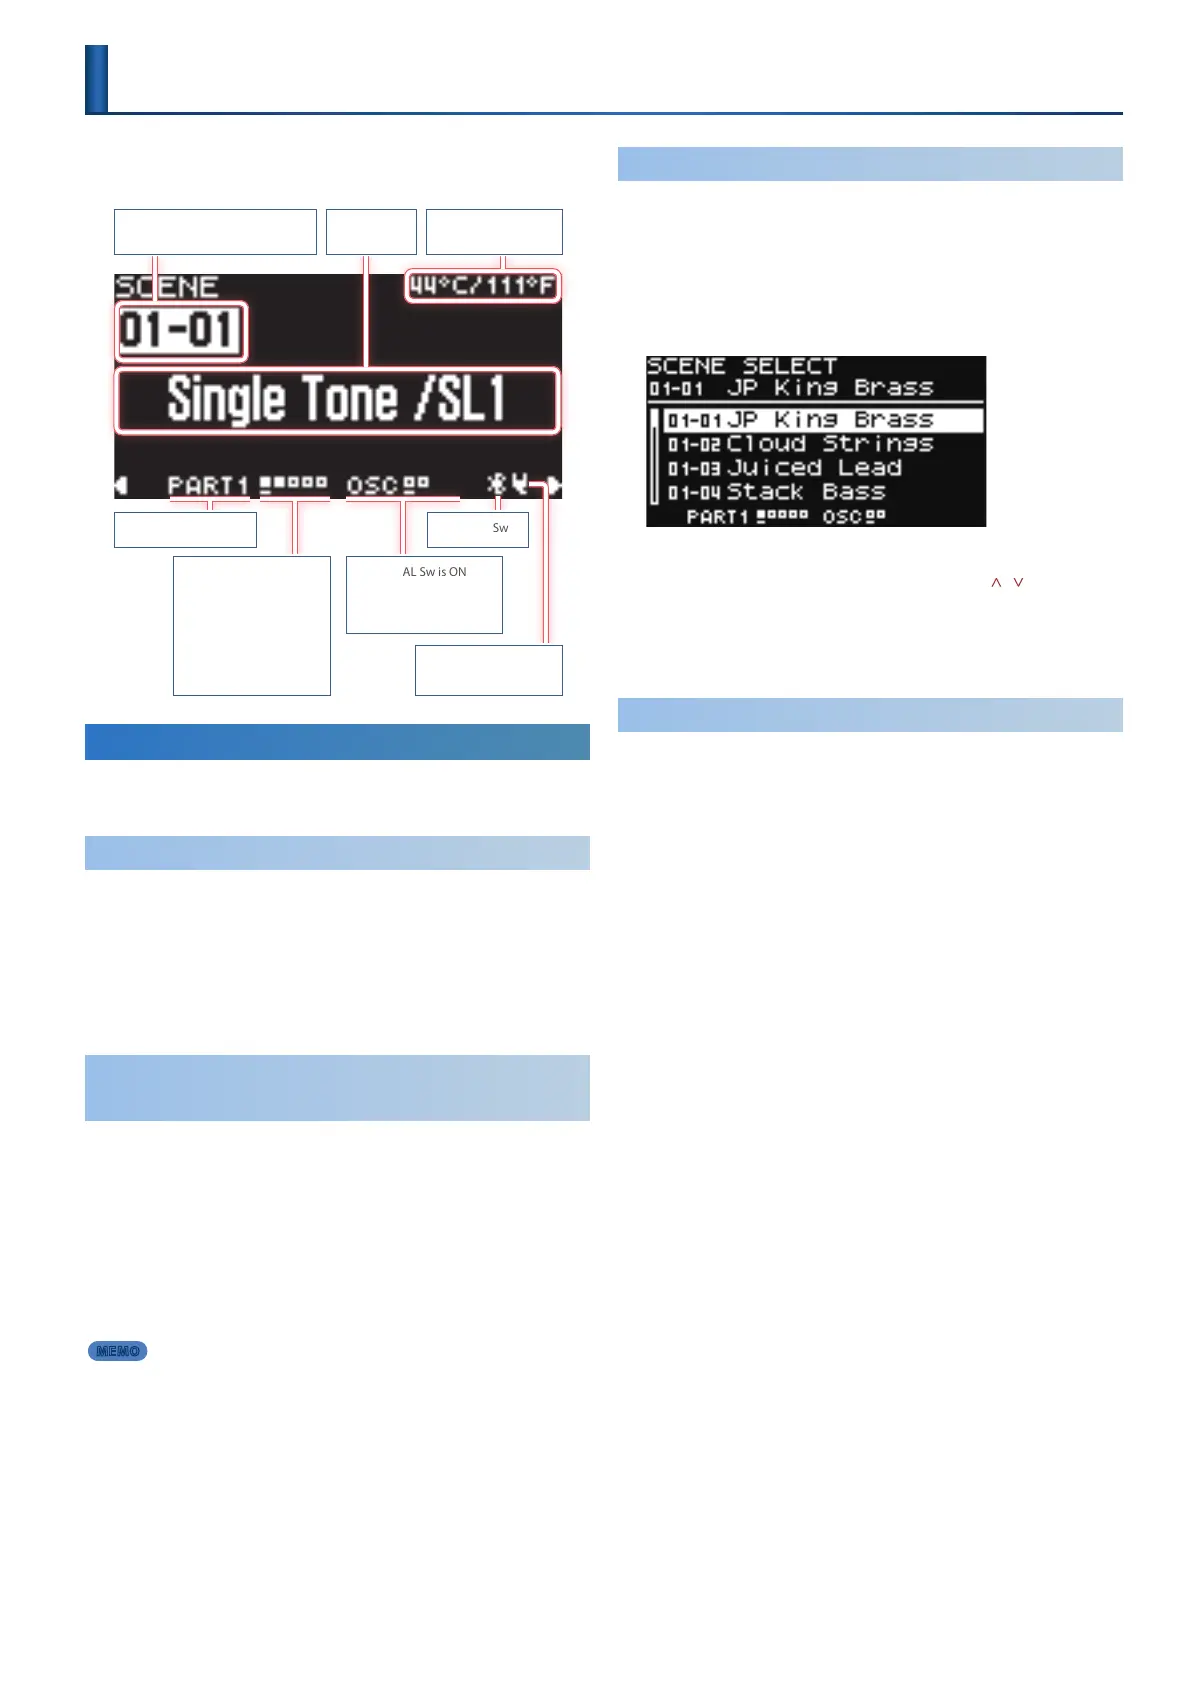
On the JUPITER-Xm, you select a scene and play the sounds that are
assigned to each of the ve parts.
Bank number–Scene number
Current internal
temperature
Scene Name
Current part name
9: Key Sw is ON
8: Key Sw is OFF
–
: Part Sw is OFF
+: Arpeggio part
—
: Current part
5
: Being edited
simultaneously
9: PARTIAL Sw is ON
8: PARTIAL Sw is OFF
–
: Being edited
Bluetooth Sw
Power cord connected/
disconnected
Recalling/Saving a Scene (Scene Select Mode)
The JUPITER-Xm can store a total of 256 scenes, organized as 16 banks each
containing 16 scenes.
Recalling a Scene
1. Press the [SCENE] button to enter scene select mode.
* The SCENE TOP screen is the rst screen that appears when you turn on the
power.
* When the [PART] button is lit, press the [PART] button to return to the SCENE
TOP screen.
2. Use the [1]–[16] buttons to select a scene.
Switching between scene banks and
recalling scenes
1. Hold down the [SHIFT] button and press the [1]–[16]
buttons to select a scene bank.
2. Use the [1]–[16] buttons to select the scene.
* To recall a dierent scene bank than the one that’s currently selected, select
the scene bank and then press the [1]–[16] buttons.
* You can also use the [1] and [2] knobs to switch scenes. The scene changes at
the same time you turn the knob.
MEMO
The system parameter “Startup SCENE” lets you specify the scene that is
selected at start-up.
& “System Parameter List” (p. 43)
Selecting a Scene from a List
1. Press the [SCENE] button to enter scene select mode.
The SCENE TOP screen appears.
The [1]–[16] buttons switch to scene select mode.
2. Press the [ENTER] button.
The scene list appears.
3. Use the [2] knob to select a scene.
You can also make this selection by using the PAGE [ ] [ ] buttons
instead of the [2] knob.
Alternatively, you can use the [1] knob to jump to the previous or next
scene bank.
4. Press the [ENTER] button to conrm the scene.
Saving a Scene
The edits that you make to a part or tone, or the data that you record, are
temporary. They are lost when you turn o the power, or when you select
another scene or tone. If you want to keep the result of your editing or
recording, you must save it to a scene.
* If you want to save a tone individually, use the tone write operation (p. 8).
1. Press the [SCENE] button, and then press the [WRITE]
button.
The WRITE MENU screen appears.
2. Use the [1] knob to select “SCENE,” and then press the
[ENTER] button.
3. Use the [2] knob to select the save-destination, and then
press the [ENTER] button.
If you want to rename the scene that’s being saved, use the PAGE [<] [>]
buttons to move the cursor and use the [2] knob to specify characters.
4. Press the [ENTER] button.
A conrmation message appears.
If you decide to cancel, press the [EXIT] button.
5. To execute, press the [ENTER] button.

 Loading...


