14
Reference Manual Ver. 1.5 and later
Using the Scene Lock Function
By using the scene lock function, you can make a conrmation screen
appear when you change scenes. This helps keep you from accidentally
selecting a dierent scene when you haven’t saved the scene.
1. Press the [MENU] button.
The setting screen appears.
2. Use the [1] knob to select “SYSTEM,” and then press the
[ENTER] button.
You can also make this selection by using the PAGE [ ] [ ] buttons
instead of the [1] knob.
3. Use the [1] knob to select “Scene Lock,” and then use the [2]
knob to turn it “ON.”
4. To save the setting, press the [WRITE] button.
A conrmation message appears.
If you decide to cancel, press the [EXIT] button.
5. To execute, press the [ENTER] button.
Initializing a Scene
* When you initialize a scene, all settings saved in the scene are erased. Please
note that the data cannot be recovered.
* Initializing the scene settings also initializes the tones of PART 1–4 at the same
time.
1. Press the [SCENE] button, and then press the [WRITE]
button.
The WRITE MENU screen appears.
2. Use the [1] or [2] knob to select the “SCENE INITIALIZE,” and
then press the [ENTER] button.
3. To execute, press the [ENTER] button.
The scene is initialized.
Selecting Sounds and Model Banks
The JUPITER-Xm is equipped with multiple sound engines called “models,”
and each model has a diverse variety of sounds.
By using categories, you can narrow your focus to specic types of
instruments or sounds across all of the sound engines.
Playing the MODEL BANK Tones
(SINGLE SETUP)
When SINGLE SETUP is executed, only part 1 is enabled, and you can
perform with the tones of only one model.
1. Hold down the [SHIFT] button and press the [MODEL BANK]
button.
A conrmation message for executing SINGLE SETUP is shown.
2. Press the [ENTER] button to execute SINGLE SETUP.
3. Press the [MODEL BANK] button.
4. Use the [1]–[16] buttons to select a model/category, and
use the [2] knob to select a tone.
Useful functions for selecting tones on the
MODEL BANK screen
5 Press the [ENTER] button to select a tone from the tone list screen. Press the
[ENTER] button to conrm. Press the [EXIT] button to return to the tone you
were using before the tone list screen was displayed.
5 Press the PAGE [ä] button to move the cursor up. You can use the [2] knob to
select a model or category. Press the PAGE [å] button to go back to selecting
a tone.
* When SINGLE SETUP is executed, the scene data you were editing is lost. Save
the data if you want to keep it before executing SINGLE SETUP.
&
“Saving a Scene” (p. 13)
* The parameters that work with the controllers on this instrument dier with
each model. Refer to “Correspondence Between Controllers and Parameters”
(p. 27) for details.
* The SINGLE SETUP state is canceled when you switch scenes.
* You can also execute SINGLE SETUP from the MENU screen ([MENU]–[SINGLE
SETUP]).
Selecting Sounds
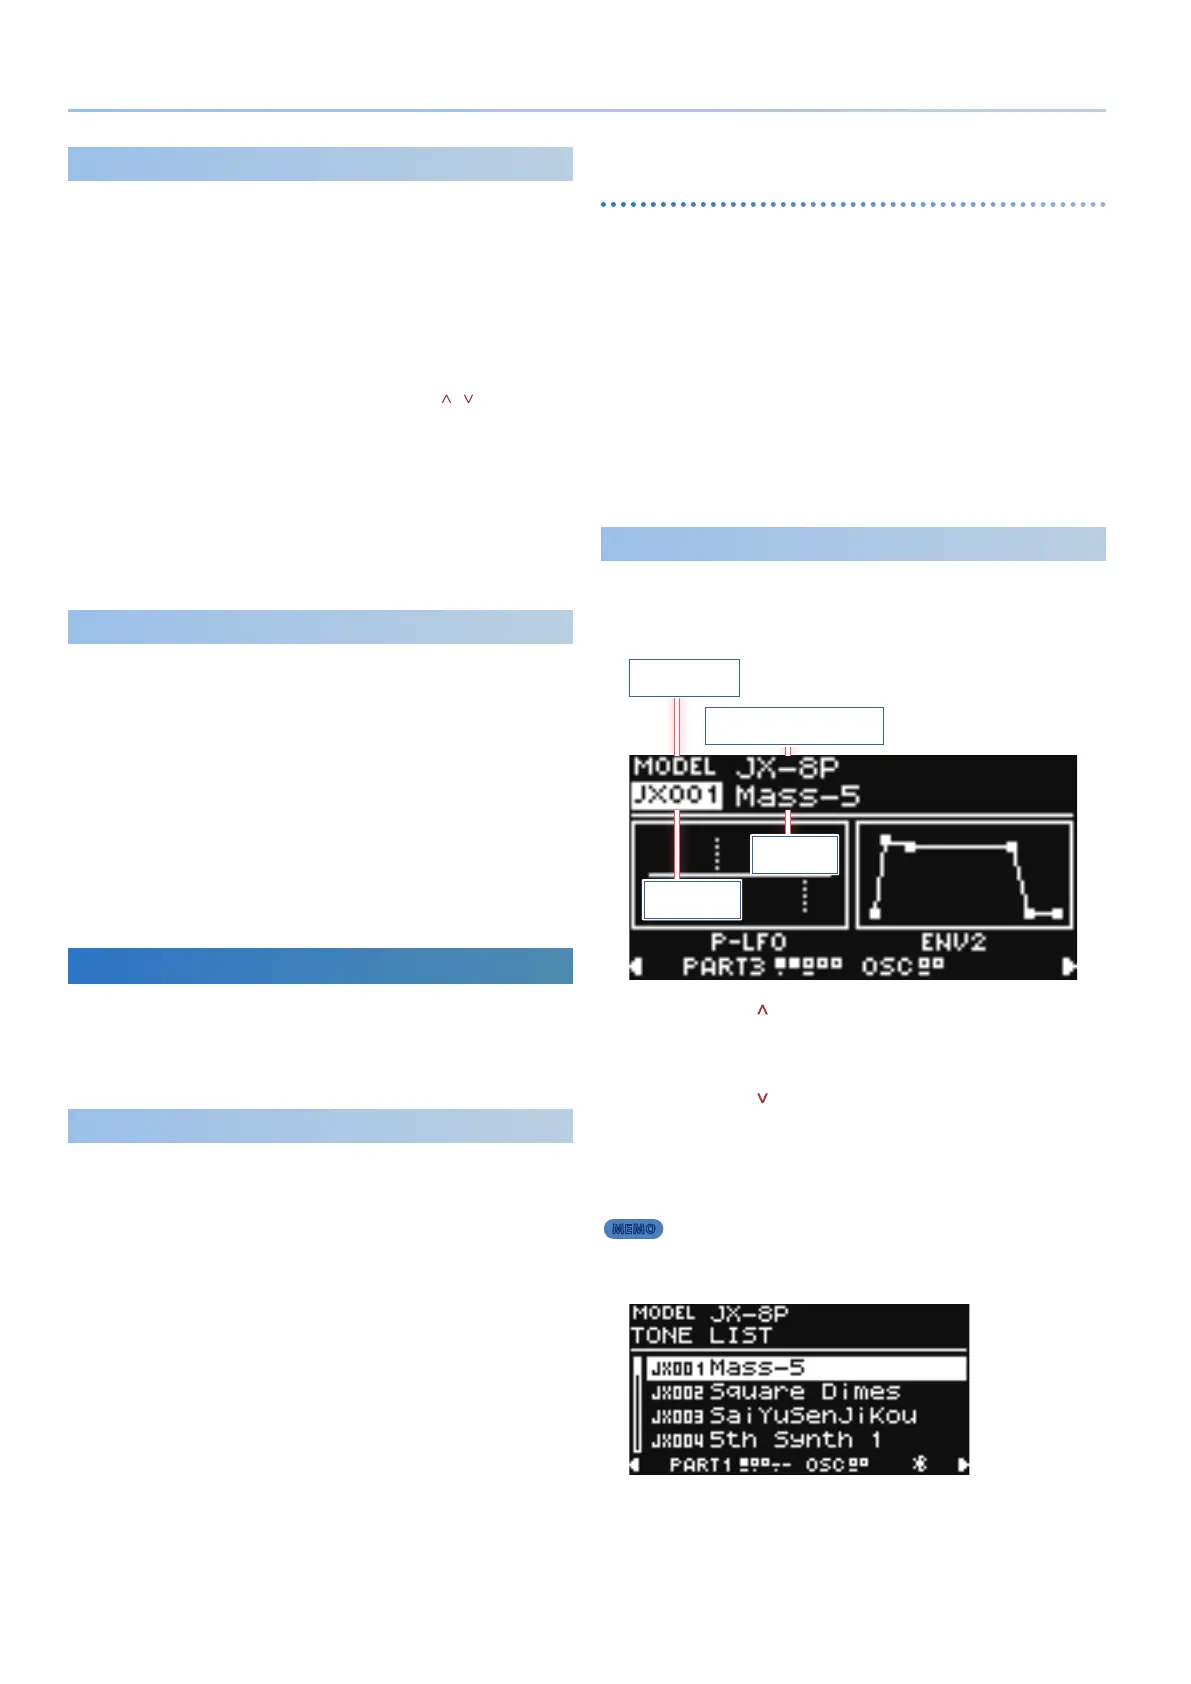
1. Press the [MODEL BANK] button.
The MODEL BANK TOP screen appears.
Model/category
Model name/category name
Tone number
Tone name
2. Press the PAGE [ ] button to move the cursor to the model/
category name.
3. Use the [2] knob to select the model/category.
4. Press the PAGE [ ] button to move the cursor to the tone
number.
5. Use the [2] knob to select a tone.
Select the desired tone from the selected model and category.
You can use the [1] knob to move rapidly.
MEMO
When the cursor is located at the model name or tone number, you can
press the [ENTER] button to access the tone list.
You can use the PAGE [<] [>] buttons to switch the MODEL, and use the
[2] knob to select the sound.
6. Press the [ENTER] button to conrm the tone.

 Loading...


