49
Reference Manual Ver. 1.5 and later
8. To execute, use the [2] knob to select “O K ,” and then press
the [ENTER] button.
The data is exported to the “EXPORT” folder on your USB ash drive.
* Never turn o the power or disconnect the USB ash drive when “Executing...”
or a similar message is shown on the screen, as the unit is processing data.
About exported MIDI les
5 The SMF format used is Format0.
5 Files are output by part, and the “_*” (with the asterisk representing the part
number) is appended to the lenames. The MIDI channel follows the settings
on this unit (SCENE PART EDIT > Rx Ch).
5 Only parts that contain user pattern data are exported.
5 Tone-related data is not included.
Returning to the Factory Settings
(FACTORY RESET)
Here’s how the settings that you edited and saved on the JUPITER-Xm can
be returned to their factory-set condition.
* When you execute this operation, all saved settings including the sound
parameters will be lost.
* If you will later need the current settings, be sure to use the backup function (p.
46) to save the current settings before you restore the factory settings.
1. Press the [MENU] button.
2. Use the [1] knob to select “UTILITY,” and then press the
[ENTER] button.
You can also make this selection by using the PAGE [ ] [ ] buttons
instead of the [1] knob.
3. Use the [1] knob to select “FACTORY RESET,” and then press
the [ENTER] button.
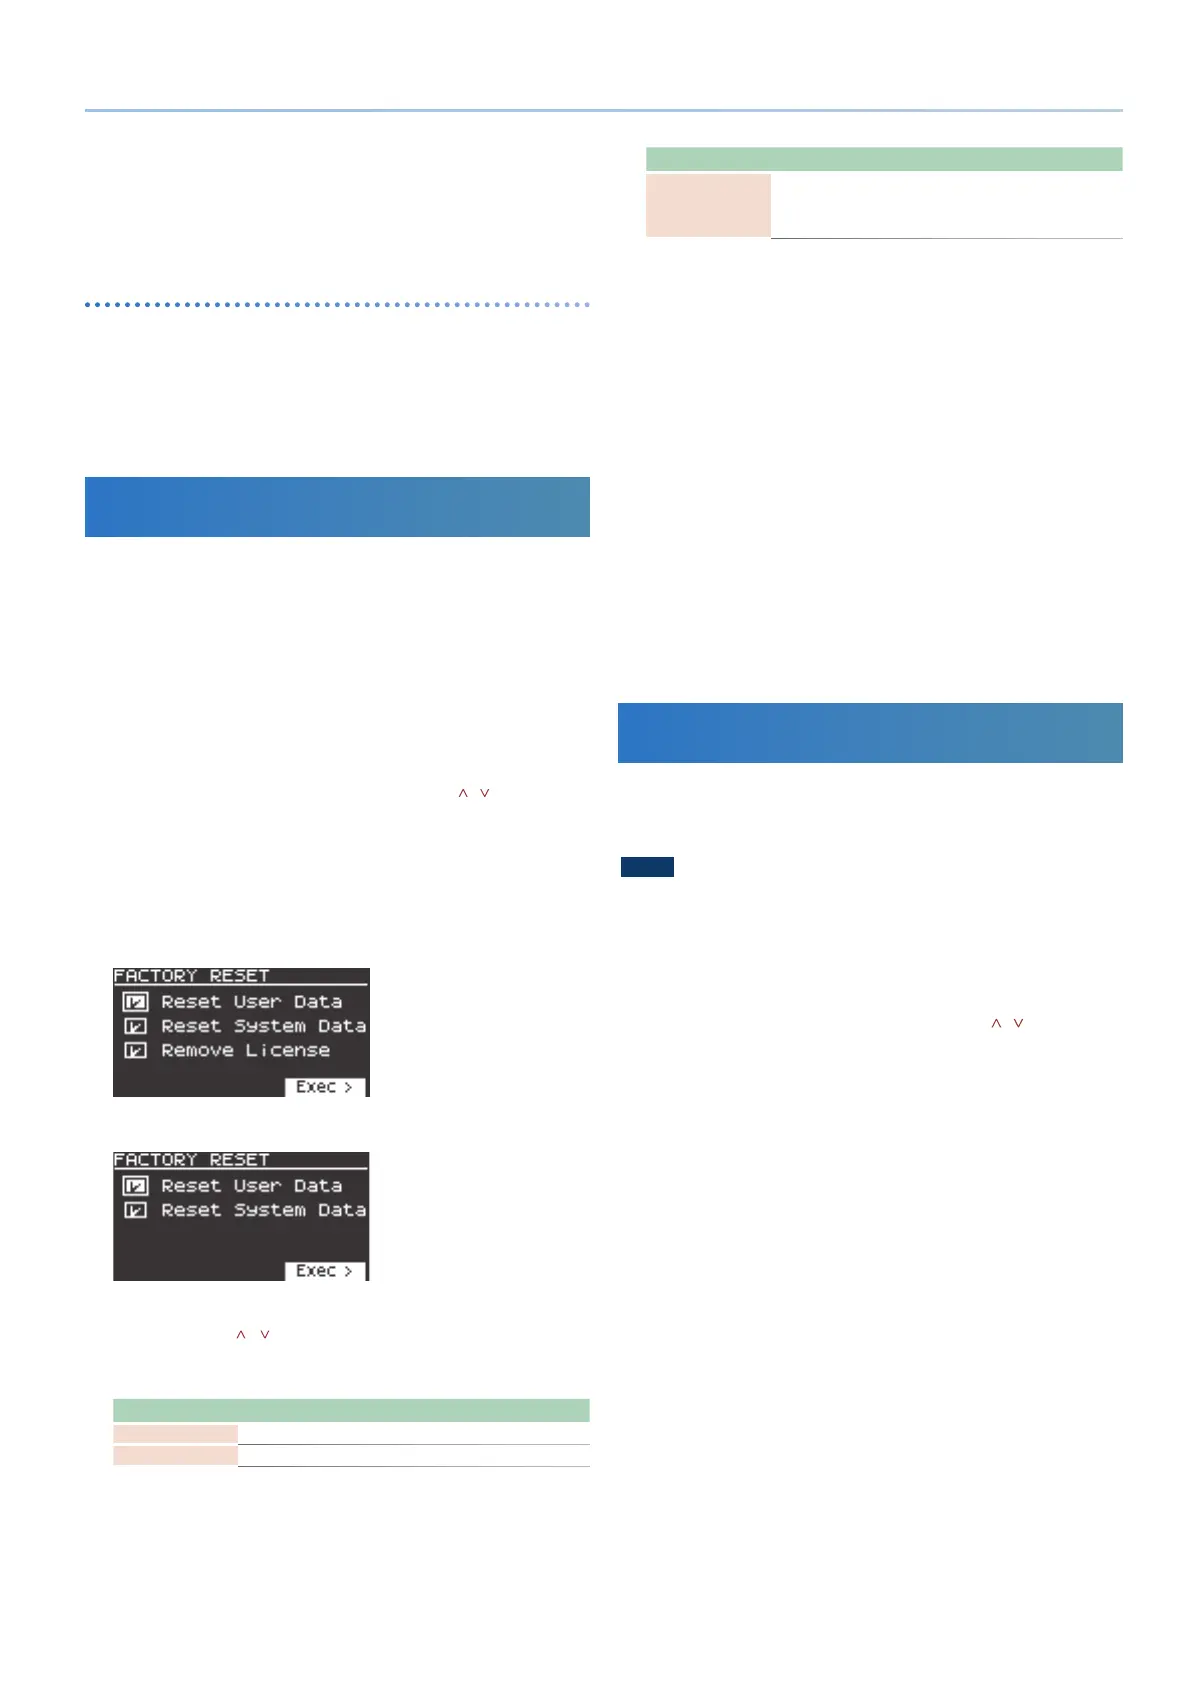
The FACTORY RESET screen appears.
If a sound pack or wave expansion is imported/installed
If a sound pack or wave expansion is not imported/installed
4. Use the cursor [ ] [ ] buttons to select the item to execute,
and press the [ENTER] button to select its check box.
Press [ENTER] again to clear the check box.
Item Explanation
Reset User Data
Initializes the scenes and user tones (* 1).
Reset System Data
Initializes the system settings (* 1).
Item Explanation
Remove License (*2)
Initializes the user license and wave expansion. Initializing
the user license lets you import/install a sound pack or wave
expansion that was downloaded with a dierent user license.
* This deletes the currently installed wave expansion.
* 1 Performing these operations erases any of the relevant data you have edited
after purchase.
To save the current settings, be sure to use the backup function (p. 46)
before you restore the unit to its factory default state.
* 2 This is displayed if a sound pack or wave expansion is imported/installed.
For more details on user licenses, see the “Sound Pack/Wave Expansion
Installation Manual” (PDF).
5. Press the cursor [>] button.
A conrmation message appears.
If you decide to cancel, press the [EXIT] button.
6. To execute, use the [2] knob to select “O K ,” and then press
the [ENTER] button.
The display indicates “Completed. Turn o power.”
7. Turn the power of the JUPITER-Xm o and then on again.
* Never turn o the power or disconnect the USB ash drive during a process,
such as while the “Executing…” display is shown.
Formatting a USB Flash Drive
(FORMAT USB MEMORY)
Here’s how to format a USB ash drive.
1. You can connect a USB ash drive here.
NOTE
5 If the USB ash drive contains important data, be aware that this operation
erases all data from the drive.
2. Press the [MENU] button.
3. Use the [1] knob to select “UTILITY,” and then press the
[ENTER] button.
You can also make this selection by using the PAGE [ ] [ ] buttons
instead of the [1] knob.
4. Use the [1] knob to select “FORMAT USB MEMORY,” and then
press the [ENTER] button.
A conrmation message appears.
If you decide to cancel, press the [EXIT] button.
5. To execute, use the [2] knob to select “O K ,” and then press
the [ENTER] button.
When formatting is complete, the screen indicates “Completed!”
* Never turn o the power or disconnect the USB ash drive during a process,
such as while the “Executing…” display is shown.

 Loading...


