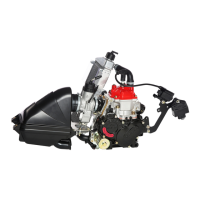
ROTAX 125 MAX evo, Junior MAX evo, Mini MAX evo, Micro MAX evo
4. Engine attachment on chassis
4.1. Attachment via engine pedestal
Using an engine pedestal for the ROTAX engine 125 MAX evo / Junior MAX evo / Mini MAX evo /
Micro MAX evo, the engine is inclined at 0° to 15° in the driving direction.
Drill 4 holes (8.5 mm dia / 0.315 in. = drillsize) on the coordinates 80 mm x 102 mm /
3.15 in. x 4.016 in. in top plate of the pedestal suitable for the chassis.
Warning: When drilling the holes in the pedestal pay attention to advice of the chassis
manufacturer.
Connect pedestal with engine crankcase by 4 screws M8 (min. strength grade 8.8).
Secure screws with supplied securing and sealing agent LOCTITE. Tighten screws
to 24 Nm / 212 in lb.
Note: Engaged thread length in crankcase to be between 16 / 5/8 “ - 24 mm / 1 in.
Warning: Pay attention to chain alignment as advised by chassis manufacturer.
Note: Do not fasten engine on chassis until chain is in position and properly aligned and
tensioned.
4.2. Direct attachment of the engine on chassis
If the frame of the chassis was specially prepared for installation of the ROTAX engine 125 MAX
evo / Junior MAX evo / Mini MAX evo then 2 sheet metal brackets with oblong holes are welded on
the two frame tubes. Between the two brackets the engine is clamped with two bolts. The correct
chain tension is reached by shifting the engine along the oblong holes. Since engine installation is
without the pedestal, the centre of gravity of the engine will be lowered by approx. 30 mm / 1.18 in.
No need for aligning the engine in regard to the chain flight as the correct alignment is already
provided by the brackets welded on the frame tubes.
Place engine between the two attachment brackets. Attach engine on frame with 2
bolts M8 of appropriate length (minimum strength grade 8.8) and 2 lock nuts.
Note: Do not fasten engine on chassis until chain is in position and properly aligned and
tensioned.
Seite/page 55/98
Ausgabe/Edition 11/2014

 Loading...