ROTAX 125 MAX evo, Junior MAX evo, Mini MAX evo, Micro MAX evo
6. Installation of the battery and the wiring harness
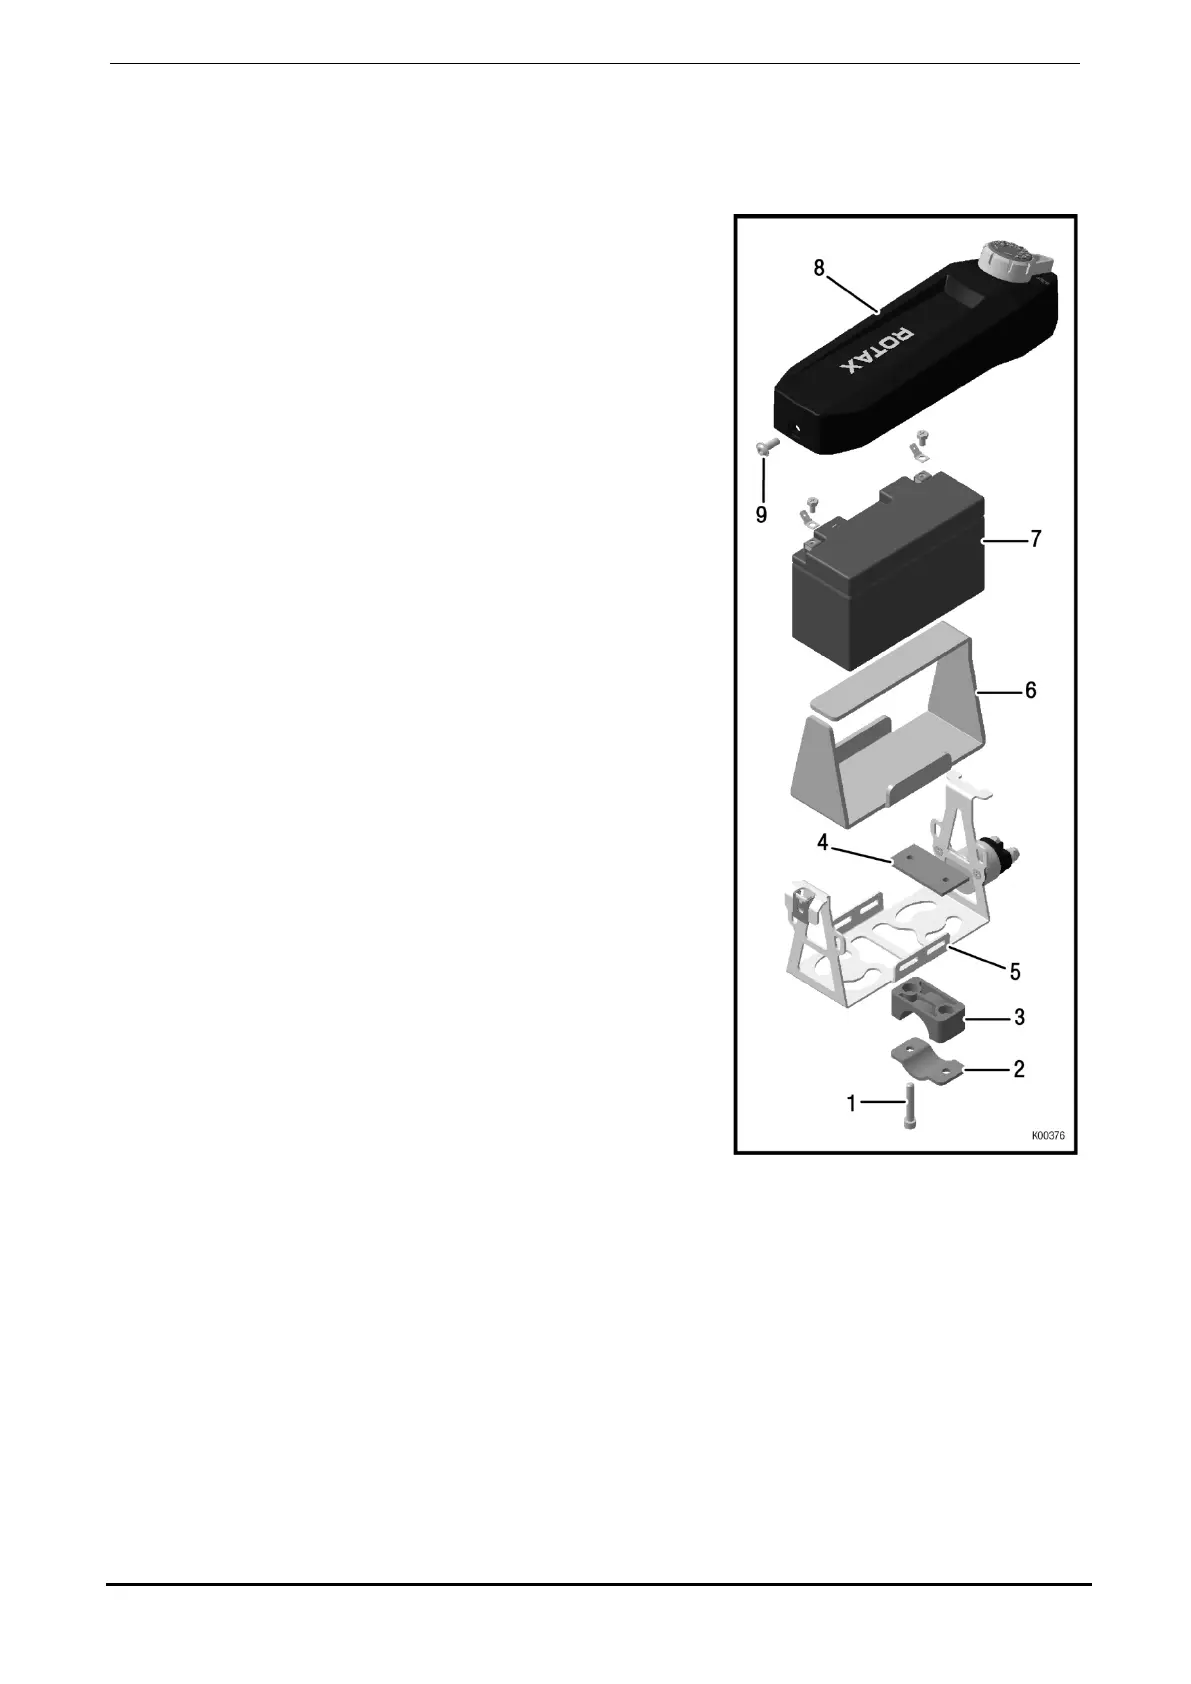
See Fig. 7.
Warning: Make absolutely sure to avoid short-circuiting of battery terminals. A short
circuit will ruin the battery and could cause
an explosion.
Due to the complexity of the wiring harness it is
recommended to locate the battery on the left side box
beside the driver’s seat. For proper attachment a fixture kit
for the battery will be supplied with the engine by ROTAX.
Attach the battery fixture (pos. 5) with the two
pipe clamps (pos. 1 – 4) on on the left side
box beside the driver’s seat.
Note: The clamps (pos. 2, 3) are designed for
chassis tubes of 30 - 32 mm (1.18 – 1.26 in)
dia.
Attention: Risk of clamp fracture! Do not over tighten the
screw (pos. 1) of the pipe clamps (pos. 2, 3).
Put the rubber pad (pos. 6) inside the battery
holder (pos. 5).
Put the battery (pos. 7) into the fixture and
install the cover (pos. 8) with pre-assembled
wiring harness using the Allen screw with
rounded flange head (pos. 9).
For connecting the battery refer to section 7.1.
Fig. 7
6.1. Installation of the wiring harness
The wiring harness is delivered partly pre-assembled to facilitate the installation. This means that
the relay, the master switch and the battery cover are already pre-assembled and pre-wired.
Note: The connector assignment is shown in the following illustrations. Details on the
assignment of cables and pins are given in the wiring diagram.
Place the wiring harness (pos. 1) loosely on the chassis.
Note: Always start the installation at the engine side to work without power supply.
Fix and isolate cable lug (pos. 6) to the wiring harness.
Fasten the plug connector for the crankshaft sensor (pos. 3) on the rear side of the
engine.
Seite/page 57/98
Ausgabe/Edition 11/2014

 Loading...


