INTRODUCTION—HOW TO USE MANUAL
2
HOW TO USE MANUAL
Throughout this manual, the following key words are
used to alert the reader of potentially hazardous situa-
tions, or situations where additional information to suc-
cessfully perform the procedure is presented:
WARNING is used to indicate the potential
for personal injury, if the procedure is not
performed as described.
CAUTION is used to indicate the potential
for damage to the product or property
damage, if the procedure is not followed
as described.
IMPORTANT: IMPORTANT is used to relay
information CRITICAL to the
successful completion of the
procedure.
NOTE: NOTE is used to provide additional infor-
mation to aid in the performance of the
procedure or operation of the door, but not
necessarily safety related.
REQUIRED TOOLS AND EQUIPMENT
1. Wall anchor hardware (¹₄-in. diameter).
2. Carpenter’s level.
3. Hammer drill and masonry drill bit sized for wall
anchors (to install anchor hardware in concrete).
4. Assorted hand tools.
ADDITIONAL REQUIREMENTS
Labor and Site Requirements
1. An electrician is required for all electrical connec-
tions. (See “Electrician’s Responsibilities” below.)
IMPORTANT: All electrical work must be per-
formed in accordance with local
and state building codes.
2. 100% accessibility to the door opening during the
installation process. Traffic should not pass through
the opening during the installation procedure.
Electrician’s Responsibilities
1. Furnish and install fused disconnect(s).
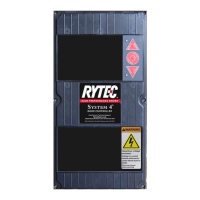
2. Install Rytec control panel.
3. Install all necessary conduit.
NOTE: High- and low-voltage cables must be
routed in separate conduit. High voltage
must use metallic conduit.
4. Run electrical power lines to fused disconnect.
5. Run power lines from disconnect to control panel.
6. Run power and control lines from control panel to
door head assembly (and defrost system if used).
7. Install conduit from control panel to floor for floor
loop activators and wire activators (if used).
8. All cables must be cut to length. No excess of high-
or low-voltage cables should be present in the con-
trol panel.
SHIPPING CRATE
The control panel was shipped from the factory in a
cardboard box along with the contents of your Rytec
door.
NOTE: A door-specific electrical schematic is
located inside the control panel.