Revised A 48 6301
6. Assembly / disassembly
6.1. Aluminium cover and shaping air shroud 65EC version
6.1.1. Disassembly
• Step 1: Make sure that the high voltage is OFF.
• Step 2: Remove the aluminium cover with the wrench P/N # 1308689.
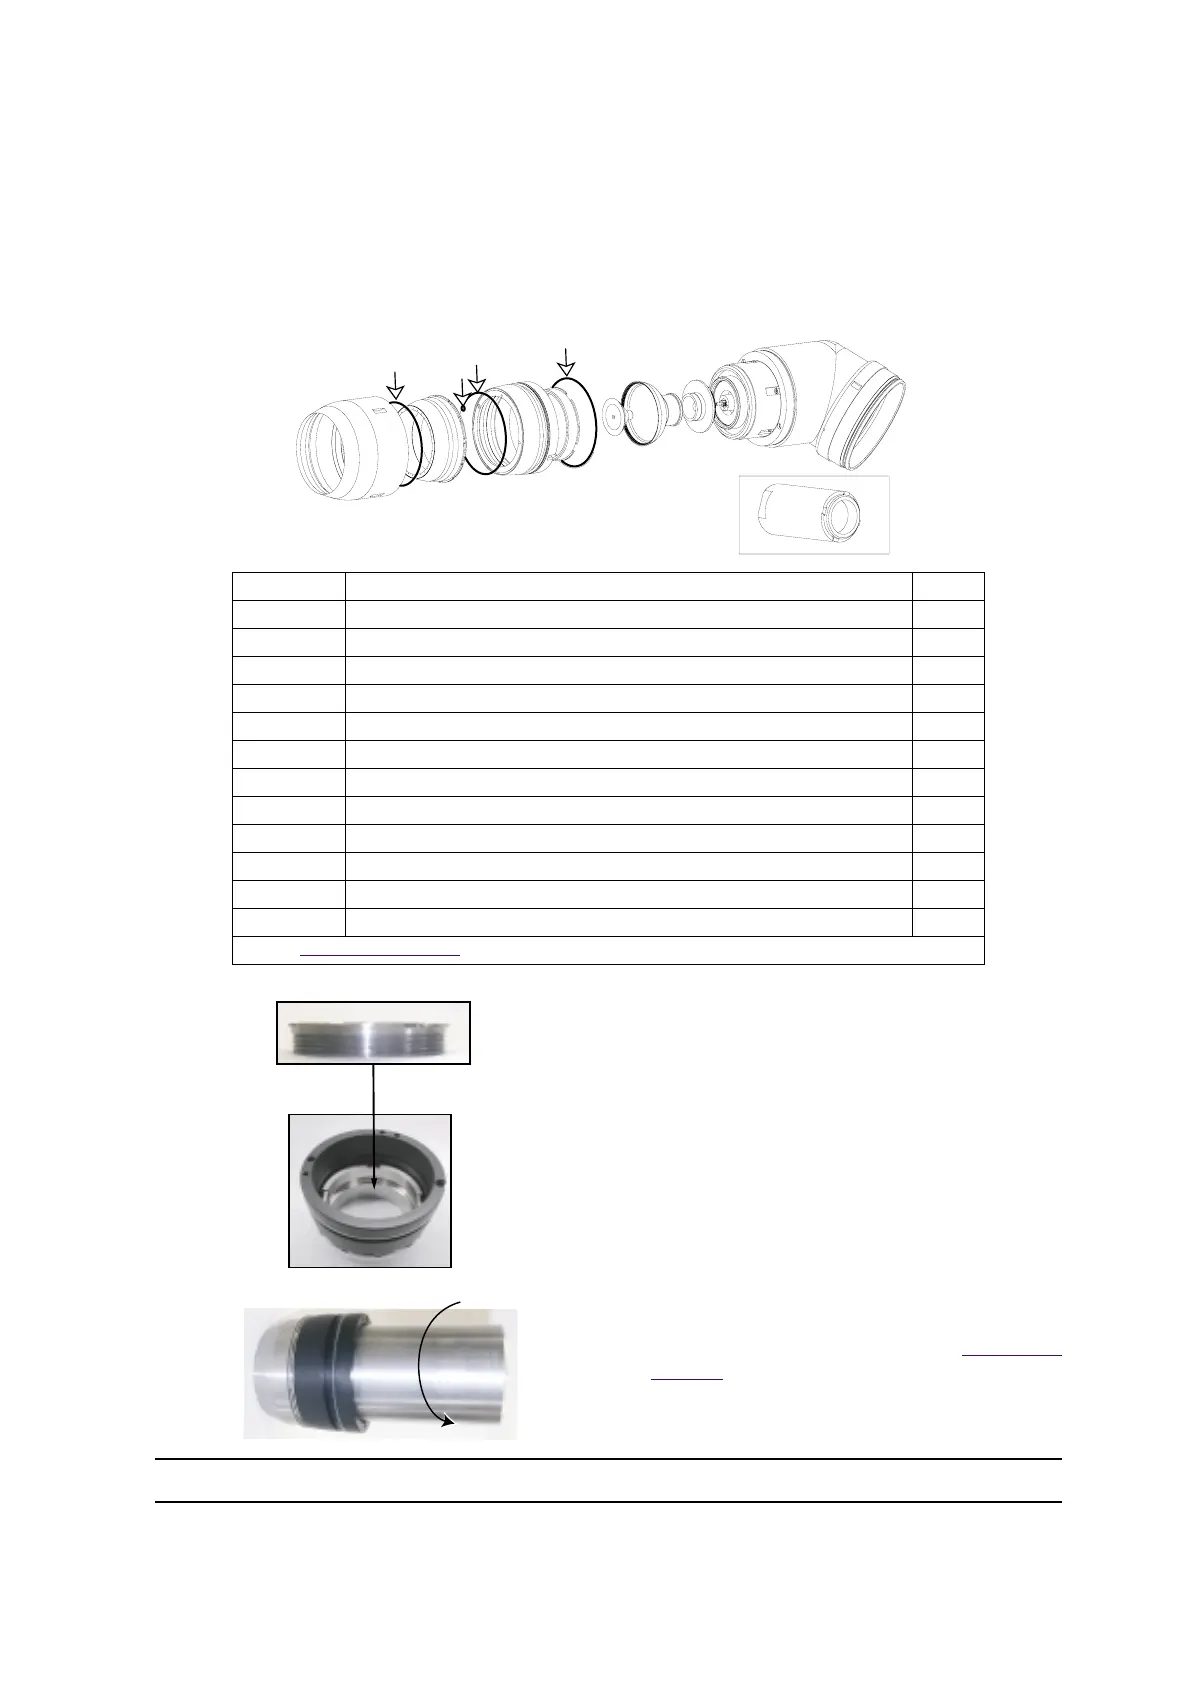
• Step 2:
The shaping air shroud and shaping air insert
are fastened together (see fig.1) with the
shaping air nut and can be disassembled using
the tool P/N # 72-1126-00 as illustrated
• Step 3:
Remove the o-rings (item 4-5-8) from the
shaping air shroud (item 6).
• Step 4:
Remove bellcup and clip assembly (see § 6.2.1
page 50 )
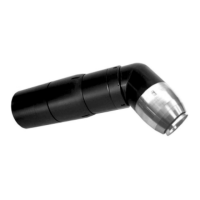
Item Description Qty
1 Aluminium cover 1
2 O-ring 84 x 2 teflon encapsulated - viton 1
3 Shaping air insert OD: 65mm 1
4 O-ring 2.0 x 1.25 chemically inert 1
5 O-ring 82 x 1.6 teflon encapsulated - viton 1
6 Shaping air shroud 1
7 Shaping air nut OD: 65mm 1
8 O-ring 88.62 x 1.78 mm teflon encapsulated - viton 1
9Deflector 1
10 Bellcup 65 EC, body 1
11 Clip 1
12 Shaping air nut removal and installation tool 1
Note: see § 8.2 page 76
for Sames spare parts lists.
1
2
3
4
5
6
7
8
9
10
11
12
DES01496
Shaping air nut
To remove
Fig. 1