115
The printer is shown on the main screen.
• If it is not detected, try to add it manually from [Add new printer]. If it is still not
detected, try the following.
◦ Check that the printer is powered on.
◦ Make sure that the LED of the LAN connector is lit.
◦ Check that the computer and printer you are using are connected to the network.
◦ Directly connect the computer and printer with a LAN cross cable, or disconnect it from
the hub cascade and make it a local LAN environment.
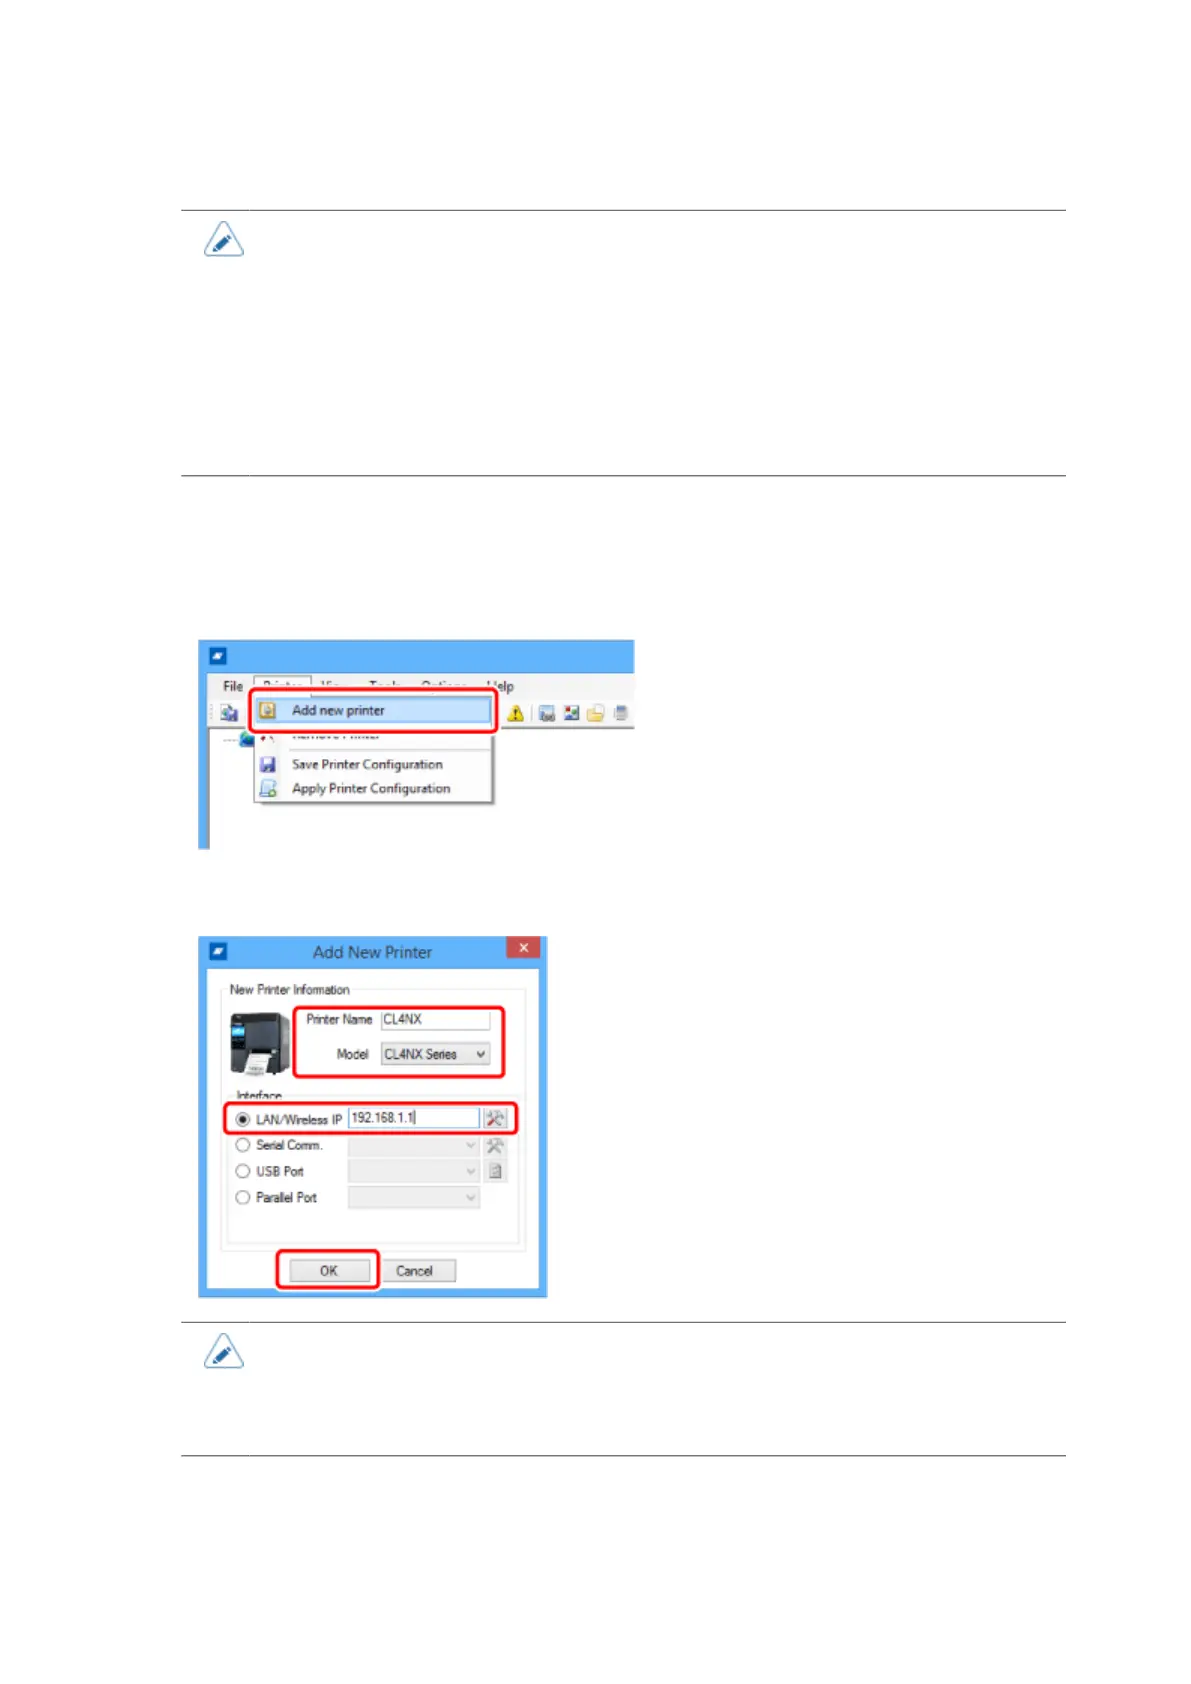
Adding the Printer Manually from [Add new printer]
a. Select [Add new printer] from the [Printer] menu on the main screen.
b. Enter [Printer Name], and select the model name of the printer from the [Model] drop down list.
c. Enter the IP address of the printer into [LAN/Wireless IP], and click [OK].
• When confirming or changing the port number, click the icon on the right side of the IP
address input column to show the [LAN / Serial Comm. Port Setting] screen.
• You can check the current IP address of the printer in the [Information] menu of the
Settings menu of the printer.
The printer is added to the main screen.