Page 57
Monitoring 4
User guide NIBP monitoring 4.7
Art. no.: 0-48-0227 Rev.: g
DEFIGARD/PHYSIOGARD Touch 7
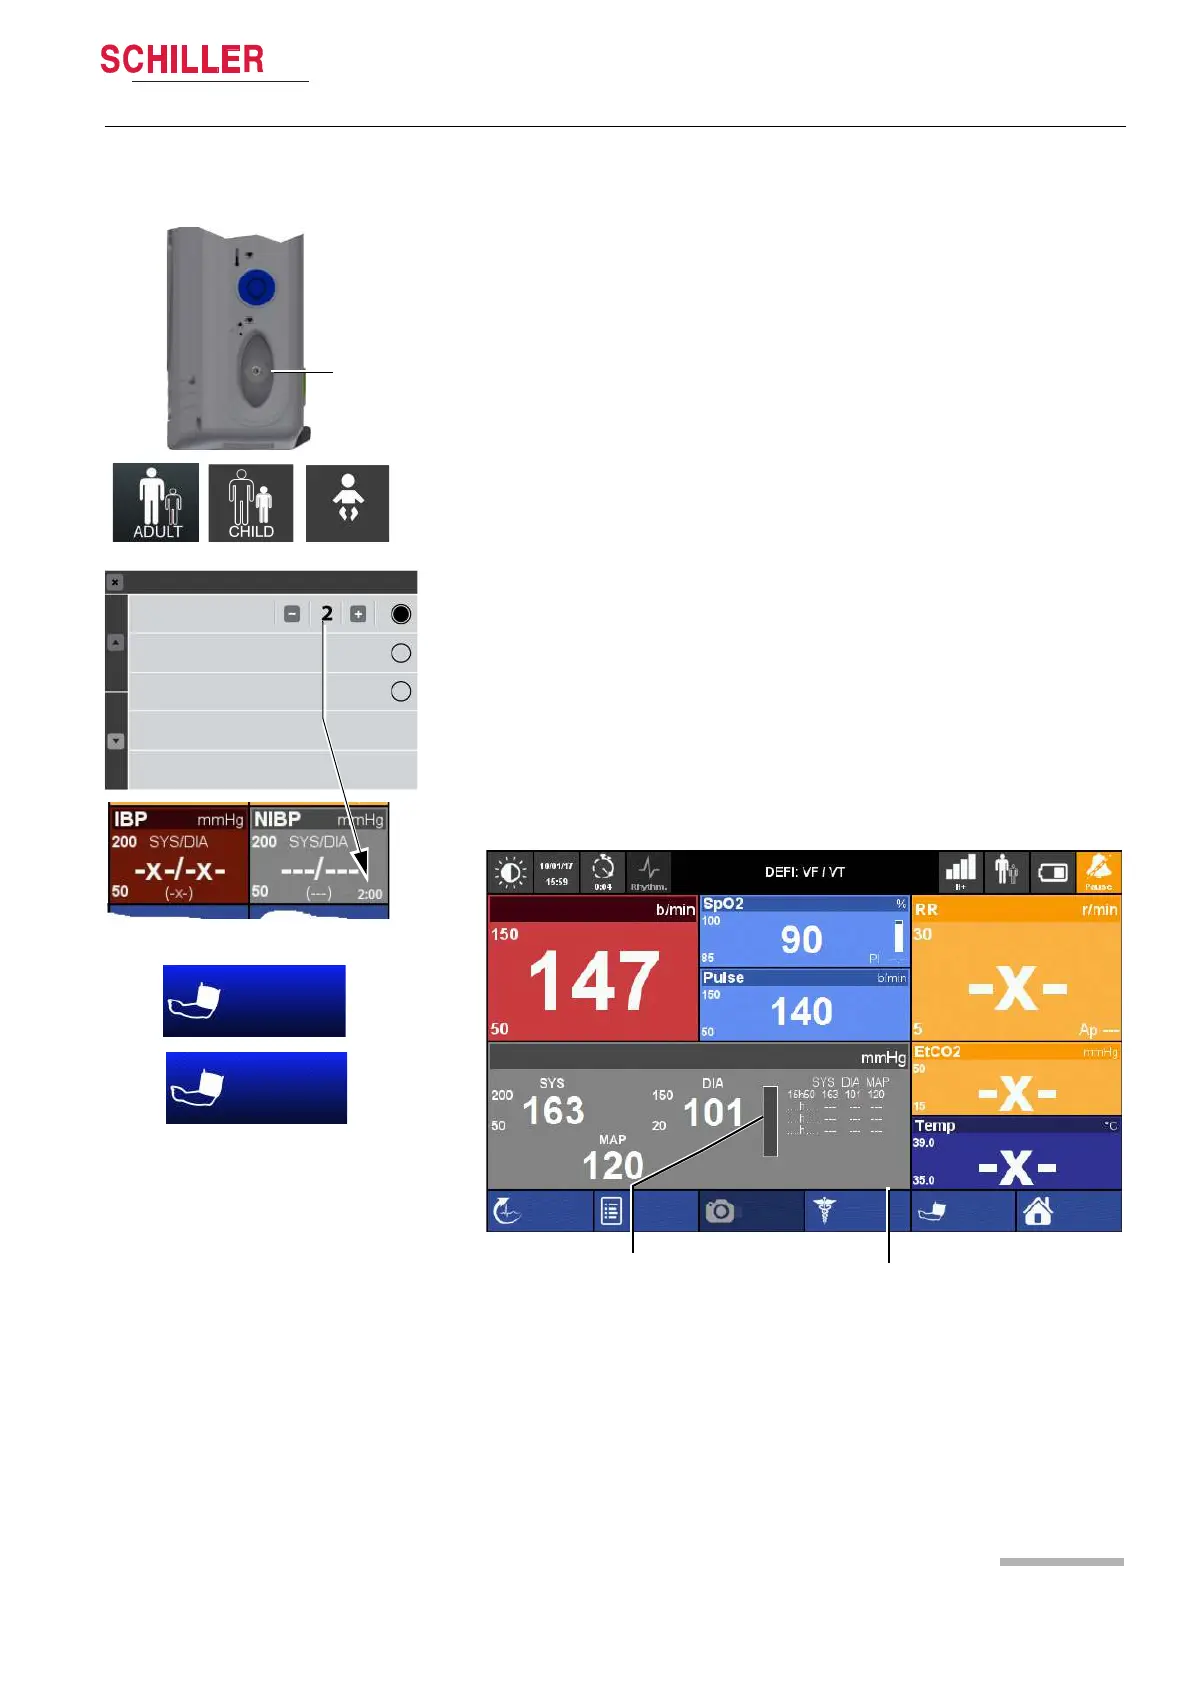
4.7.1 Starting NIBP monitoring
• When the measurement is started, the increasing cuff pressure is displayed on the
bar graph.
• The last four measurements are displayed in the window.
1. Note the cuff size for the respective patient type see chapter.13.2 Accessories
DEFIGARD/PHYSIOGARD Touch 7 page 159.
2. The cuff is attached to the left or right upper arm, about 4 cm above the elbow (on
children a little closer).
3. Connect the cuff tubing to the connection sleeve (1) and make sure it properly
locks into place.
4. Define the NIBP settings directly via the Touch screen NIBP measurement field.
– Patient type - adult, child or neonate (indicated at the top right)
5. Open the NIBP menu and check the settings.
– Setting of the Automatic cycle time or manual measurement
6. Start the NIBP measurement by pressing the soft key “Start”.
To disconnect the cuff tube, press the milled shell of the connecting sleeve
backwards.
Clean and disinfect the cuff after each use see chapter 10.5 Cleaning page 119
and
10.6 Disinfection page 120.
The following settings are available for the cycle time:
Automatic Cycles 2/3/5/10/30 minutes
Manual The measurement is manually initiated by pressing the soft key.
Venous Block The venous block is used to apply an intravenous access. The
pressure is exactly 40 mmHg. The blockage time is limited to 80
second. You can stop anytime the blockage by the NIBP Stop
key.
Fig. 4.9 NIBP soft key
1
Automatic Cycle
Manual
Venous Block
NIBP Module
V. BLOCK
START
Neonate
Bar graph applied pressure
Remaining time till to the next
NIBP measurement
Screenshot
Manual Def
Start
Menu
HR
Off
NIBP
Event
R-ECG
Adult
1:30
 Loading...