© 2014 SeaStar Solutions Optimus Installation Manual, Rev. E
5-21
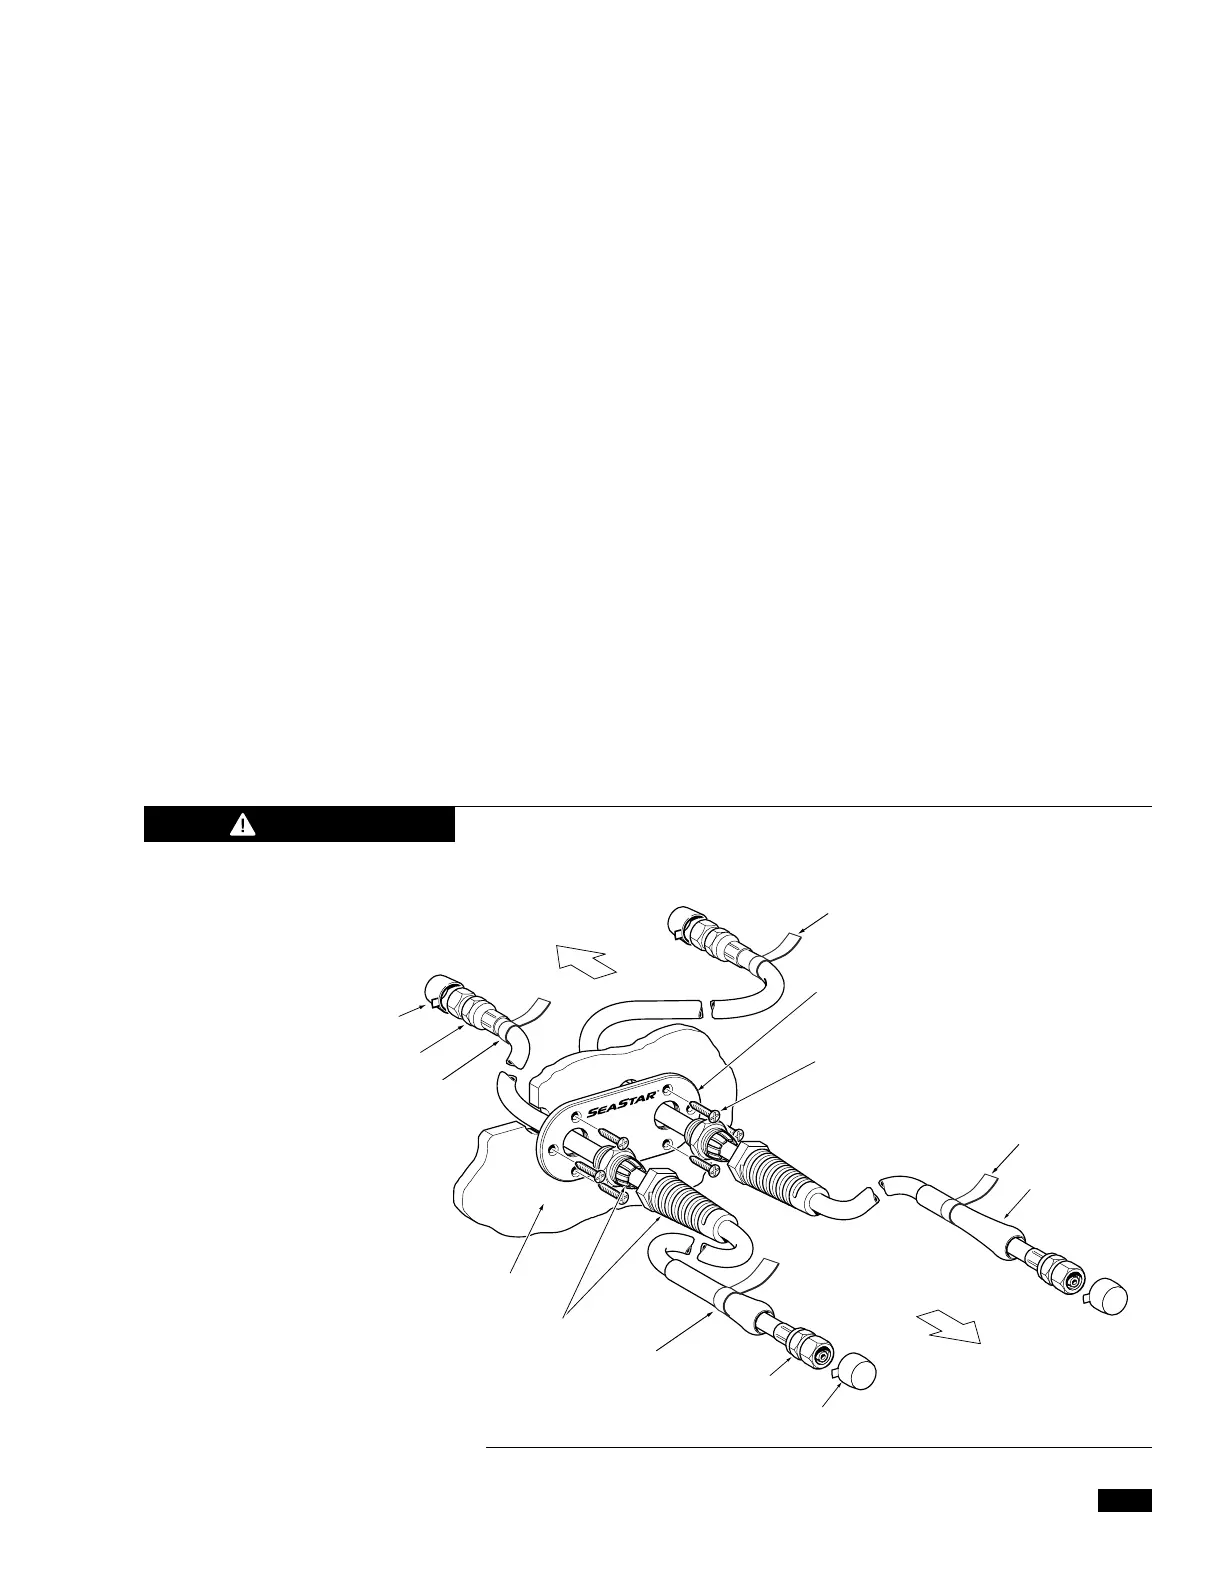
DUST CAP
TO PUMP
TO CYLINDER
HOSE FITTING
BULKHEAD MOUNTING PLATE
I.D. TAG
(provided with Kit)
I.D. TAG
(provided with Kit)
#10 SCREWS
CUSTOMER SUPPLIED
BULKHEAD
PIGTAIL FITTING
BEND RESTRICTOR
DUST CAP
HOSE FITTING
HO86xx Dual Polished Plate shown.
I.D. TAG
(provided with Kit)
I.D. TAG
(provided with Kit)
DO NOT INSTALL BULKHEAD HOSES BELOW THE WATERLINE.
Figure 5-21.
WARNING
5.5.2.1 Bulkhead Hoses
1. Apply hose labels as instructed in Section 5.5.1
2. Determine desired area where the hoses will exit the transom.
DO NOT mount below the waterline of the boat as this is not a
fluid tight fitting.
3. Drill two 1” holes in desired location through the bulkhead or
splashwell. Clean hole after drilling to ensure it is free of any
burrs that may puncture or chafe the steering hose(s).
4. Feed the hoses from the outside of the boat through the
splashwell/bulkhead. Note that the bend restrictor (see figure
5-22) must be at the cylinder end of the hose.
5.
Secureeachbulkheadplateusing#10screws(customersupplied).
6. Attach the hydraulic hoses to the SmartCylinder and slide the
bend
restrictor over the fitting as shown in figure 5-22. Torque fitting
to 15 ft-lb. (20 Nm). If necessary, you can reposition the fitting on
the cylinder. See section 5.5.3.
7. Once you are satisfied with the hose routing from the bulkhead
plate to the cylinders, thread the pigtail fitting onto the bulkhead
mounting plate and torque to 20 in-lb (2.31 Nm).