© 2014 SeaStar Solutions Optimus Installation Manual, Rev. E
5-22
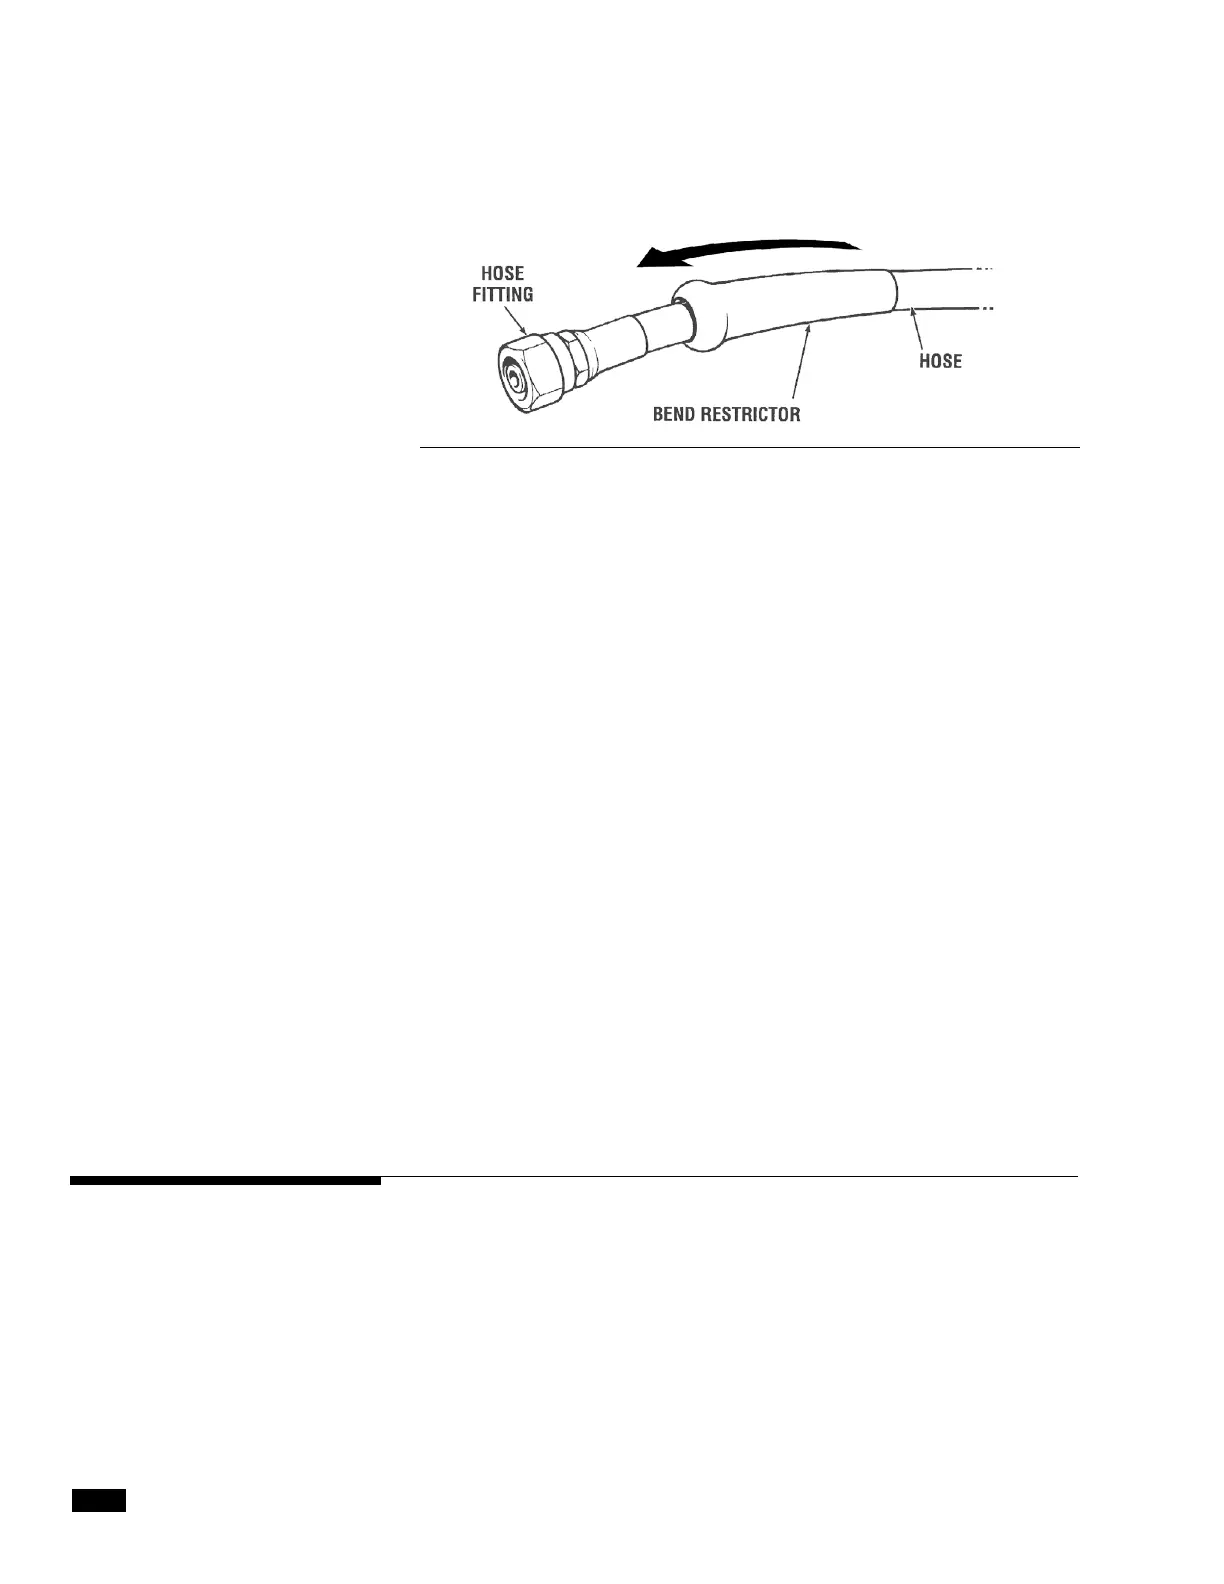
Figure 5-22.
5.5.2.2 Standard Hoses
1. Apply hose labels as instructed in section 5.5.1
2. Feed the hoses from the outside of the boat through the
splashwell/bulkhead. Note that the bend restrictor (see figure
5-22) must be at the cylinder end of the hose.
3. Attach the hydraulic hoses to the SmartCylinder and slide the
bend
restrictor over the fitting as shown in figure 5-22. Torque fitting
to 15 ft-lb. (20 Nm). If necessary, you can reposition the fitting on
the cylinder. See section 5.5.3.
4. Inside the vessel, route the hoses along the gunwale or inside
a protective PVC pipe to the power steering pumps. Connect
the hoses to the appropriate pump ports and tighten to 15 ft-lb.
(20 Nm)
The cylinder ‘U’ and ‘D’ ports must be connected to the
corresponding pump ‘U’ and ‘D’ ports.
8. Inside the vessel, route the hoses along the gunwale or inside
a protective PVC pipe to the power steering pumps. Connect
the hoses to the appropriate pump ports and tighten to 15 ft-lb.
(20 Nm)
The cylinder ‘U’ and ‘D’ ports must be connected to the
corresponding pump ‘U’ and ‘D’ ports.
1. Back off lock nut (item 1 in figure 5-23) counter-clockwise, until
it stops.
2. Thread fitting into the cylinder port until the fitting washer (item 2)
contacts the face of the cylinder port. Tighten hand tight. DO NOT
USE A WRENCH.
3. Re-position fitting to desired orientation by turning it counter-
clockwise to a MAXIMUM of 1 full turn.
4. While holding the fitting body securely with a wrench, torque the
locknut to 40–43ft-lb.
5.5.3 Hose Fitting Reorientation (if required)