Doc# E166703 4-16
4: Electrical Installation
Electro Industries/GaugeTech
The Leader In Power Monitoring and Smart Grid Solutions
Electro Industries/GaugeTech
The Leader In Power Monitoring and Smart Grid Solutions
Electro Industries/GaugeTech
The Leader In Power Monitoring and Smart Grid Solutions
4.7.1: Removing the MP200 Unit Using the EI SB-6TC Shorting Block
NOTE: This procedure uses the EI SB-6TC shorting block. For shorting blocks other
than that, see the instructions in 4.7.2: Removing the MP200 Unit Using a Shorting
Block Other than the EI SB-6TC, on page 4-19.
1. Verify that all circuits are de-energized and locked out.
2. All shorting blocks shall be wired as per the wiring diagrams in this manual with
one side of each CT at ground potential. Refer to Figure 4.4: EI SB-6TC Shorting
Block Wiring Diagram, on page 4-7.
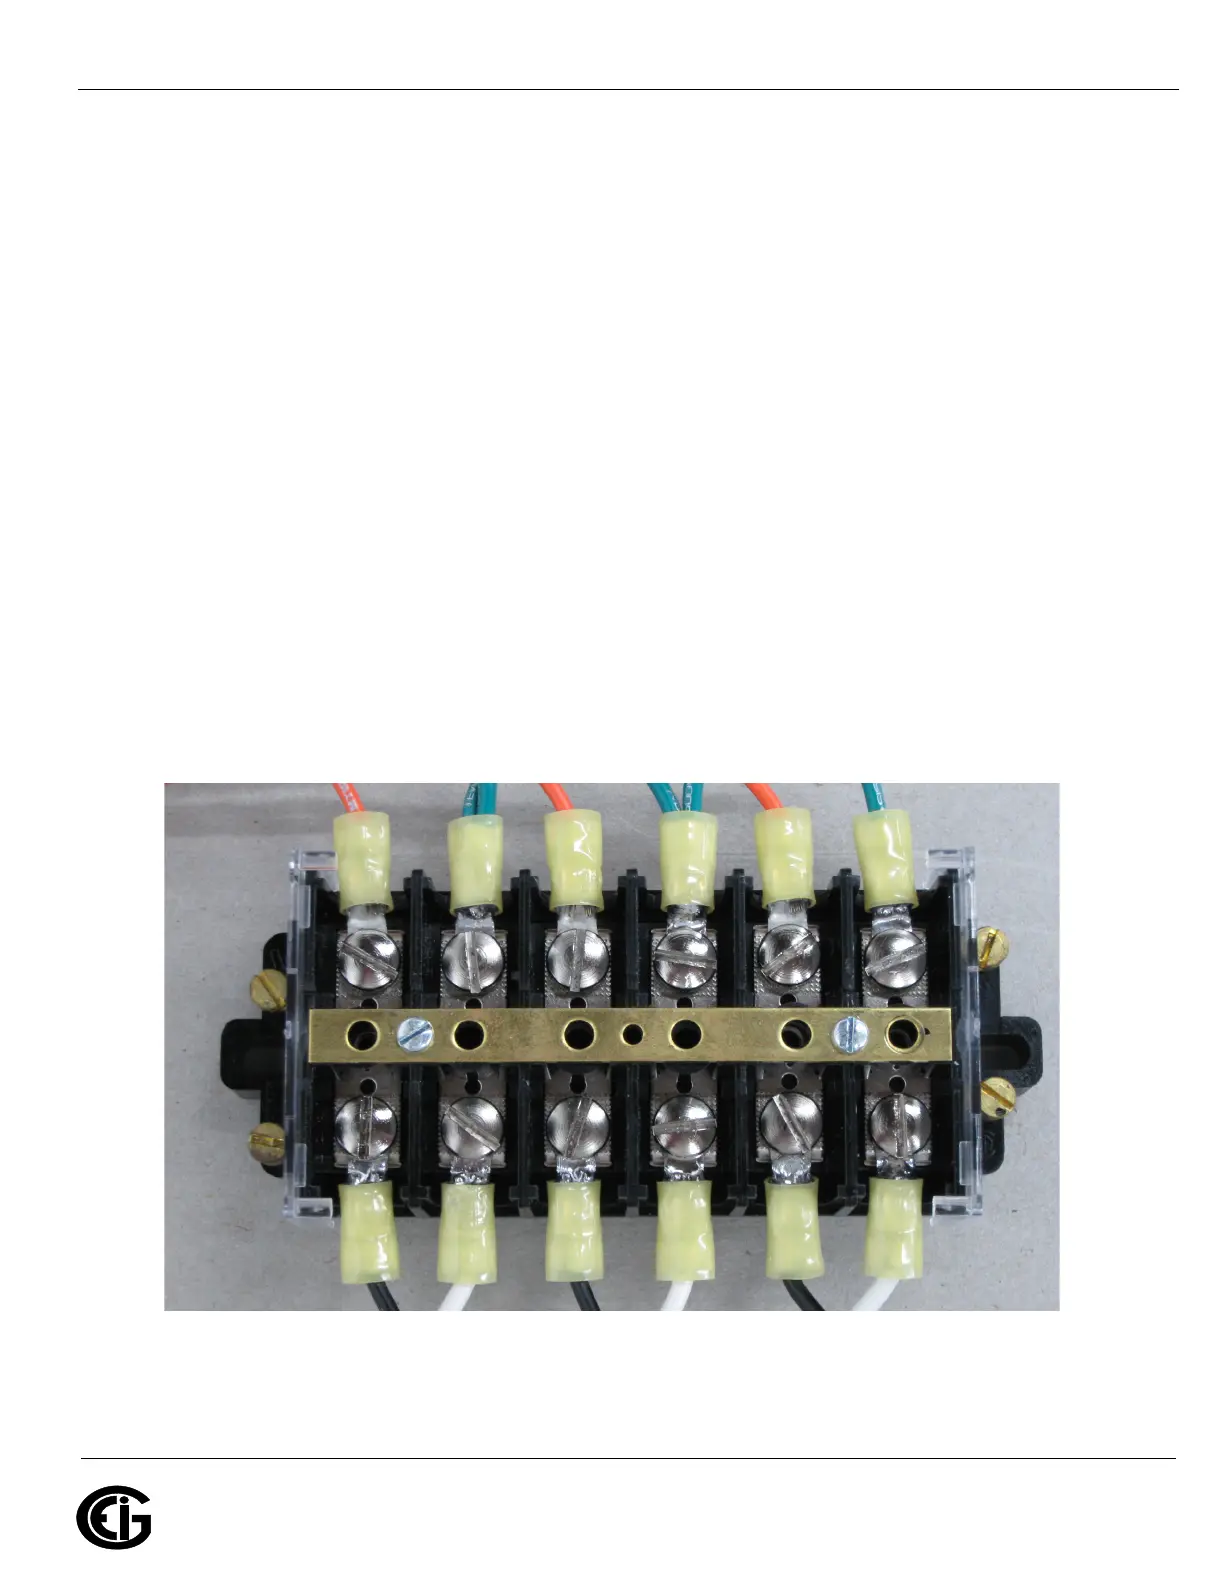
3. All shorting blocks are equipped with 4 brass shorting screws stored in the four
corners of the base. Refer to the figure below.
IMPORTANT! If all 4 brass shorting screws are not on the shorting blocks do not
continue until replacements are obtained.
IMPORTANT! Si toutes les quatre vis de court-circuit en laiton ne sont pas sur les
blocs de court-circuit, ne pas continuer jusqu'à ce que vous obteniez des
remplacements.
Figure 4.5: EI SB-6TC Shorting Block with Wiring Installed
4. Select one of the shorting blocks.