ShopBot PRS Assembly Manual Page -24
• With bolts “finger tight,” move along the X-Rail on the front side of your tool,
aligning the aluminum bar on the inside exactly flush with the inside of the table
side.
• Then start at one end further tightening the bolts.
• As you continue to lock the front X-Rail in position, slide your 6ft level or straight
edge along the outside edge of the rail to check for straightness. Nudge the
aluminum bar slightly if it needs adjustment.
• When you’ve got the front side rail in position and straight, fully tighten all the bolts
on the front side rail.
Adjust the Position of the Rear X-Rail
You’ll use a tape measure to set the initial position of the rear X-Rail. Always make these
kinds of important measurements from the 1” mark on the tape. Do not trust the accuracy
of the clip at the end of the tape.
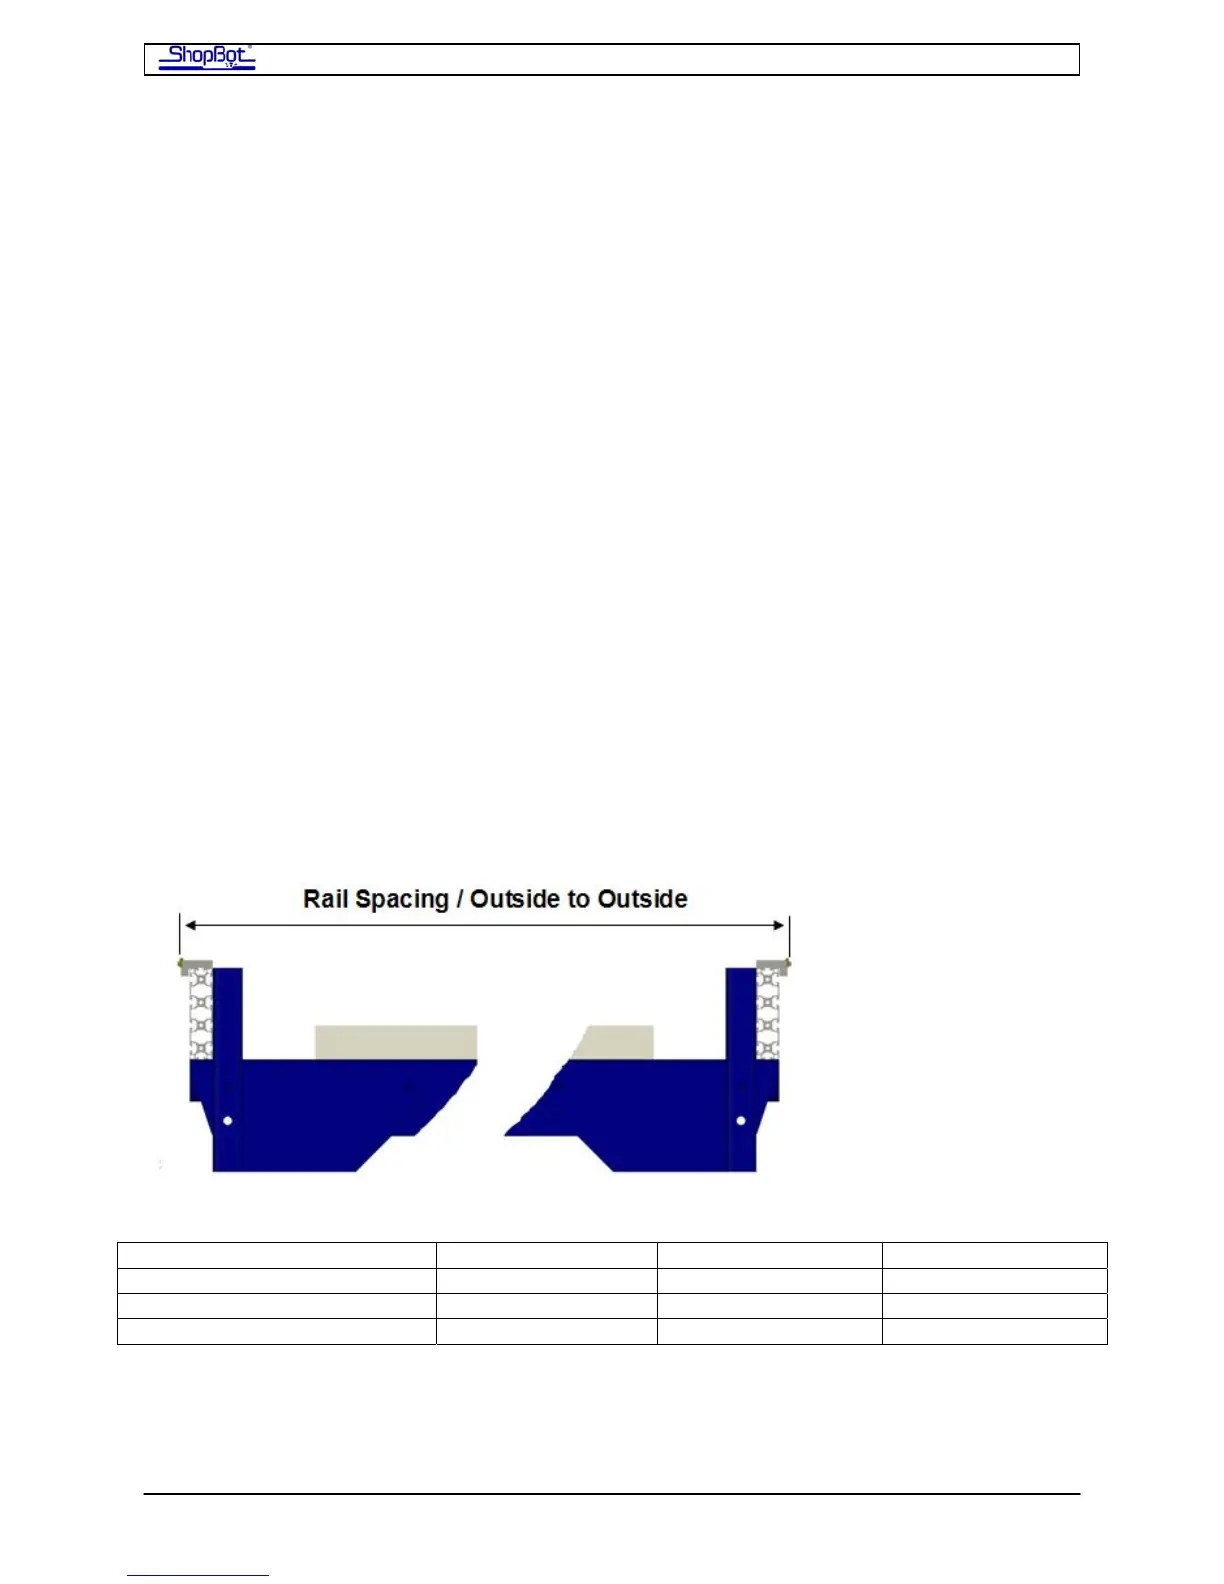
• Consult the chart below for the exact distance, outside edge to outside edge, for the
rails.
• Use the tape to check the distance at each of the bolts, and adjust where necessary.
Try to get within 1/32in of the distance. Note that the edge portion of the rails is ¼”
wide, so there will be a 1/16” mark that should fall on the exact centerline of the ‘V’
of the rail.
• Tighten these bolts on the rear rail down just a bit. But note that you are probably
going to need to adjust the rear rail again slightly, after putting the X-Car in place.
========== WORK AREA WIDTH ==========
DIMENSION 48” (121.92cm) 60” (12.40cm) 72” (182.88cm)
Outside to Outside of Rail 65.812”(167.16cm)
77.812”(197.64cm) 89.812”(228.12cm)
Outside to Outside of Table 64.5” (163.83cm) 76.5”(194.31cm) 88.5”(234.79cm)
PRSAssembly080922.doc Copyright 2007,2008 ShopBot Tools, Inc