ShopBot PRS Assembly Manual Page -55
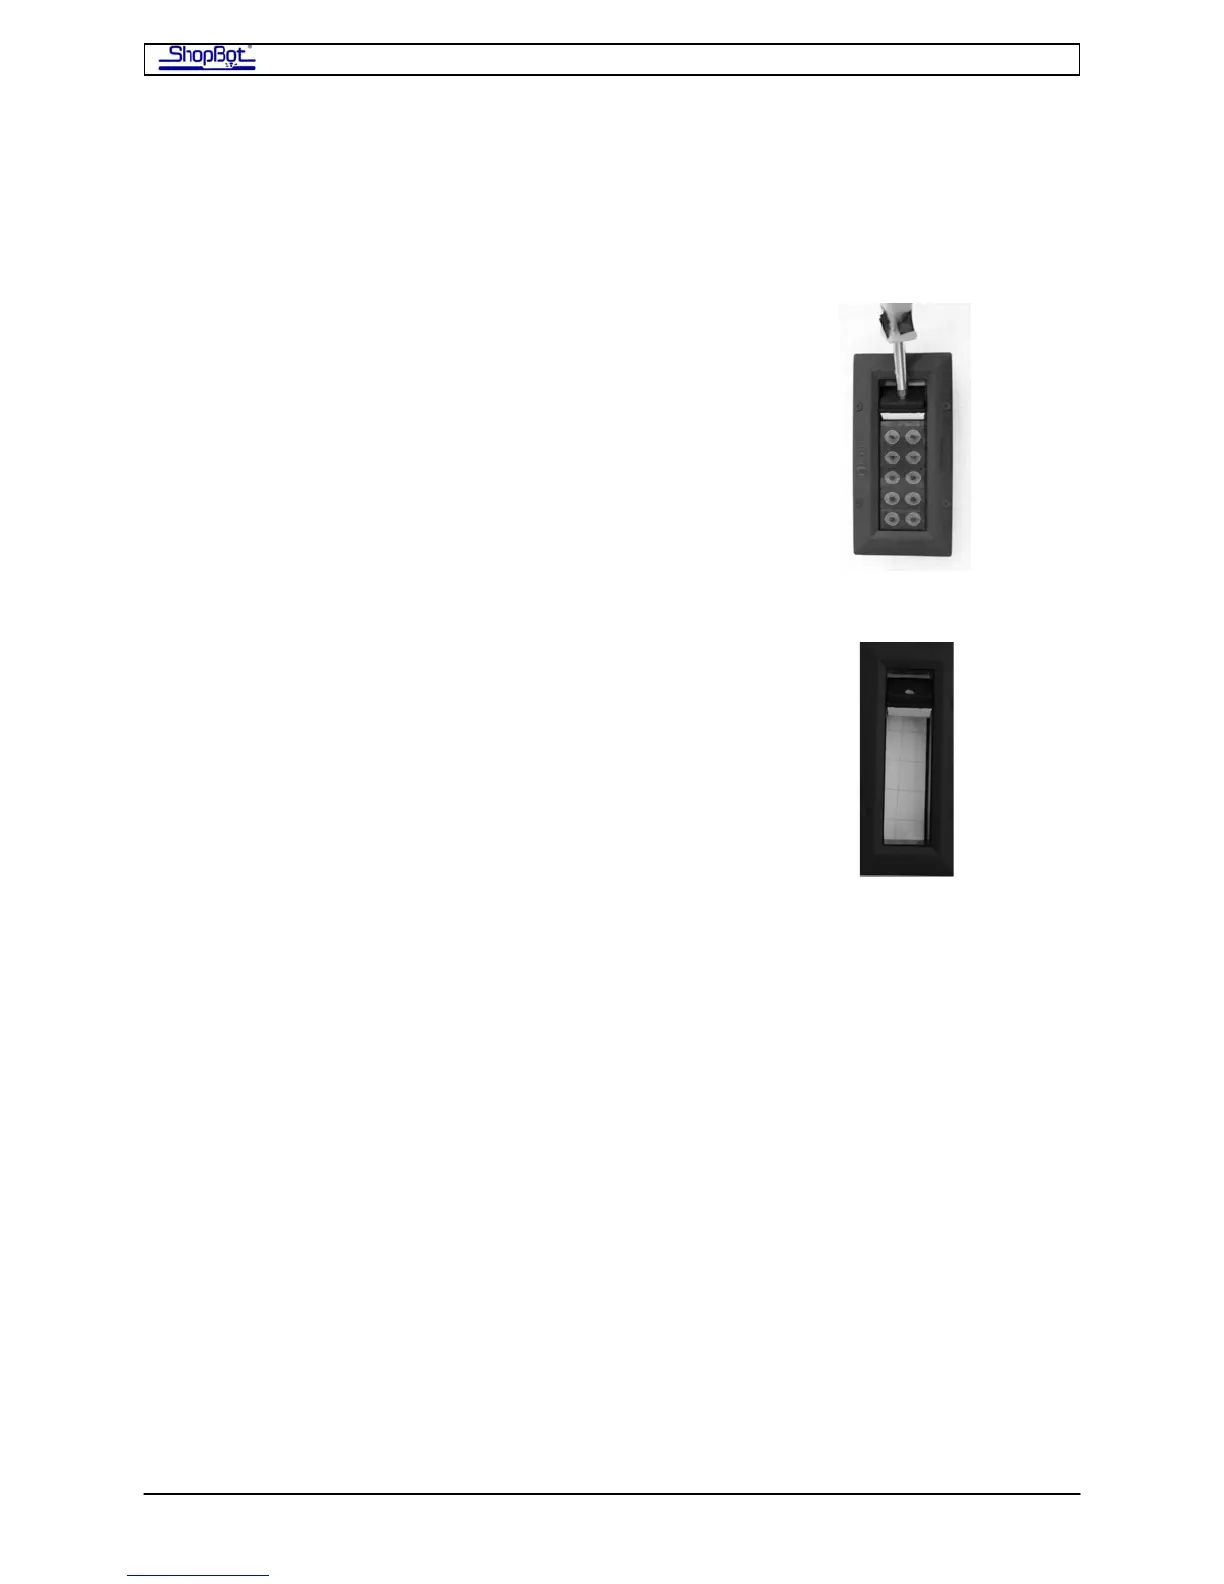
Open the Roxtec Fixture
You will be routing cables through the Roxtec Wire Management Fixture attached to the side
of the PRSalpha Control Box. This device gives all wires a tight entry and will seal your
PRSalpha Control Box against dust and debris.
Take a screw driver to lever open the pivot seal of the Roxtec
fixture. There is no screw; just pry it open.
Remove all of the gaskets from the Roxtec fixture.
Once you have attached all of the cables inside the PRSalpha Control Box, you will run the
cables through the gaskets and tighten the fixture to keep dust out of the PRSalpha Control
ox. You may need to run more than one of the smaller cables in the same gasket. B
Plug the Motor Cables into Drivers
Bring the motor cables through the Roxtec opening and plug them into to the drivers which
are the black boxes arrayed horizontally in the PRSalpha Control Box (#7 in the open
RSalpha Control Box illustration shown earlier). P
Plug each motor cable into its driver. The white plug fits the white receptacle on the driver
only one way. Make sure it is aligned correctly and fully seated. in
Fro tm he entry point of the cables:
• X1 (one red tape) and X2 (two red tapes) go to the two drivers at the far right. As
those two drivers are both on Channel 1 (they move simultaneously), an X motor
cable can be plugged into either driver.
• The Y motor cable (blue tape) is plugged into Channel 2, the 3rd driver from the
right.
• The Z motor cable is plugged into Channel 3, the 4th driver from the right.
• Additional motors (Accessory Z, etc.) would be plugged into the additional drivers to
the left of the 4 standard drivers.
PRSAssembly080922.doc Copyright 2007,2008 ShopBot Tools, Inc