30
8012704/YHS4/V2-0/2016-10 | SICKOPERATING INSTRUCTIONS | GM32
Subject to change without notice
4 START-UP
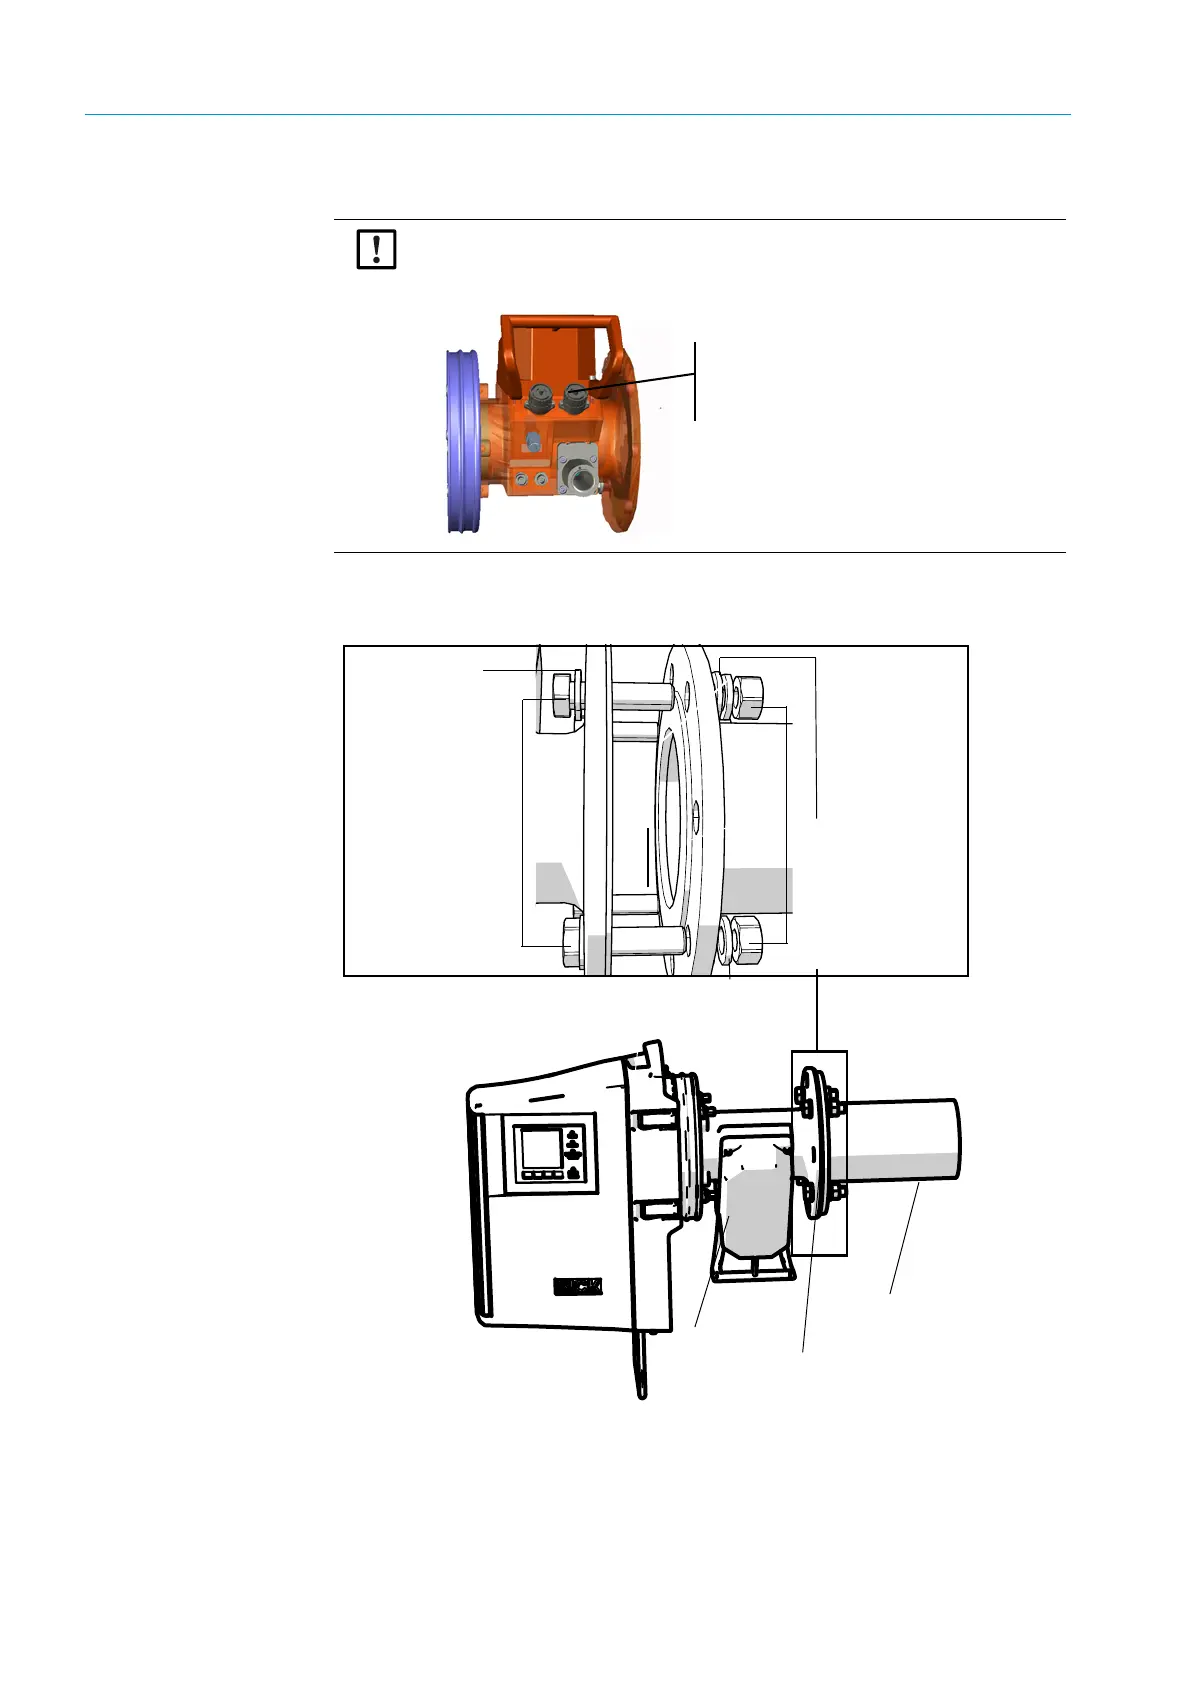
4.5 Installing the purge air fixtures on the flange with tube
1 On the SR-unit:
Install the purge air fixture on the flange with tube (seal and 4 screws).
Fig. 15: Purge air fixture installed on the “flange with tube”
Fig. 16: Purge air fixture installed on the “flange with tube”
2
Install accordingly on the reflector side.
Do not interchange the purge air fixtures.
● The purge air fixture on the SR-unit has 2 plugs.
● The purge air fixture on the reflector unit has 1 plug.
2 plugs:
Purge air fixture of the SR-unit
1 plug:
Purge air fixture of the reflector unit
Purge air fixture
Flange with tube
Screws
Washer
Spring washers
Nuts
Flange seal