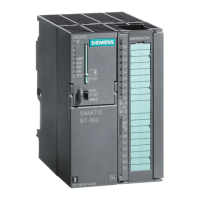
Installing and removing the FM 352
FM 352 electronic cam controller
28 Operating Instructions, 05/2011, A5E01071724-03
Installing the FM 352 electronic cam controller
1. The FM 352 is supplied with a bus connector. Plug this connector into the bus connector
of module to the left of the FM 352. The bus connector is installed on the rear panel of the
module; you may first have to loosen the module again.
2. If you install any further modules on the right side, start by plugging the bus connector of
the next module into the right hand bus connector of FM 352.
If the FM 352 is the last module in the tier, do not install a bus connector.
3. Screw-tighten the FM 352 (tightening torque approx. 0.8 N/m to 1.1 N/m).
4. After installation, you can assign a slot number to FM 352. For this purpose, the CPU
comes with slot plates.
The required numbering scheme and the procedure for inserting the slot plates can be
found in the Operating Instructions SIMATIC S7-300 CPU 31xC and
CPU 31x: Installation (http://support.automation.siemens.com/WW/view/en/13008499
).
5. Install the shield connection element.
Order No.: 6ES7 390-5AA00-0AA0
Removing the electronic cam controller
1. Switch off the power drive.
2. Switch off the 24 V supply to FM 352.
3. Set the CPU to STOP.
4. Open the front panel covers.
Remove the labeling strip.
5. Unlock and remove the front connector.
6. Remove the sub D connector of the encoder.
7. Loosen the fixing screw on the module.
8. Swivel the module up, and then remove it from the rail.
 Loading...


