Operating the device
5.3 Operating RAID systems
SIMATIC IPC677E
Operating Instructions, 04/2019, A5E45117996-AA
61
Set up the onboard RAID system (Create Volume)
1. Switch on the device or restart it.
2. Immediately after turning on the device, as soon as the message "
Press ESC for boot
options
" appears, press and hold the <Esc> button.
3. From the firmware selection menu, using the arrow keys, select the entry "Device
Management" and confirm your selection.
4. From the "Devices List", select the entry "Intel <R> Rapid Storage Technology".
5. Select under "Create RAID Volume".
6. On the next screen, assign a name for the RAID system.
7. Select "RAID Level" and select the entry "RAID1" in the following selection window. A list
of the available drives is displayed.
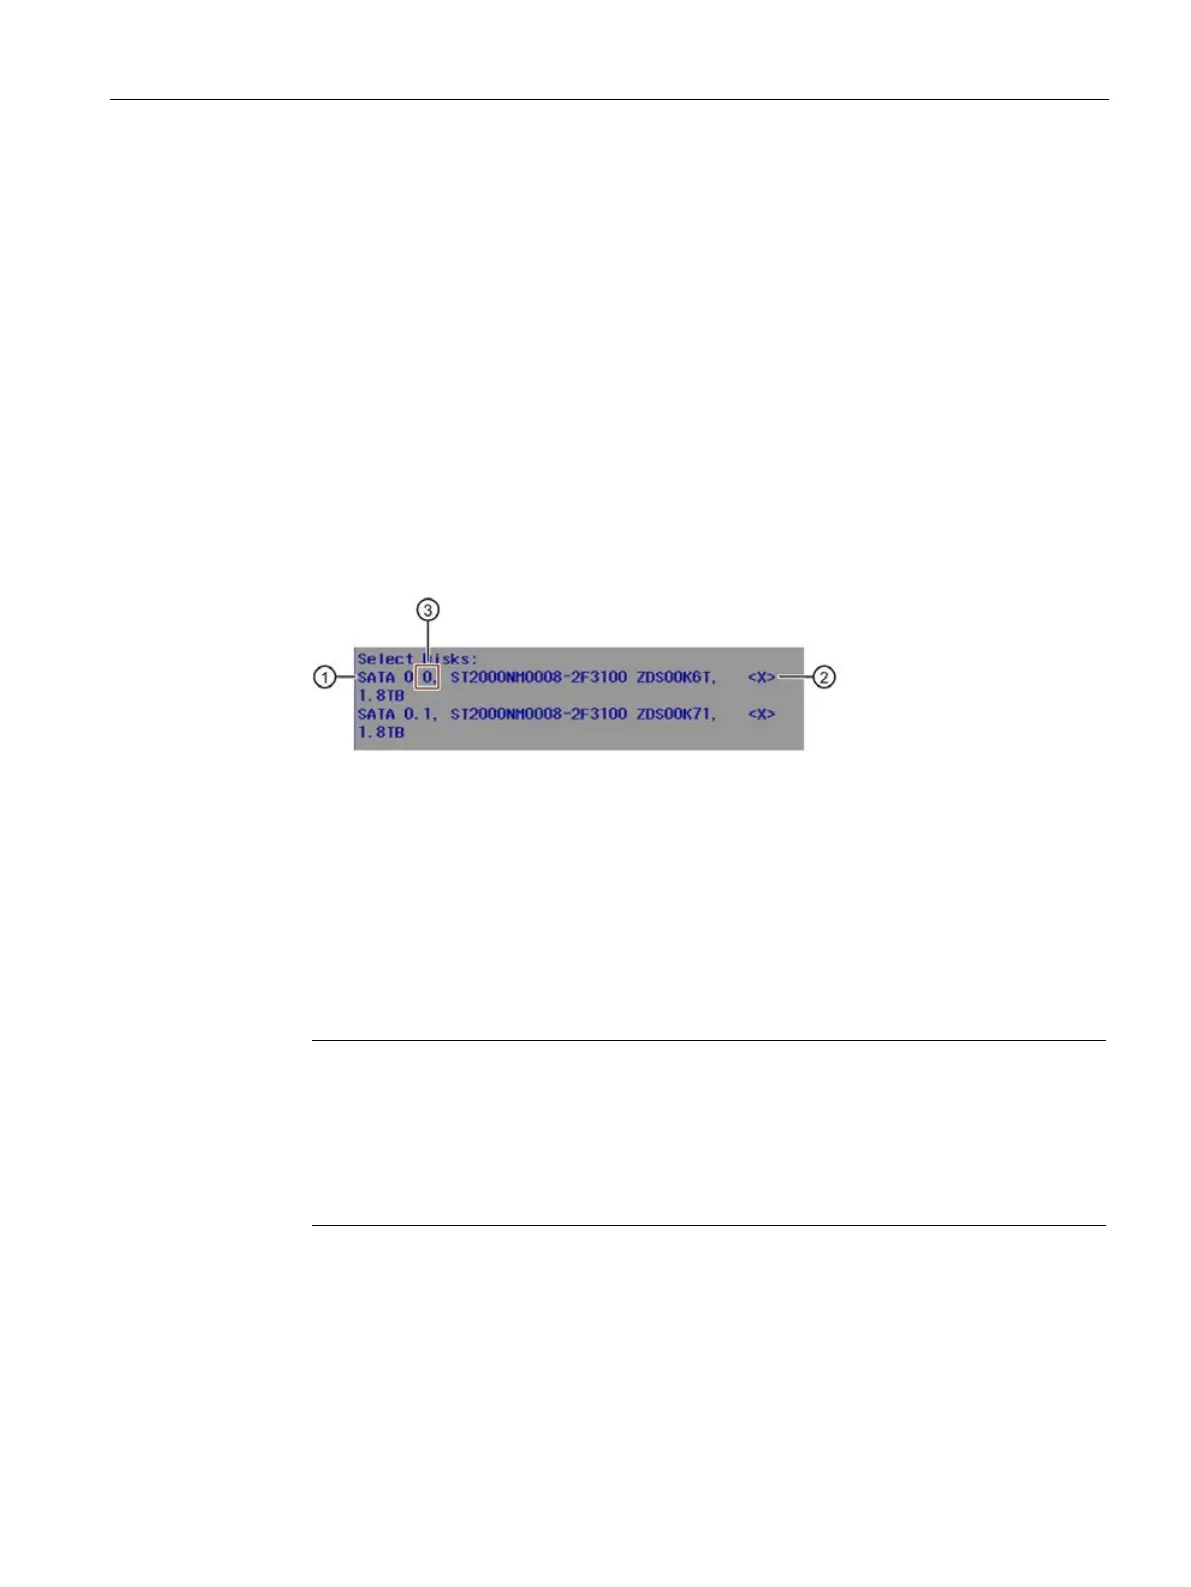
8. Under "Select Disc" select the drives
① that you want to integrate into your RAID system
and confirm your selection.
– The mounted drive is provided with a check mark in the list
②.
– You will find the assignment of the drive to the installation location in the drive cage
after the drive name, see
③.
9. Select "Create Volume".
The following screen shows the details on the RAID system just set up (RAID Volume).
The onboard RAID system is set up.
10. Press the <Esc> multiple times in succession until you reach the "Main Page" of the
firmware/BIOS menu.
Note
Confirm "Exit Discarding Changes" message with "YES"
If when exiting the firmware/BIOS menu with the <Esc>
button, the warning message
"Exit Discarding Changes" is displayed, confirm this message with "Yes".
The prenumbered settings are saved nonetheless and you can leave the firmware/BIOS
menu.
11. In the Main Page of the firmware/BIOS menu, select "Continue".
Your device continues the boot operation and switches on.