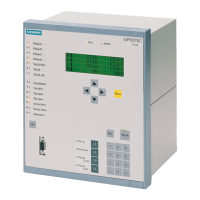
3 Mounting and Commissioning
272
7SD610 Manual
C53000-G1176-C145-4
To perform work on the printed circuit boards, such as checking or moving switching
elements or exchanging modules, proceed as follows:
• Prepare your workplace: prepare a suitable underlay for electrostatically sensitive
devices (ESD). Also the following tools are required:
– screwdriver with a 5 to 6 mm wide tip,
– a crosstip screwdriver for Pz size 1,
– a 5 mm socket wrench.
• Unfasten the screw-posts of the D-subminiature connectors on the back panel at
location „A“ and „C“. This activity does not apply if the device is for surface mount-
ing.
• If the device features additional interfaces besides those at location „A“ and „C“, the
screws located diagonally to the interfaces must be removed. This activity does not
apply if the device is for surface mounting.
• Remove the covers on the front panel and loosen the screws which can then be ac-
cessed.
• Carefully take off the front cover.
Work on the Plug
Connectors
Caution!
Mind electrostatic discharges:
Non-observance can result in minor personal injury or property damage.
In order to avoid electrotrastic discharges when handling with plug connectors first
touch an earthed metal surface .
Do not plug or unplug interface connectors under voltage!
The order of the boards is shown in Figure 3-3.
• Release the connector of the ribbon cable between processor module C-CPU-2
and front cover at the front cover itself. To do this, spread the latches on the upper
and lower end of the plug connector to release the plug connector of the ribbon
cable.
• Disconnect the ribbon cables between the processor board C-CPU-2 (No. 1 in
Figure 3-3) and the input/output board I/O-11 (No. 2 in Figure 3-3).
• Remove the boards and set them on the grounded mat to protect them from ESD
damage. In the case of the device variant for panel surface mounting, please be
aware of the fact that a certain amount of force is required in order to remove the
C-CPU-2 module due to the existing plug connectors.
• Check the jumpers according to Figures 3-4 to 3-10 and the following information.
Change or remove the jumpers if necessary.
www . ElectricalPartManuals . com

 Loading...