Scanner Viewing and Saving Data
43
PID Trigger Status Icons
The icons (below) are used to help you quickly identify the status of individual PID
triggers:
z Setting triggers:
To use triggers, they must be turned on (set/configured), and then armed. Use the
following procedures to setup PID triggers.
1. Highlight the PID to setup with a trigger.
2. Select the Trigger icon.
Selecting the Trigger icon (Figure 6-25) displays trigger menu options:
- Set Trigger—opens setup screen for upper/lower limits (trigger points)
- Arm Trigger—arms the trigger to capture data
- Clear All Triggers—deletes all previously set triggers
Figure 6-25 Trigger menu
If triggers are already set, the menu options are:
- Clear Trigger—deletes the highlighted trigger
- Disarm Trigger—disarms the highlighted trigger
- Clear All Triggers—deletes all set triggers
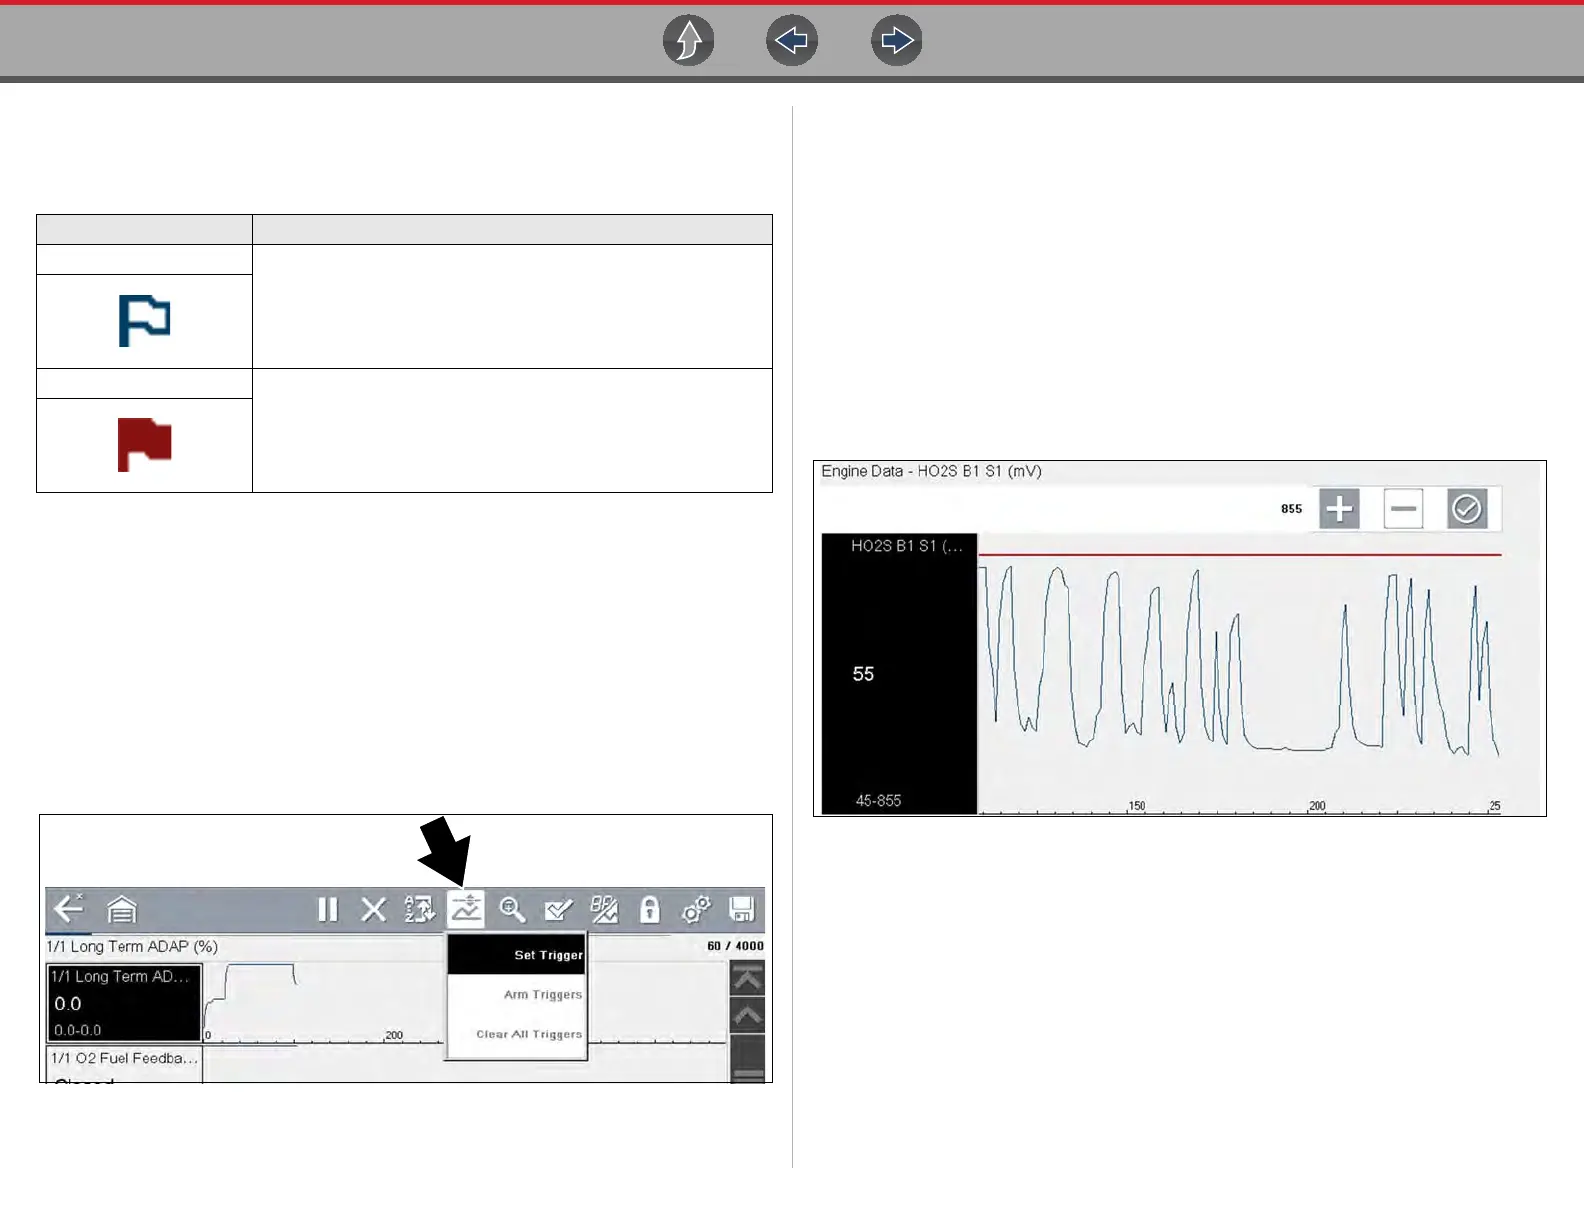
3. Select Set Trigger.
A graph of the highlighted PID and setup icons display (Figure 6-26).
The upper trigger point must be set first. A red horizontal line is displayed
across the data graph (Figure 6-26) representing the upper trigger point.
4. Use the plus (+) and minus (–) icons (Figure 6-26), or the up b and down d
arrow buttons to change the position of the upper trigger point.
5. Select a, or press the Y/a button, to set the upper trigger point.
Figure 6-26 Trigger setup - upper limit
The upper trigger line changes color to gray and the lower trigger line displays
in red (Figure 6-27).
6. Change the position of the lower trigger line in the same manner as the upper.
7. When finished, select a, or press the Y/a button, to set the lower trigger level.
Icon Description
Trigger Armed
Trigger has been set (configured) and is armed.
Trigger Activated
Trigger has been activated (upper or lower limit has been met).