11
Chapter 3 Getting Started
Make sure the diagnostic tool has a charged battery pack, is connected to a powered vehicle data
link connector (DLC), or is connected to an AC power supply.
3.1 Powering Up
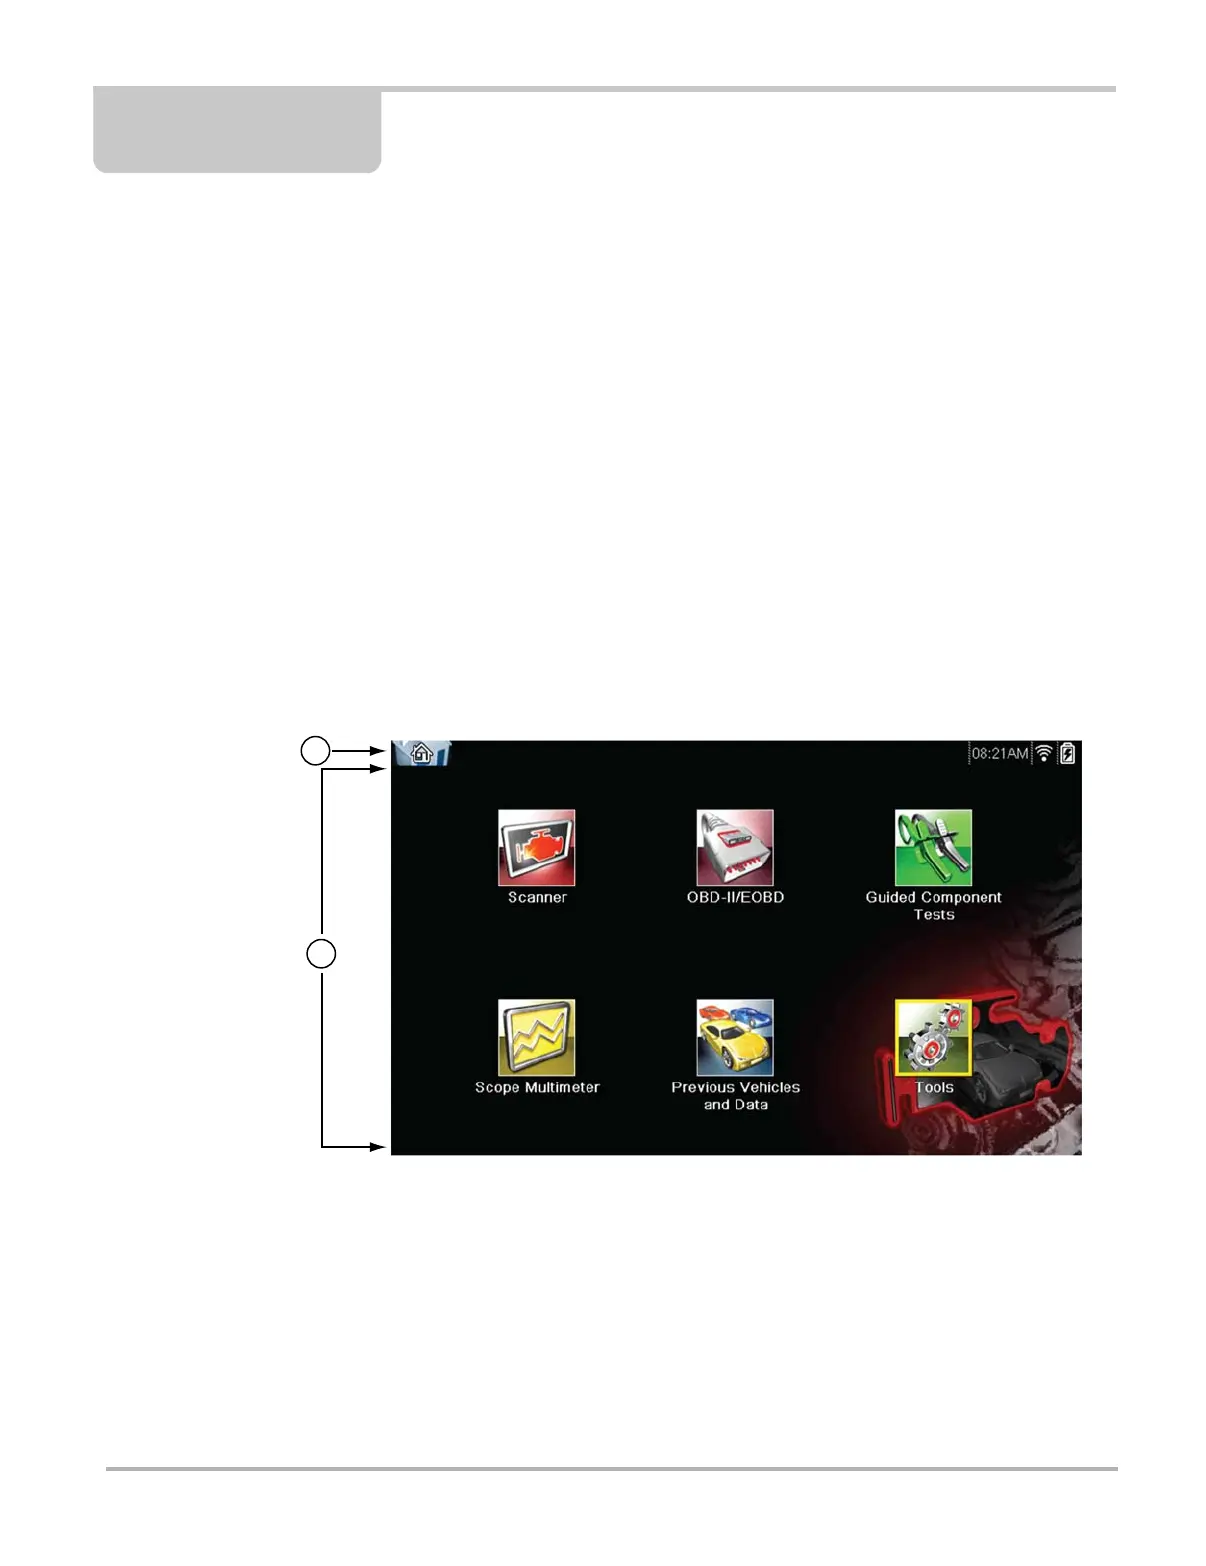
The unit should automatically power on and open the Home screen (Figure 3-1) when ever power
is supplied through the data cable or by the AC Power Supply. If not, press the Power key on the
front of the unit to switch the tool on.
3.2 Home Screen
The main body of the Home screen has six selectable buttons, one for each of the primary
diagnostic tool functions. These are explained briefly in the next section and discussed in detail in
the Navigation chapter.
1— Titlebar
2— Main Body
Figure 3-1 Sample Home screen
3.2.1 Title Bar
The title bar at the top of the screen provides basic information about current tool operating
conditions. Title bar options vary depending upon vehicle make and model, what module is being
used, what test is being performed, or what menu is selected. The title bar contains information
only, there are no selectable items.