16
Getting Started Connecting an AC/DC Power Supply
• Use batteries from a reputable manufacturer only.
• When replacing batteries, always replace the whole set.
• Do not use different brands of batteries together.
• Do not try to recharge batteries that are not specifically designed to be recharged.
• Do not allow children to install batteries unsupervised.
• Follow the battery manufacturer's instructions as to proper handling, storage, and
disposal of batteries.
Improper use of batteries can result in personal harm.
3.5 Connecting an AC/DC Power Supply
The optional AC/DC power supply provides power from a wall socket.
For related information, see the following sections:
• “DC Power Input” on page 9
• “AC/DC Power Supply” on page 11
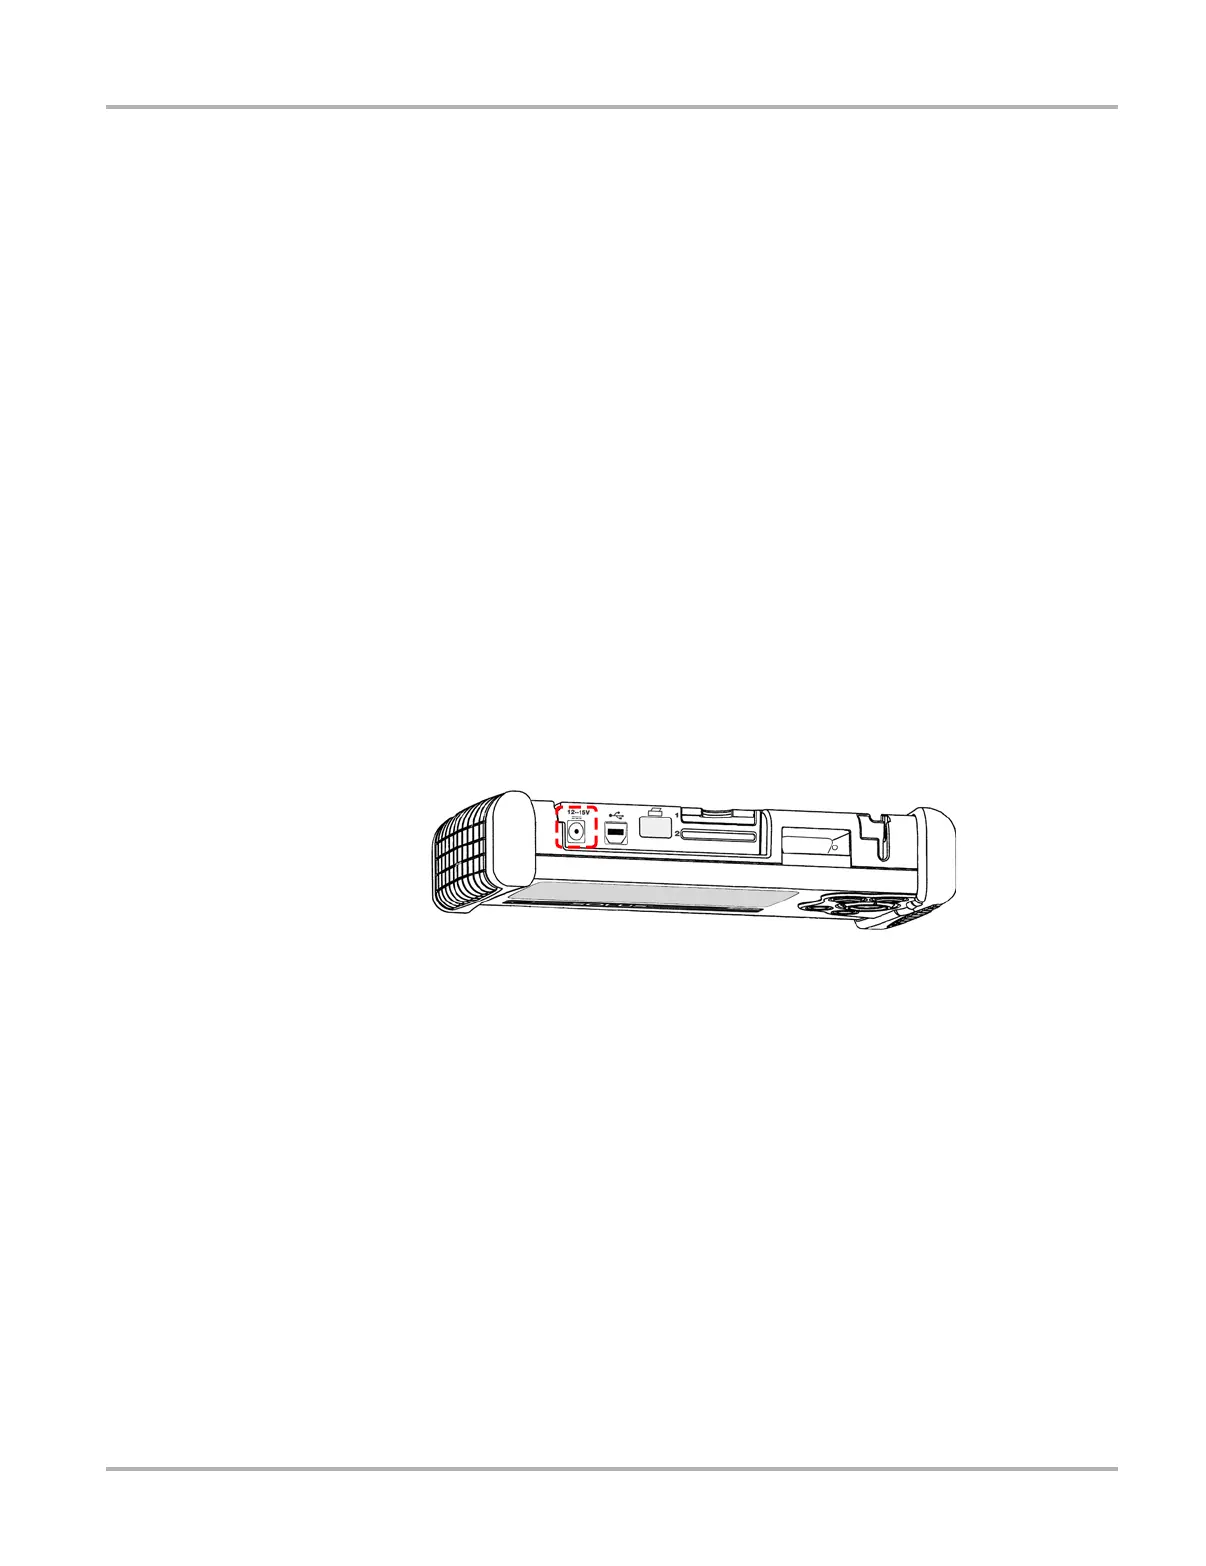
z To connect an AC/DC power supply:
1. Plug the 2.5 mm end of the AC/DC power supply cord into the DC power adapter input on the
top of your scan tool (Figure 3-3).
Figure 3-3
DC power supply input
2. Plug the other end of the power adapter into an appropriate wall socket.
3.6 Powering On the Unit
When a master storage CF card is installed and power is supplied, power on your scan tool.
z To power on the scan tool:
• Press the Power button (Figure 2-2 on page 5).
The unit beeps and the main menu screen displays after a few seconds.
3.7 Setting Up to Print
This scan tool prints wirelessly from infrared (IR) enabled, PCL 3 printers.