Sirius 800 www.snellgroup.com Power Supply and Fan Maintenance
Issue 1 Rev 1 Page 25 © 2014 Snell Limited
4.3 Hot Swapping the Power Supply Units
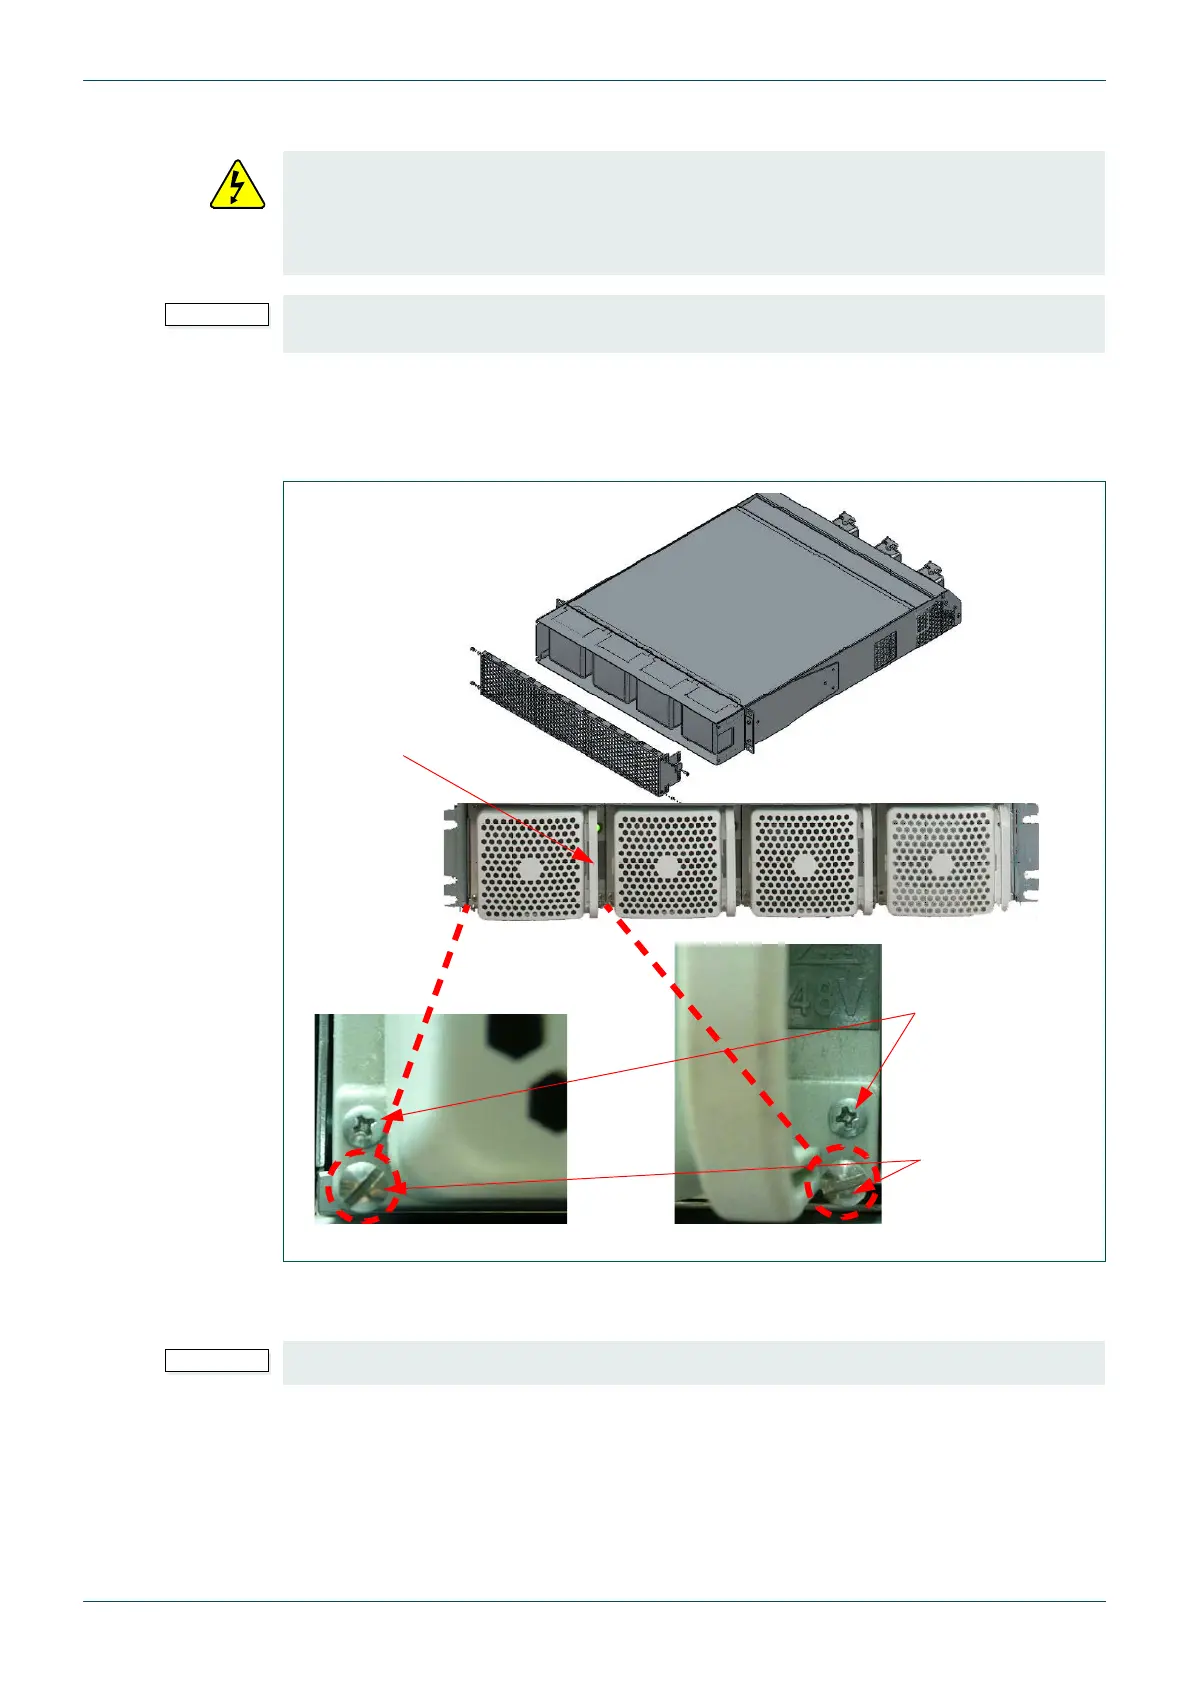
1. Remove the protective mesh cover from the front of the power supply shelf by
loosening the four hexagon head screws (2 either side of the mesh cover) using a 2.5
size Hex key or driver. Carefully pull the mesh cover away from the front of the PSU
shelf, see Fig 7.
2. To remove an individual PSU loosen the two “flat head” screws at the very bottom of
the PSU (see Fig 7.).
3. Take hold of the handle on the right side of the PSU and carefully withdraw it from the
frame.
4. When you have removed the PSU, an alarm signal is active until the unit is replaced.
If the PSU is removed from a power shelf that doesn’t have an alarm cable fitted the
alarm will not be activated. This is the case in Sirius 850 systems equipped with three
power supply shelves.
• Great care should be taken when removing an individual PSU from a power shelf.
This should only be carried out by a qualified engineer.
• Individual PSUs can be hot swapped however if a complete power supply shelf
needs to be replaced it must be isolated first. See section 4.4 for details.
• The power supply unit is heavy weighing 24 Kg (53 lbs). When lifting use the
correct local Health and Safety lifting guidelines.
Fig 7. Removing the Power Supply Units
Do not unscrew the “crosshead” screws marked in Fig 7.
Handle
Do Not unscrew
the “crosshead”
screws
Loosen the “flat
head” screws
 Loading...