Sirius 800 www.snellgroup.com Module Maintenance
Issue 1 Rev 1 Page 50 © 2014 Snell Limited
6.3.1 Upgrade Procedure
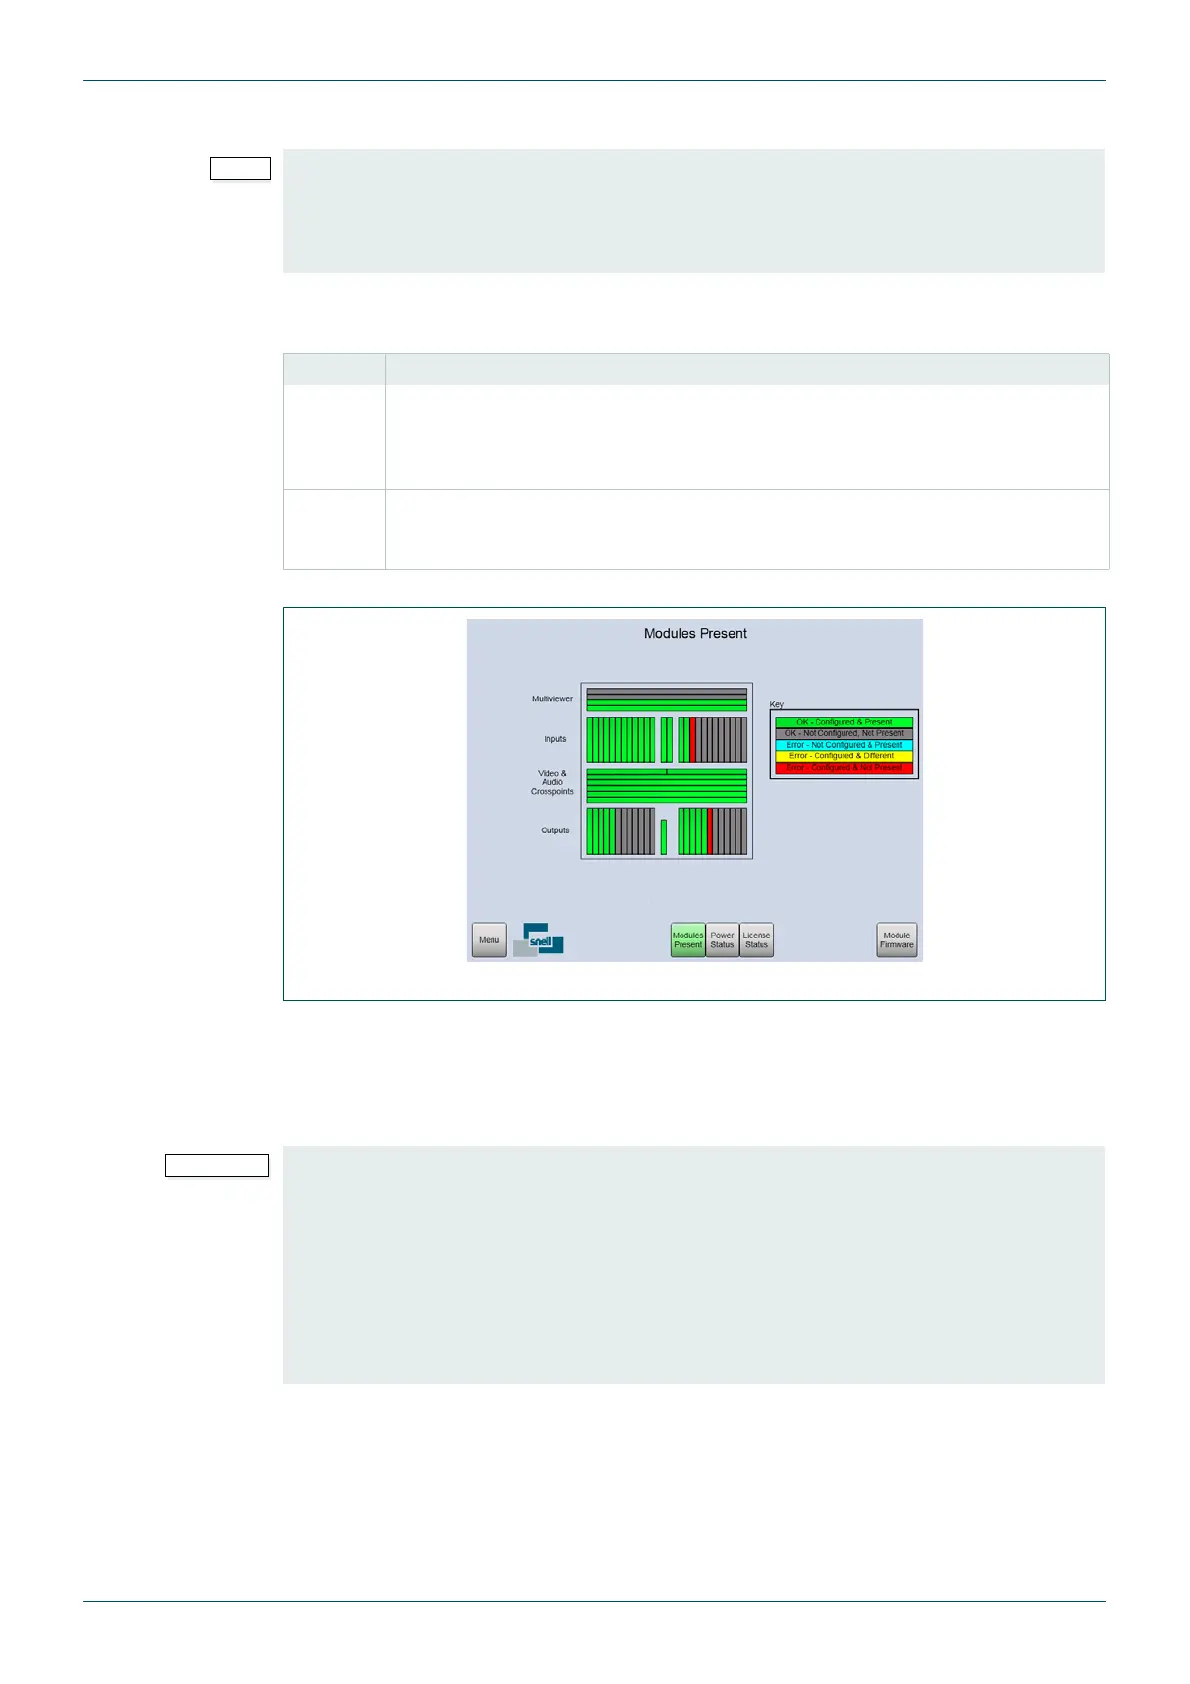
1. Check the Door PC “Modules Present” screen and note the color of each of the
module slots that are to be expanded (see Table 14. & Fig 18.):
2. Backup the Workbench database, see section 6.4 for details on backing up the
database.
3. Once the Workbench database has been backed up fit the new rear panels (see
section 5.1 for details on rear panel and front module compatibility).
• Do not insert the new input and/or output modules until you reach step 6. on
page 51.
• Microsoft Remote Desktop can be used to view and control the Door PC if required
(see section 8.2).
Color Description
Red OK - Configured & Not Present
Once the new Input and/or Output modules have been installed you will need to
use the Workbench Auto Configure feature so that the Nucleus controller can
learn the new router configuration.
Grey Error - Not Configured, Not Present
A few additional steps will be required to update the controllers with the new
router configuration.
Table 14. Slot Colors
Fig 18. Sirius 840 Module Status shown as an Example
• Rear panels must be fitted and fastened securely to the router frame before
inserting the front modules.
• The rear panel fastening screws should not require any pressure when screwing
them into the router frame. They should screw in without any resistance until the
screw head secures the rear panel to the frame. If a rear panel fastening screw
binds up then it should be removed and the screw alignment should be checked
before the screw is refitted.
• Do not over tighten the rear panel fastening screws.