Sirius 800 www.snellgroup.com Module Maintenance
Issue 1 Rev 1 Page 54 © 2014 Snell Limited
19. If the new configuration is working correctly on the Active updated Nucleus controller
copy the working updated controller's configuration to the Inactive (non updated)
Nucleus controller using the following steps:
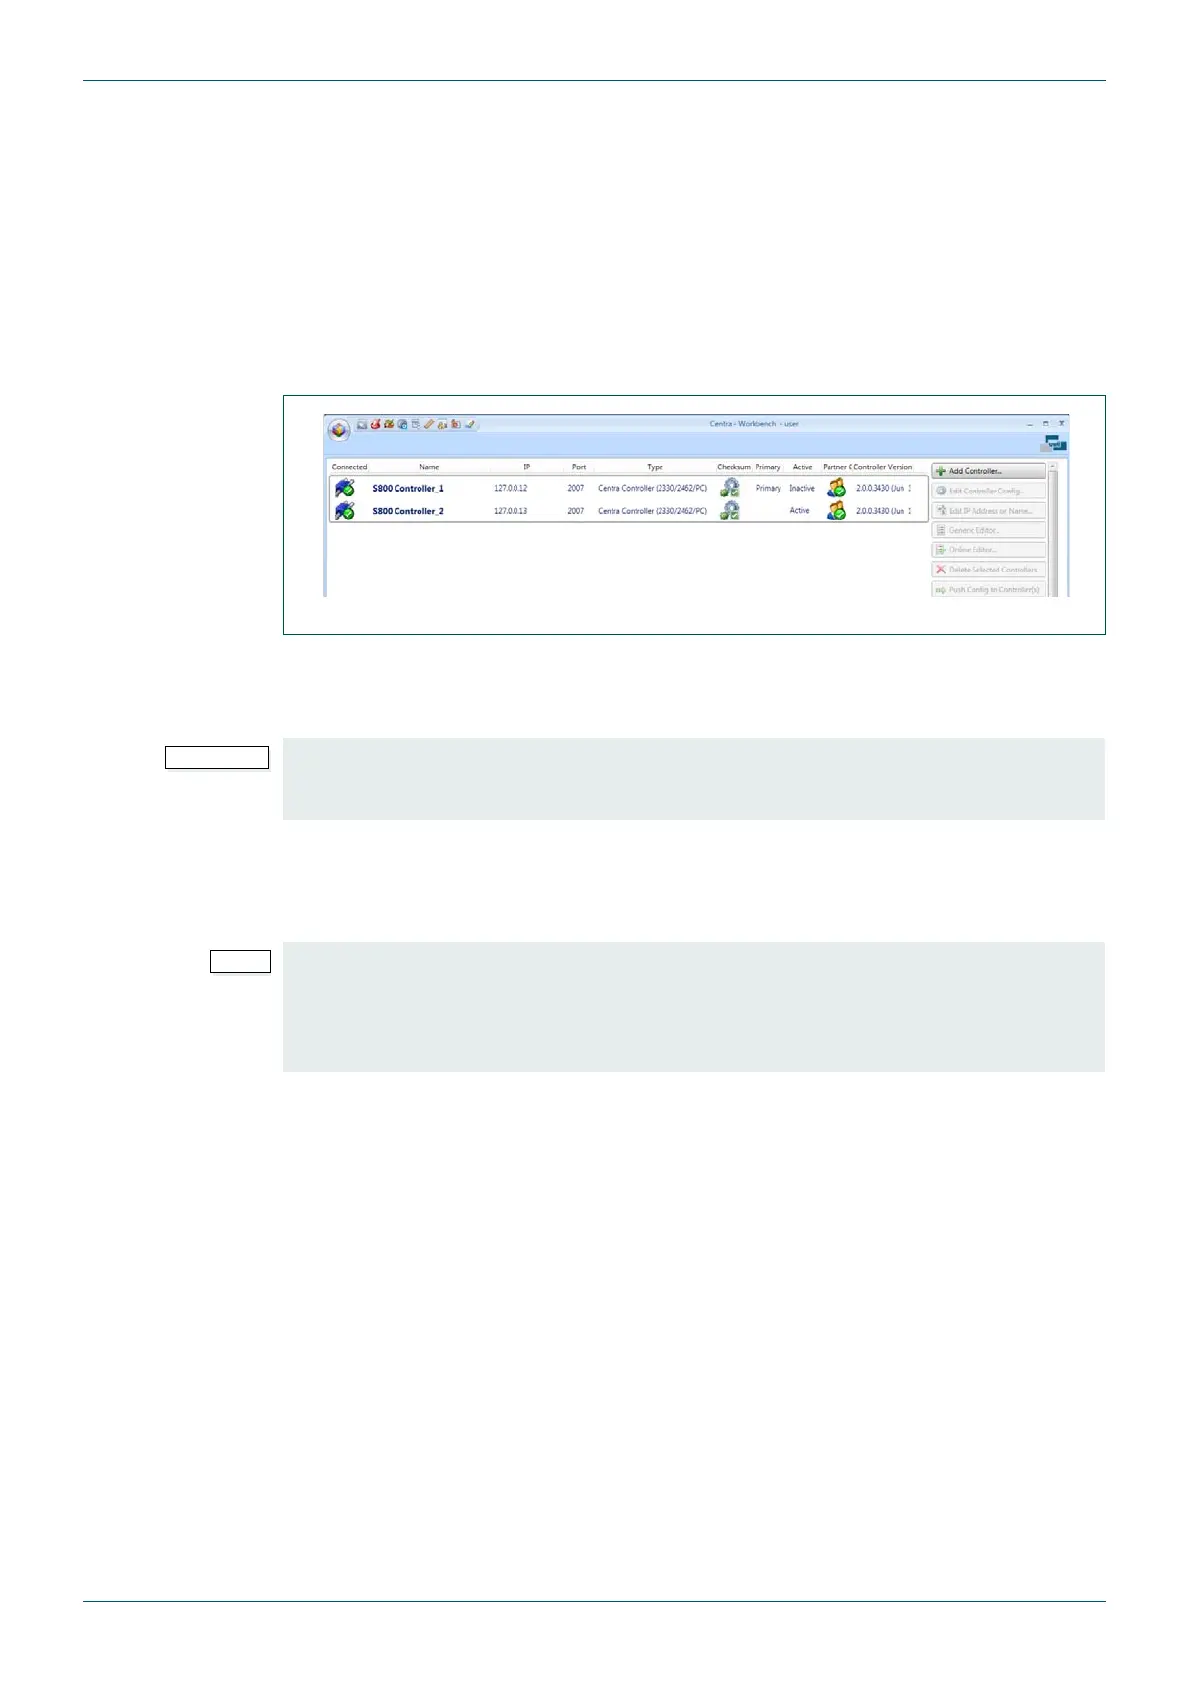
a Select the Active updated Nucleus controller from the Workbench controller
configuration screen (see Fig 22.).
b Click on the Copy config to partner button on the right of the controller
configuration screen.
c Select only the Inactive (non updated) Nucleus controller and click on the Push
Config to Controller(s) button
20. Once the configuration has been pushed to the Inactive Nucleus controller restart it
and wait for it to display as connected (Green) in Workbench and indicate that it is
Inactive. Verify that the Checksum is displayed as a White Tick in a green box.
21. The input and/or output modules have now been successfully installed in the router
and are ready to be used.
22. The original Active Nucleus controller can now be made Active again if required.
6.3.2 Additional notes and support
It should not be necessary to make any other changes to the Workbench database however if
you have any issues after you have completed the update procedure please supply the
following information to Snell Customer Support (see section 1.2 on page 8 for your customer
support e-mail address):
• Make a new backup of the current SQL database and Zip it up (this may need to be
posted on an FTP site if the files are two large to e-mail)
• Provide details of the original router configuration size and the required new router
configuration size.
• List the types and number of new cards being installed and their location in the frame.
• Supply any Workbench log files if they are available.
Fig 22. Workbench Controller Screen
Always wait for a controller to come up green and report its state in Workbench before you
swap between controllers. Doing this ensures that you get clean and un-interrupted
operation of the router with no disturbance to video or external control systems.
If any Workbench screens are configured to display module; temperature, licence status
and/or power status check that they are displaying these parameters for the new modules.
If the parameters are not being displayed for the new modules the screens will need to be
edited in Workbench Designer using the Choose DCCP Field window from
Device Explorer to choose the correct parameters for the new modules.
 Loading...