16
Chapter 1 Overview
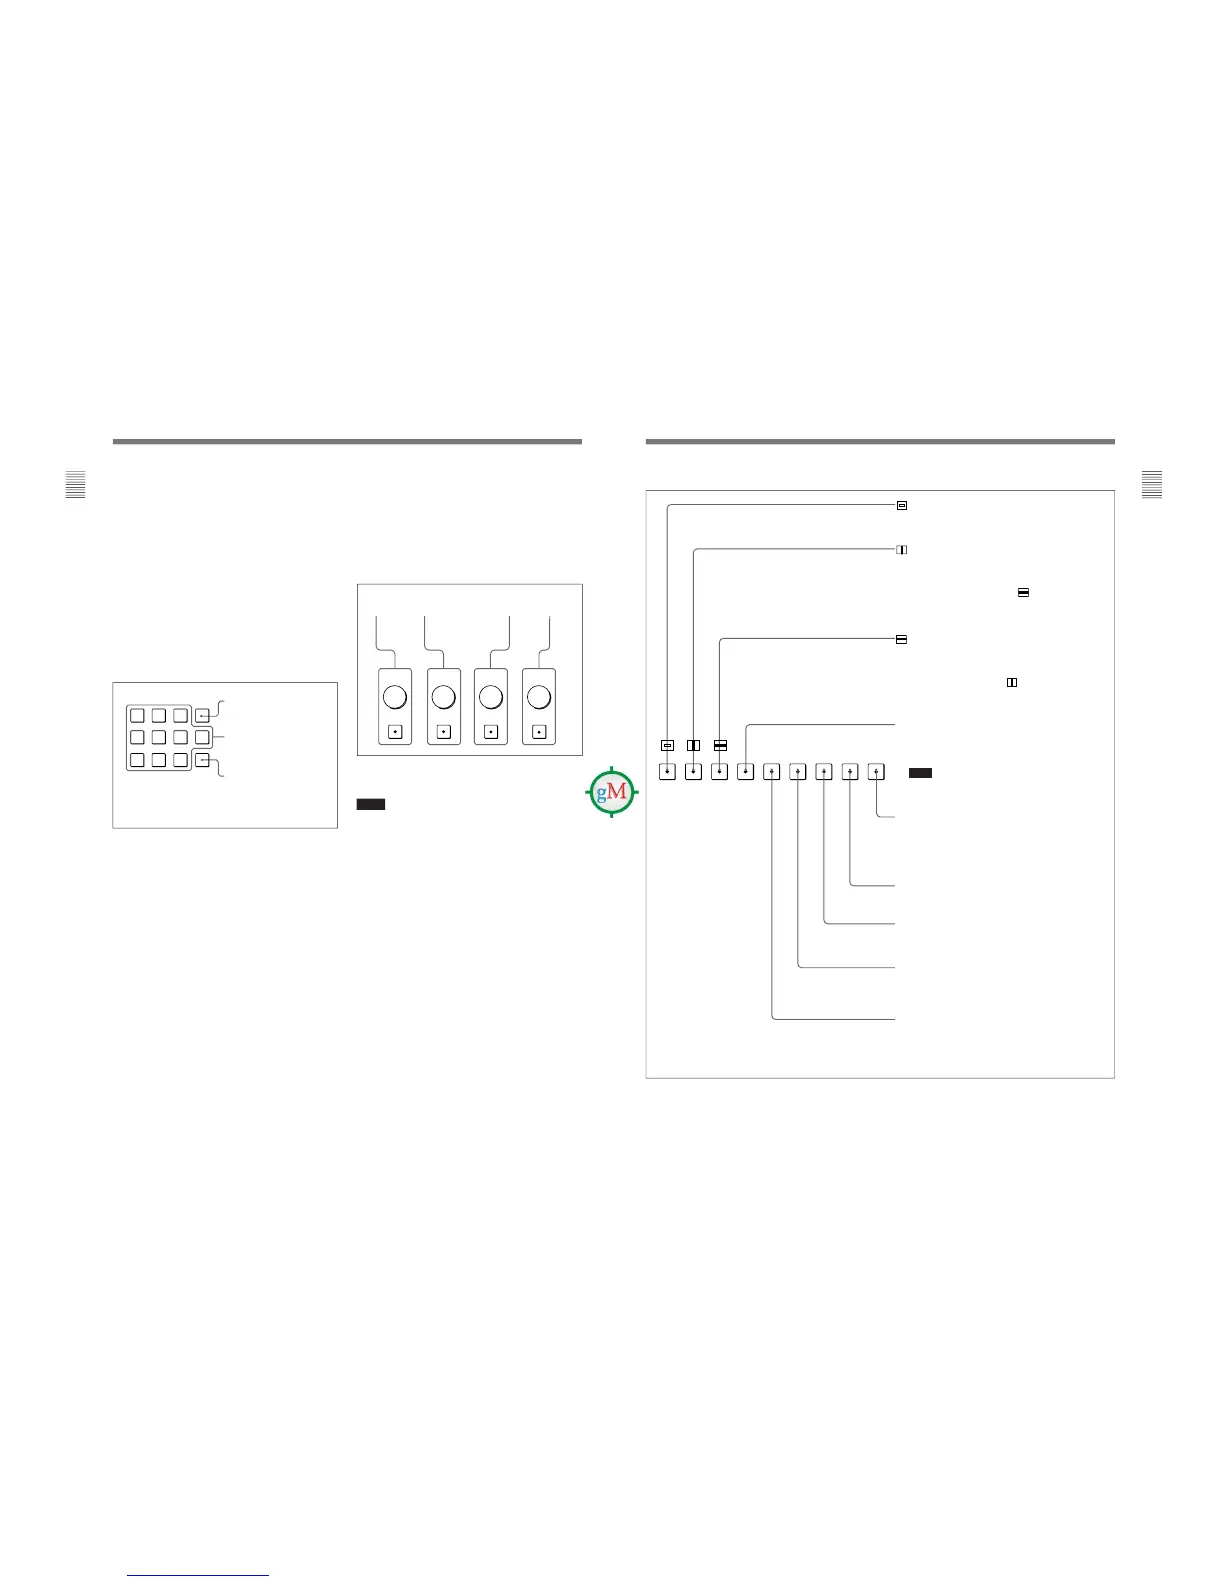
Location and Function of Parts
6 DEGAUSS button
Press to degauss the CRT (every time the monitor is
turned on, the CRT is degaussed automatically). To
degauss again, wait for more than five minutes.
7 DISPLAY UNIT connector (rear)
Connect to the CONTROL UNIT connector of the
monitor, using an optional RCC-5G/10G/30G cable or
the cable supplied with the BKM-32H or BKM-34H
Monitor Control Unit Attachment Kit.
The power is supplied from the monitor and the
control signal is sent and received via this connector.
8 Numeric keypad
Use to designate the channel number for the input
signal to be monitored, or to enter the setting values
with the menus.
Channel number entry method
When selecting a channel number from 1 to 9, press
one-digit channel number on the numeric keypad.
When selecting a channel number from 10 to 99, press
0 button, then press the two-digit channel number.
Numeric buttons
Ent button: Confirms the
values and characters entered
(ENTER button of the menu
operation buttons 4 has the
same function).
Del button: Deletes the values
and characters entered.
CONTRAST
button and
knob
BRIGHT
button
and knob
CHROMA
button
and knob
9 MANUAL adjustment buttons and knobs
Each press of one of these buttons turns the button’s
green LED on or off. When the corresponding button is
on (lit), it is possible to manually adjust the contrast,
brightness, chroma and phase by turning the
corresponding knobs. The PHASE knob is also used to
enter the setting values with the menus. It is possible to
set the preset value for each adjusting item with the
CONTROL PRESET ADJ menu.
For information about the CONTROL PRESET ADJ menu,
see “ [A] Preset Adjustment of the Picture Level Control
Knobs — CONTROL PRESET ADJ menu” on page 28.
Notes
•The signal phase cannot be adjusted when using the
composite SECAM, composite PAL D, component or
SDI (component or composite serial digital interface)
format.
•The phase and chroma cannot be adjusted when using
GBR signals.
17
Chapter 1 Overview
(Underscan) button: When this button is pushed in (ON),
the picture is underscanned by 3%, and four ends of the
raster is displayed on the screen.
(H delay) button: When this button is pushed in (ON), the
picture moves horizontally, and a horizontal sync signal
appears approximately
3
/
8
in the left edge of the screen.
• The brightness of the picture increases automatically, and it
makes it easy to check the sync part.
• If it is pressed together with the
button, a pulse cross
picture is displayed.
(V delay) button: When this button is pushed in (ON), the
picture moves vertically, and a vertical sync signal appears
approximately in the center of the screen.
• The brightness of the picture increases automatically, and it
makes it easy to check the sync part.
• If it is pressed together with
button, a pulse cross
picture is displayed.
MONO button: When this button is pushed in (ON), a
monochrome picture is displayed. When the buttons is off,
the monitor switches automatically between color and
monochrome mode, depending on the presence or absence
of color burst signal.
Note
The MONO button does not function with the GBR signal
input.
ADDRESS button: When this button is pushed in (ON), the
ADDRESS menu appears on the screen. By using the
ADDRESS menu, operation conditions for multiple monitors
are set.
For more information about the ADDRESS menu, see
“Selecting the Monitor to Control — ADDRESS Menu” on
page 60.
F2 button: When this button is pushed in (ON), you can access
directly the MANUAL menu of the level 2 of the COLOR TEMP
ADJ menu, if the short-cut function is assigned to this button.
F1 button: When this button is pushed in (ON), the characters
disappear from the monitor on the MANUAL menu of some
menus.
COMB button: Turn the comb filter on and off.
This function is available when an optional decoder adaptor such
as a BKM-24N is installed. (For NTSC, PAL and PAL-M only)
APT (aperture) button: When this button is pushed in (ON), the
frequency response can be modified. The degree of
modification is set with the menu.
For information about the aperture modification frequency for
each signal format, see “Aperture modification frequency for
each signal format” on page 19.
Function buttons in SHIFT OFF mode (LEDs of function buttons in green)