1-15
BVM-D32E1WA/D32E1WE/D32E1WU
22
Chapter 2 Menu
Basic Menu Operations
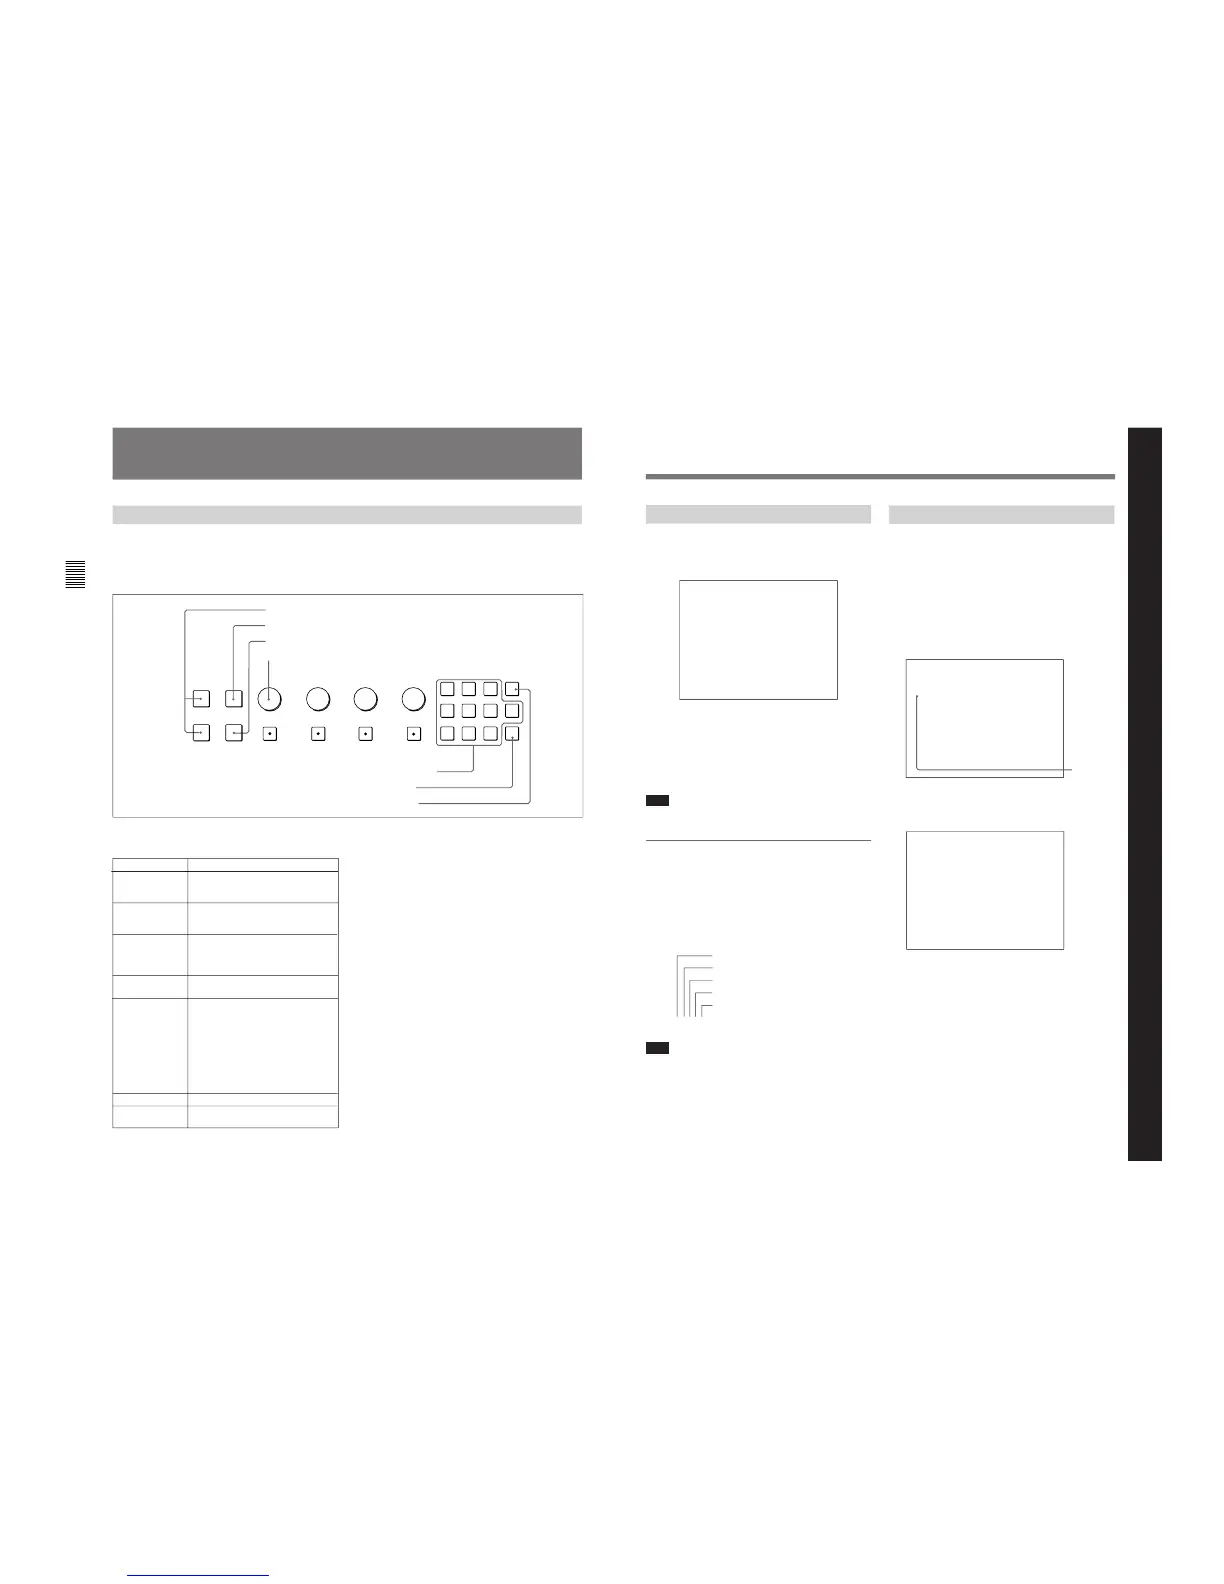
Menu Operation Buttons
Button Function
1UP button Moves the cursor upward. In setting
mode, increases the setting and
adjustment values.
1DOWN button Moves the cursor downward. In setting
mode, decreases the setting and
adjustment values.
The menus are operated using the menu operation
buttons on the BKM-10R Monitor Control Unit
(optional). The operations are the same for the BKM-
11R (optional).
The functions of the menu operation buttons are
described below.
INPUT
1
2
3
Del
4
5
6
0
7
8
9
Ent
PHASE
CHROMA
BRIGHT
CONTRAST
MANUAL MANUAL MANUAL MANUAL
UP MENU
DOWN
ENTER
6 Ent button
4 PHASE knob
2 MENU button
1 UP/DOWN buttons
3 ENTER button
5 Numeric keypad
7 Del button
2MENU button Displays the menus. Goes back to the
menu of the upper level (on the Main
Menu, goes back to the normal
picture).
3ENTER button/ Executes the items selected and
6Ent button settings.
4PHASE knob By turning this knob clockwise, the
cursor moves upward. In setting mode,
increases the setting and adjustment
values (has the same function as UP
button).
By turning this knob counterclockwise,
the cursor moves downward. In setting
mode, decreases the setting and
adjustment values (has the same
function as DOWN button).
5Numeric keypad Enters the numerical values.
7Del button Deletes the values and characters
entered.
23
Chapter 2 Menu
Displaying the Menus
Press the MENU button.
The menu list is displayed on the screen.
CONTROL PRESET ADJ...
MENU
COLOR TEMP ADJ...
SETUP...
MEMORY CARD...
C O P Y ...
STATUS...
FROM
KEY PROTECT OFF
p
Menu List
When you select one item on the main menu, the level
1 menu corresponding to the selected item on the main
menu appears.
For information about the items on the main menu, see
“Menu Structure” on page 27.
Note
Menu settings displayed in blue cannot be changed.
About menu numbers
For purposes of explanation in this manual, each menu
is preceded by menu numbers. The alphabet
determines the classification of Menus on the Menu
List (Main Menu), and the numbers determine the
level and the order. These menu numbers are not
shown on the screen.
e.g. A1354
Note
Only the menus which require explanation are
preceded by menu numbers. Thus, the menu number is
counted without menus which do not require
explanation.
Menu Operation
Follow the steps described below to display the menu
and perform the adjustment or setup you wish.
1
Press the MENU button 2.
The Menu List is displayed.
2
Using the UP/DOWN buttons 1 or PHASE knob
4, move the cursor to the desired item. (Example:
select the SET UP menu by pressing the DOWN
button.)
3
Press the ENTER button 3 or Ent button 6.
The Level 1 of the selected menu is displayed.
Cursor
Menu List
CONTROL PRESET ADJ...
MENU
COLOR TEMP ADJ...
SETUP...
MEMORY CARD...
COPY
STATUS...
KEY PROTECT OFF
p
...
FROM
INPUT CONFIGURATION...
SET UP
REMOTE...
PASSWORD...
SYSTEM CONFIGURA
RMITY
TION...
ON SCREEN SET...
ALIGNMENT...
WHITE UNIFO
p
...
EXTEND MENU
...
(continued)
Chapter 2 Menu
Indicates the CONTROL PRESET ADJ menu
Indicates the first menu in Level 1
Indicates the third menu in Level 2
Indicates the fifth menu in Level 3
Indicates the fourth menu in Level 4