6-53
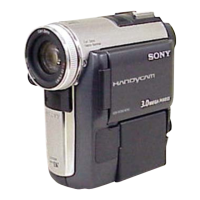
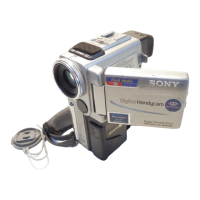
DCR-PC350/PC350E
3-3. SERVO AND RF SYSTEM ADJUSTMENT
Before perform the servo and RF system adjustments, check that
the specified value of “54 MHz/67.5 MHz Origin Oscillation
Adjustment” of “CAMERA SYSTEM ADJUSTMENT” is satisfied.
And check that the data of page: 0, address: 10 is “00”. If not, set
data: 00 to this address.
Note: The lens block (CD-537 board) must be connected when performing
the adjustments.
Adjusting Procedure:
1. CAP FG duty adjustment
2. Switching position adjustment
3. Error rate check
1. Cap FG Duty Adjustment (VC-370 Board)
Set the Cap FG signal duty cycle to 50% to establish an appropriate
capstan servo. If deviated, the uneven rotation of capstan and noise
can occur.
Measurement Point Display data of page: 3, address: 02, 03
Measuring Instrument Adjustment remote commander
Adjustment Page C
Adjustment Address 16
Specified Value Data of page: 3, address: 02 is “00”.
Data of page: 3, address: 03 is “00”.
Note1: The data of page: 0, address: 10 must be “00”.
Adjusting method:
Order Page
Address
Data Procedure
1 Close the cassette compartment
without inserting a cassette.
2 0 01 01 Set the data.
3 3 01 1B Set the data, and press PAUSE
button.
4 3 02 Check that the data changes in
the following order.
“1B” → “2B” → “00”
5 3 03 Check that the data is “00”.
(Note2)
6 0 01 00 Set the data.
Note2: If the data is “01”, adjustment has errors or the mechanism deck is
defective.
2. Switching Position Adjustment (VC-370 Board)
To obtain normal playback waveform output during the playback
mode, adjust the switching position.
Mode VTR playback (PLAY/EDIT)
Signal SW/OL reference tape (XH2-3)
Measurement Point Display data of page: 3, address: 02, 03
Measuring Instrument Adjustment remote commander
Adjustment Page C
Adjustment Address 10, 11, 12, 13
Specified Value Data of page: 3, address: 02 is “00”.
Data of page: 3, address: 03 is “00”.
Note1: The data of page: 0, address: 10 must be “00”.
Adjusting method:
Order Page
Address
Data Procedure
1 Insert the SW/OL reference tape
and enter the VTR STOP mode.
2 0 01 01 Set the data.
3 C 10 EE Set the data, and press PAUSE
button.
4 3 21 Check that the data is “02”.
(Note2)
5 3 01 0D Set the data, and press PAUSE
button.
6 3 02 Check that the data changes to
“00”.
7 3 03 Check that the data is “00”.
(Note3)
8 0 01 00 Set the data.
Note2: If the data of page: 3, address: 21 is “72”, the tape top being played.
After playing the tape for 1 to 2 seconds, stop it, perform step 5
and higher.
If the data of page: 3, address: 21 is “62”, the tape end being played.
After rewinding the tape, perform step 5 and higher.
Note3: If bit 0 of the data is “1”, the EVEN channel is defective. If bit 1 is
“1”, the ODD channel is defective. Contents of the defect is written
into page: C, addresses: 10 and 12. See the following table. (For
the bit values, refer to “6-4. SERVICE MODE”, “4-3. 4. Bit value
discrimination”. ) If bit 3 of the data is “1”, the tape end being
played, so rewind the tape and perform the adjustment again.
When the EVEN channel is defective
When the ODD channel is defective
Data of page: C,
address: 12
EE
E8
E7
Contents of defect
Writing into EEPROM (IC2602) is defective
Adjustment data is out of range
No data is returned from IC2301
Data of page: C,
address: 10
EE
E8
E7
Contents of defect
Writing into EEPROM (IC2602) is defective
Adjustment data is out of range
No data is returned from IC2301