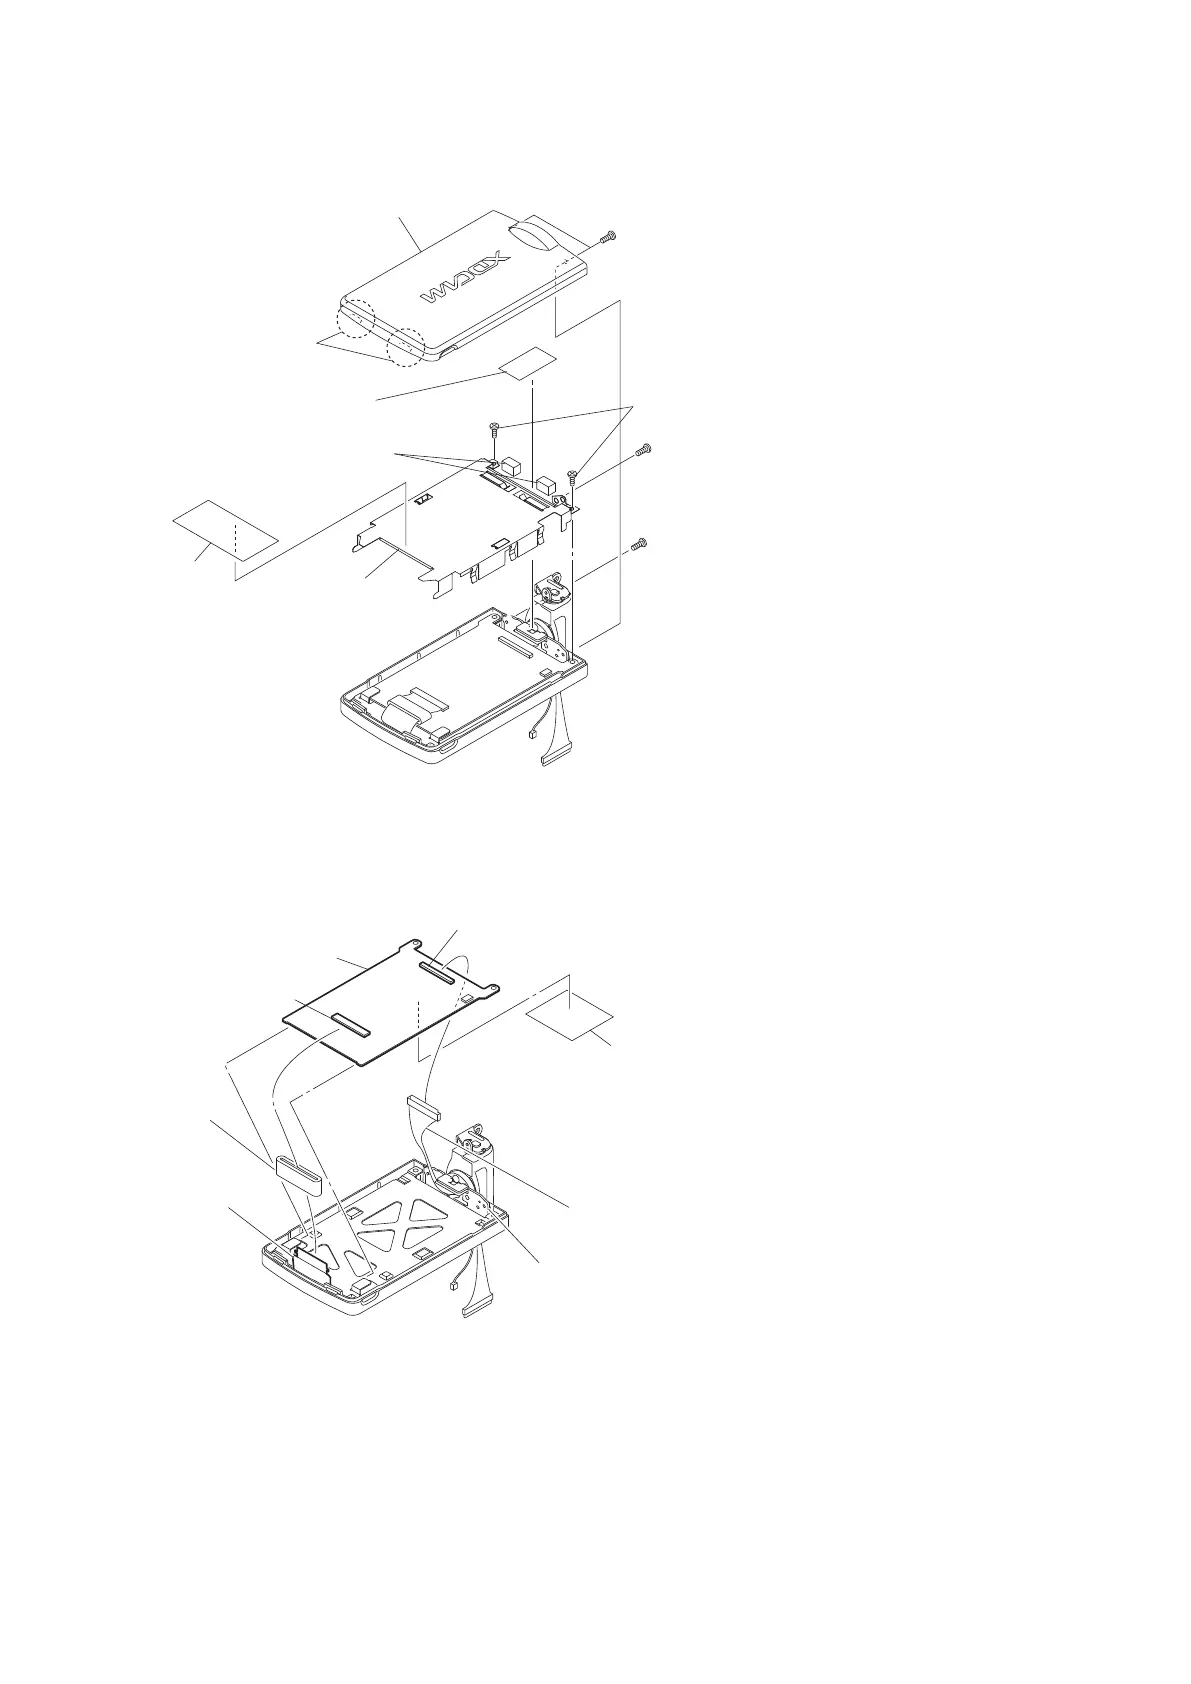
5. Remove the two tapping screws (2 x 5) to detach the LCD shield plate.
Claws
LDC cabinet
LCD shield plate
LCD conductive tape
Tape 50
Precision screws (M2 x 5)
Precision
screw (M2 x 4)
Tapping screws
(2 x 5)
Main gaskets (H)
Precision
screw (M2 x 4)
6. Disconnect the harness from the connector CN100 on the IF-1188 board.
7. Disconnect the flexible board from the connector CN300 on the IF-1188 board, and remove the ferrite core.
8. Remove the IF-1188 board and hinge.
9. Peel off the tape 25.
Flexible board
Ferrite core
Harness
Hinge
IF-1188 board
CN100
Tape25
CN300
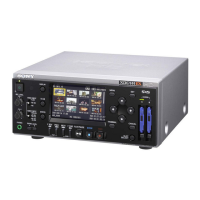
10. Remove the panel retainer and panel ground plate, and then remove the LCD panel.
11. Peel off the UL tape W8L25.
PMW-200/PMW-EX280
2-31