5 Using the unit
46 SOREDEX
206718 rev 9
3. Guide the patient to the unit and instruct to stand as
straight and tall as possible. Ask the patient to take grip
on the handles and set the mouth against lip holder.
4. Check the position of the midsagittal light. If it is not on
the midsagittal plane of the patient, adjust the patient’s
head.
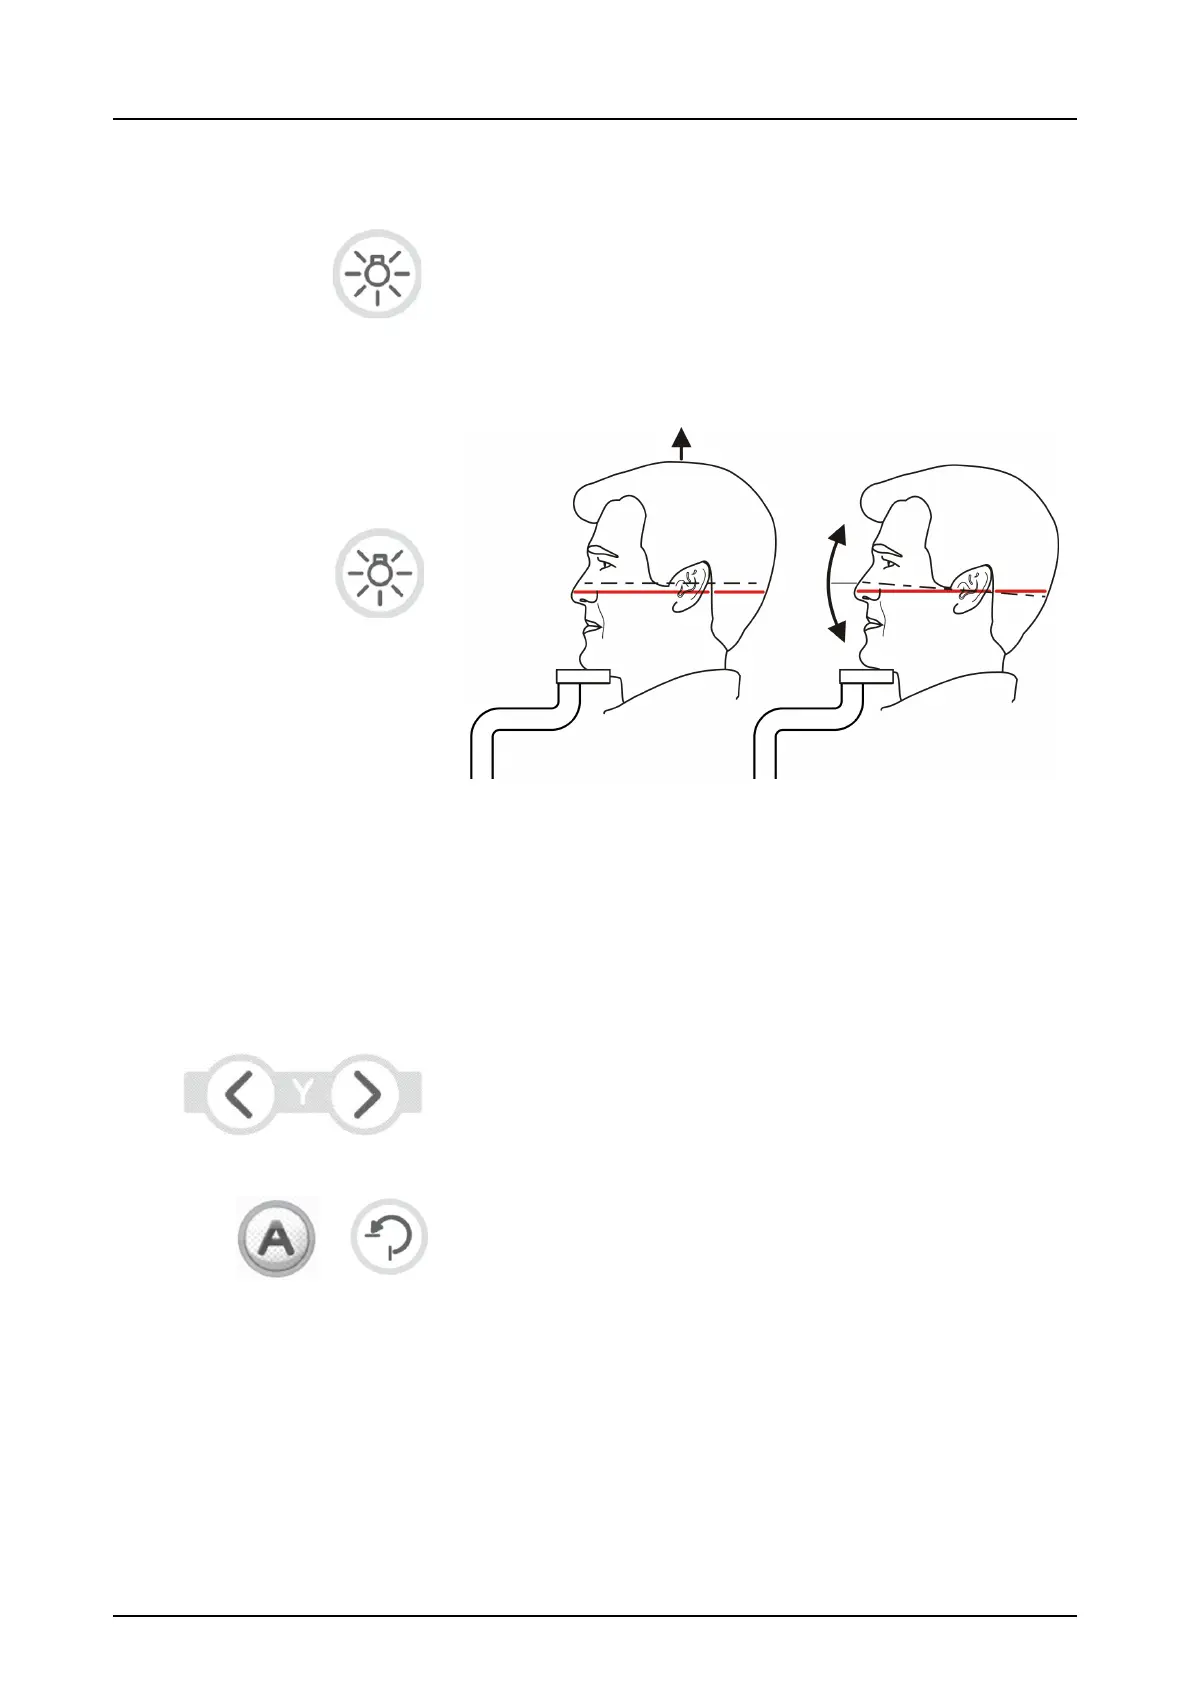
5. Adjust the height of the Frankfort-Horizontal (FH) light to
get the light over the orbita porion. Straighten the pa-
tient's head if needed.
6. Close the temple supports by sliding the temple support
knob to the right. Adjust the position of the nasion sup-
port and push the forehead support in until it touches the
patient’s nasion.
7. Adjust the position of the image layer as necessary. The
focal trough light should be positioned in the middle of
the 3rd tooth or if wanted slightly posterior.
NOTICE! If the focal trough light is not positioned as de-
scribed above, press the focal trough adjustment key(s)
to move the focal trough light until it is positioned correct-
ly.
8. If AES is enabled (green light lit around "A"), press the
Return button and wait for the movement to finish. Verify
that the suggested exposure values are suitable for the
patient. If AES is disabled, set the exposure values man-
ually and press Return after patient positioning is done
and temple supports are closed.