EZ Setup & Main Interface
DVR User Manual
10
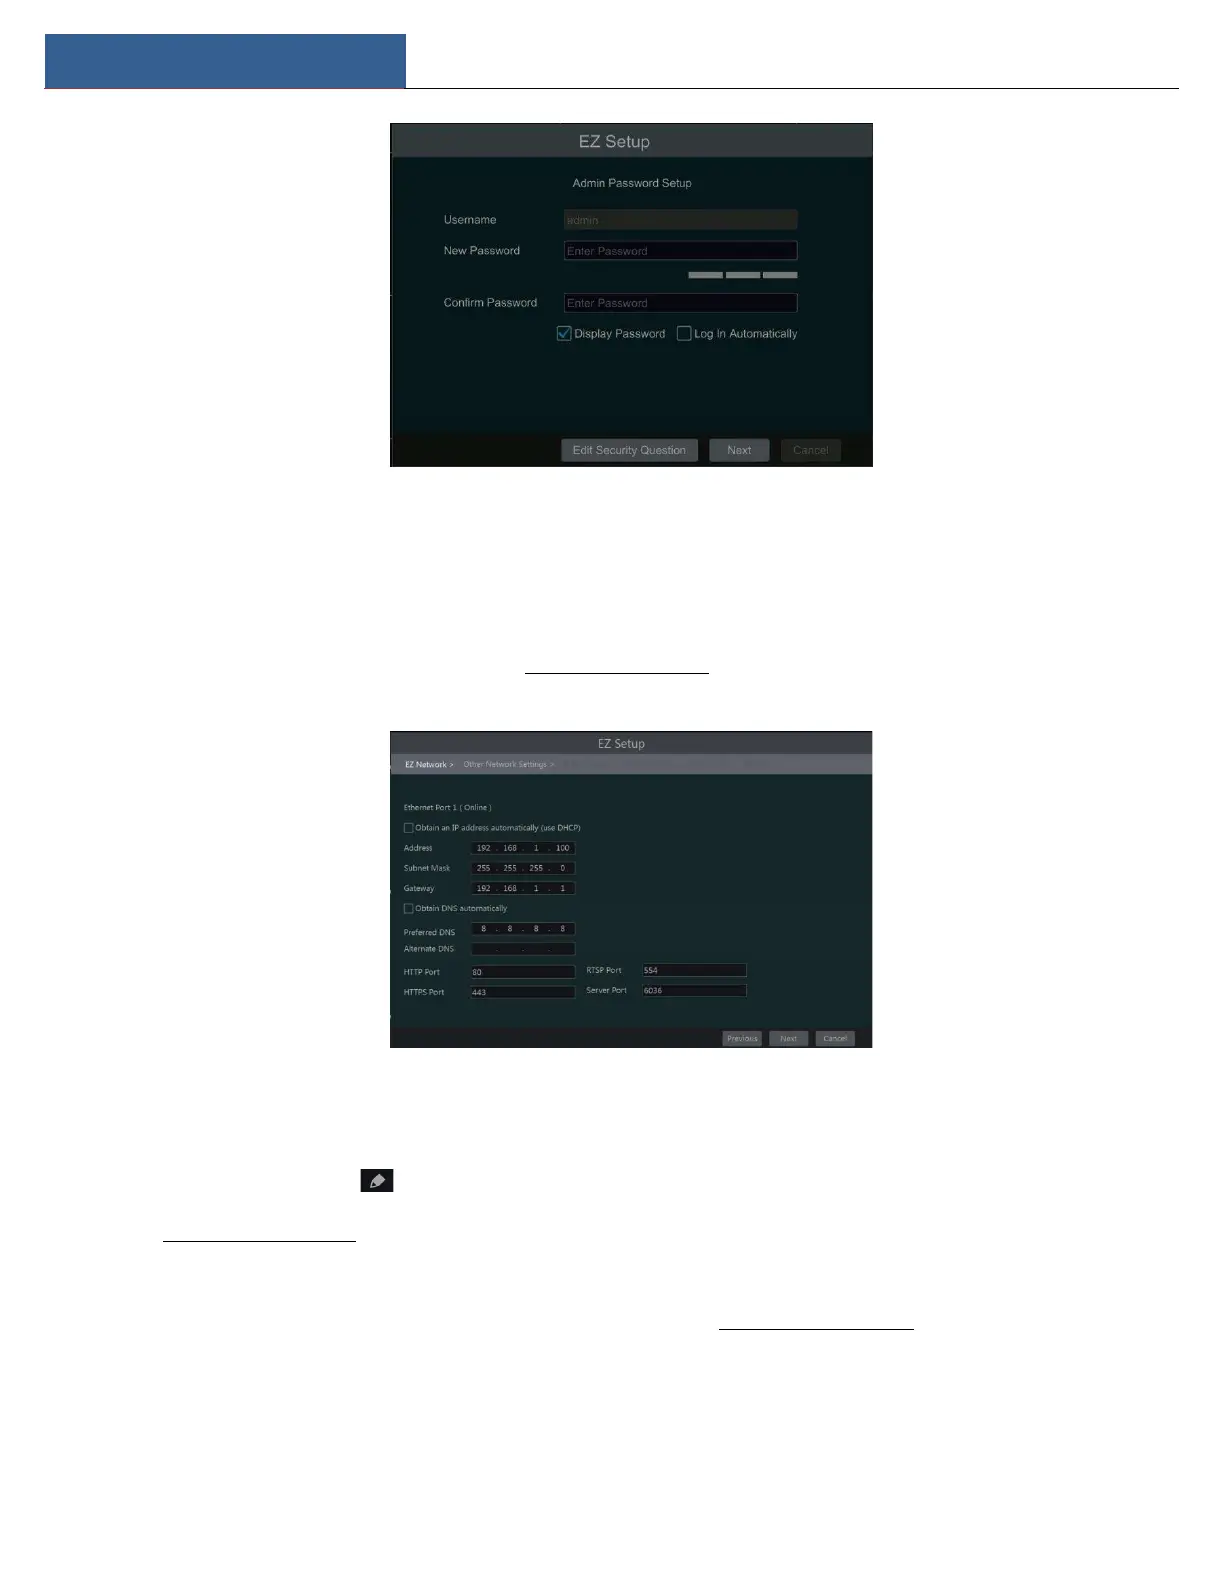
Click “Next” to continue or click “Cancel” to exit the wizard.
② Network Settings. Select the network configuration as required. Check “Obtain an IP address automatically” and “Obtain DNS automatically”
to get the IP address and DNS automatically (the DHCP function of the router in the same LAN should also be enabled), or manually enter them.
Enter the HTTP port, RTSP port and Server port (please see 12.1.2 Port Configuration for details). Click “Next” to continue.
③ Other Network Settings.
UPnP settings: Check “Enable” in the interface and enter the external port and then click “Test”. If the UPnP status is “Invalid UPnP”, the port
number may be wrong. Click to modify the port until the UPnP status turns to “Valid UPnP”. Refer to the following picture. You can
view the external IP address of the DVR. Enter the external IP address plus port in the address bar of your browser to access the DVR. (Please
see 11.1.6 UPnP Configuration for details).
DDNS Settings: Check “Enable” and then select the DDNS type. Enter the server address, domain name, username, and password according to
the selected DDNS type and then click “Register” or “Test” to test the effectiveness of the domain name. If it is effective, you can enter the
domain name in the address bar of your browser to access the DVR. (Please see 11.1.4 DDNS Configuration for details).
Note: Make sure the router supports UPnP function and the UPnP is enabled in the router. Set the DVR’s IP address, subnet mask and gateway and
so on corresponding to the router.