STARLITE Mk5 User Manual Version 1.2
33
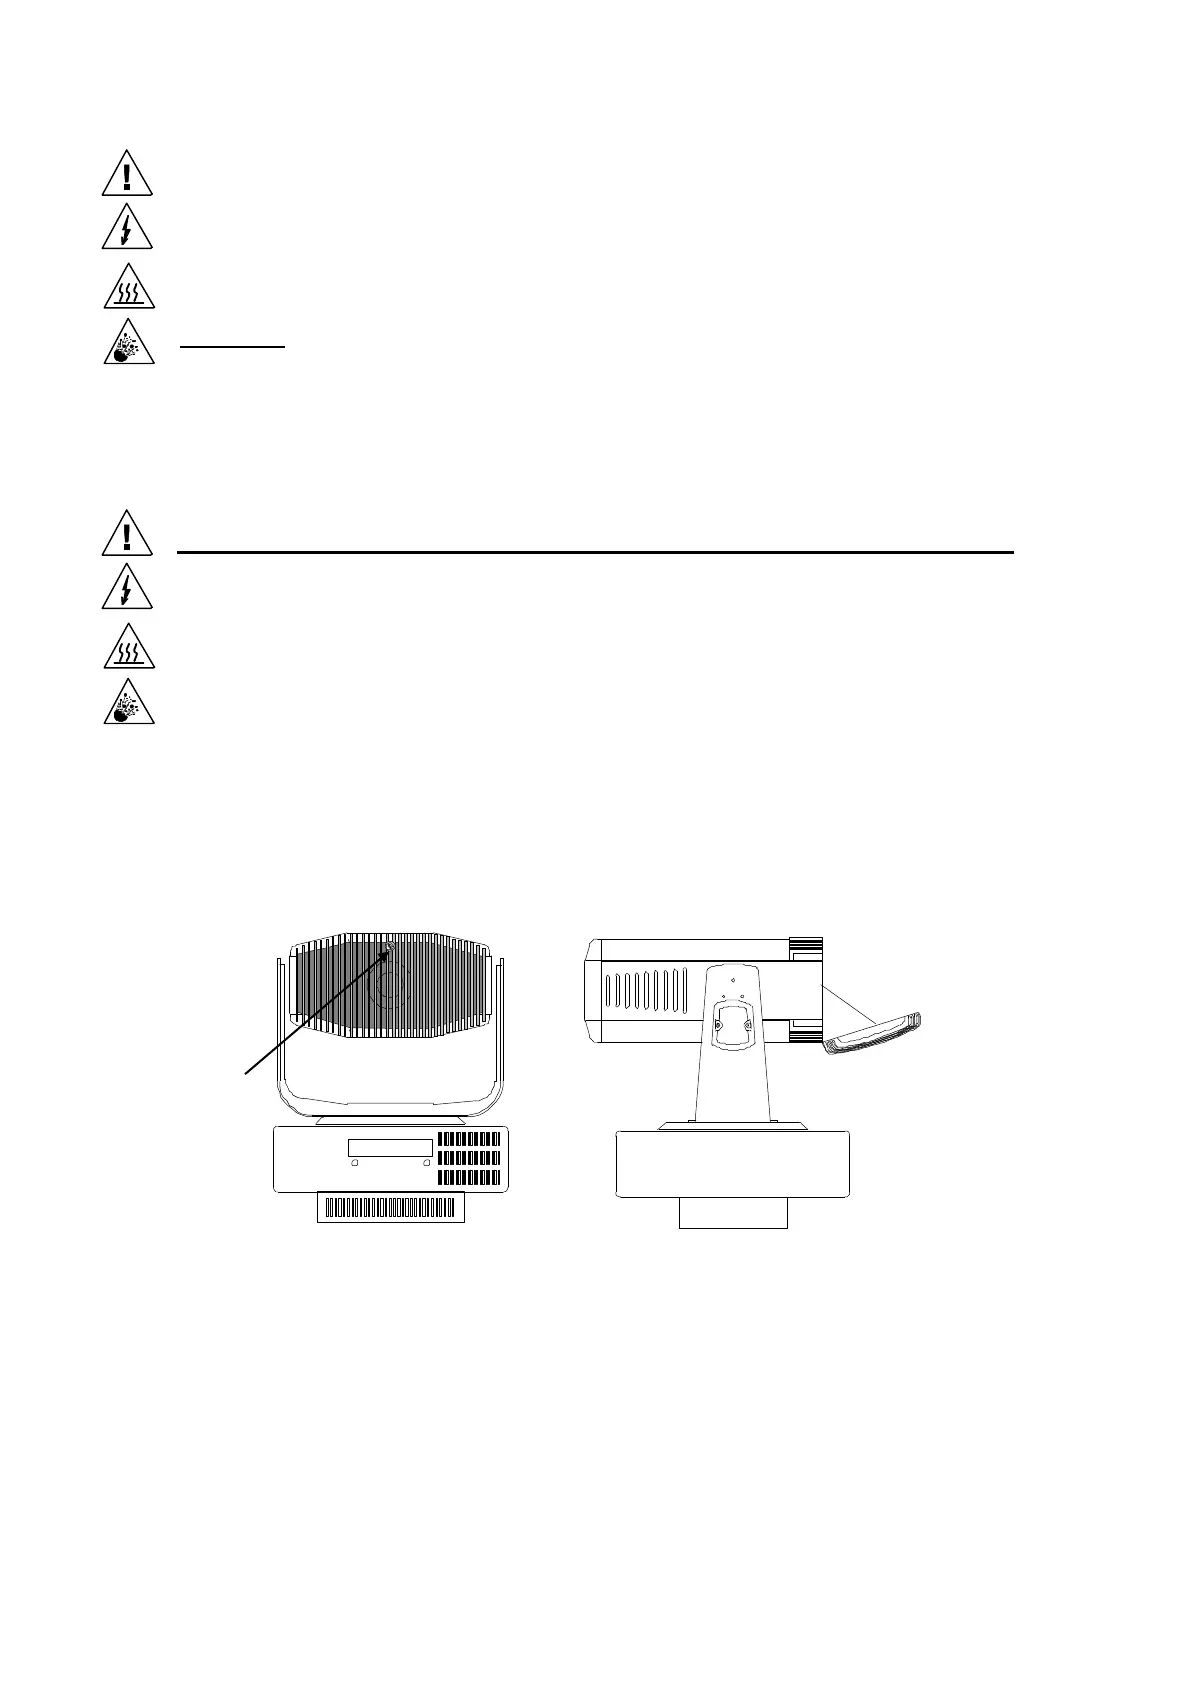
Lamp Housing
The finned lamp housing at the rear of the unit head contains the HMI lamp (575 W or 1200W) and
the safety interlock system, which ensures safe operation of the metal halide arc lightsource.
The fins on the lamp housing are designed radiate away part of the excess heat generated by the lamp,
thereby reducing the amount of forced air cooling required. This design allows the use of high wattage
lamps without excessively noisy cooling fans.
Please Note: The fins on the lamp housing get extremely hot during normal operation of the
unit. Please allow sufficient cooling time before commencing any work on the unit.
The lamp housing has a safety interlock system that will automatically extinguish the lamp if the rear
access door is inadvertently opened during normal operation. This safety interlock is there to protect
against the high voltages, high temperatures and high levels of Ultra-Violet radiation present when
the HMI lamp is operating and should not be tampered with or altered in any way.
To Install or replace the lamp
You will require the following:
♦ Flat bladed screwdriver (8mm wide tip)
♦ Osram (or equivalent) HMI 575 or 1200W Lamp depending on unit type. (See base label)
♦ Face / Eye protection
♦ Gloves
1) Switch off the unit and disconnect the power cord from the mains supply.
2) Stand the unit on a suitable surface and ensure that it has been allowed to cool down.
3) Manually tilt the unit head so that the finned lamp box retaining screw is to the top and the rear
door hinges to the bottom.
4) Using the correct screwdriver, undo the retaining screw and gently lower the lamp box door until
it is resting on the safety stay.
5) Wearing suitable hand and eye protection, lightly grip one of the metal ends of the lamp envelope
and completely unscrew the knurled nut.
6) Loosely replace the nut.
7) Repeat step 5 above for the other end of the lamp.
8) Hold onto the metal frame of the lamp / lens module and ease the module away from its mounting
/ locating studs by gently pulling backwards. When free, rest the module on the back door.
Door
Retaining