Return To Table of Contents
48 2030-809-002 REV D www.stryker.com
OPTIONAL BATTERY REMOVAL AND REPLACEMENT
Tools Required:
• Tor x T27
• 7/16” Wrench
• 1/2” Socket Wrench
• Bungee Cords
• Phillips Screwdriver
• 5/32” Allen Wrench
Procedure:
1. Raise the litter to full up. Unplug the power cord from
the wall socket and push the battery power on/off switch
tothe “OFF” position.
2. Using a Phillips screwdriver, remove the four screws
holding the base hood to the base frame.
3. Lift the base hood and support it from the litter frame
using bungee cords or the equivalent.
4. Properly ground yourself (see Static Discharge
Precautions).
5. Open the cable clamp at the head end, left side of the
base frame and remove the cables from the clamp.
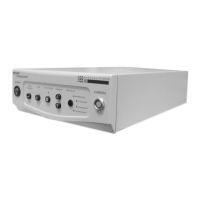
6. Using a Torx T27, remove the four screws (A) holding the
electronics box cover and remove the cover.
7. Disconnect the two battery cables (B).
WARNING
The battery tray assembly weighs 50 pounds. Use caution
when removing the two hex head screws securing it to the base
frame or personal injury could result. Battery posts, terminals
and related accessories contain lead and lead compounds,
chemicals known to the State of California to cause cancer
and birth defects or other reproductive harm. Wash hands after
handling. Properly dispose of the old battery in accordance
with local regulations.
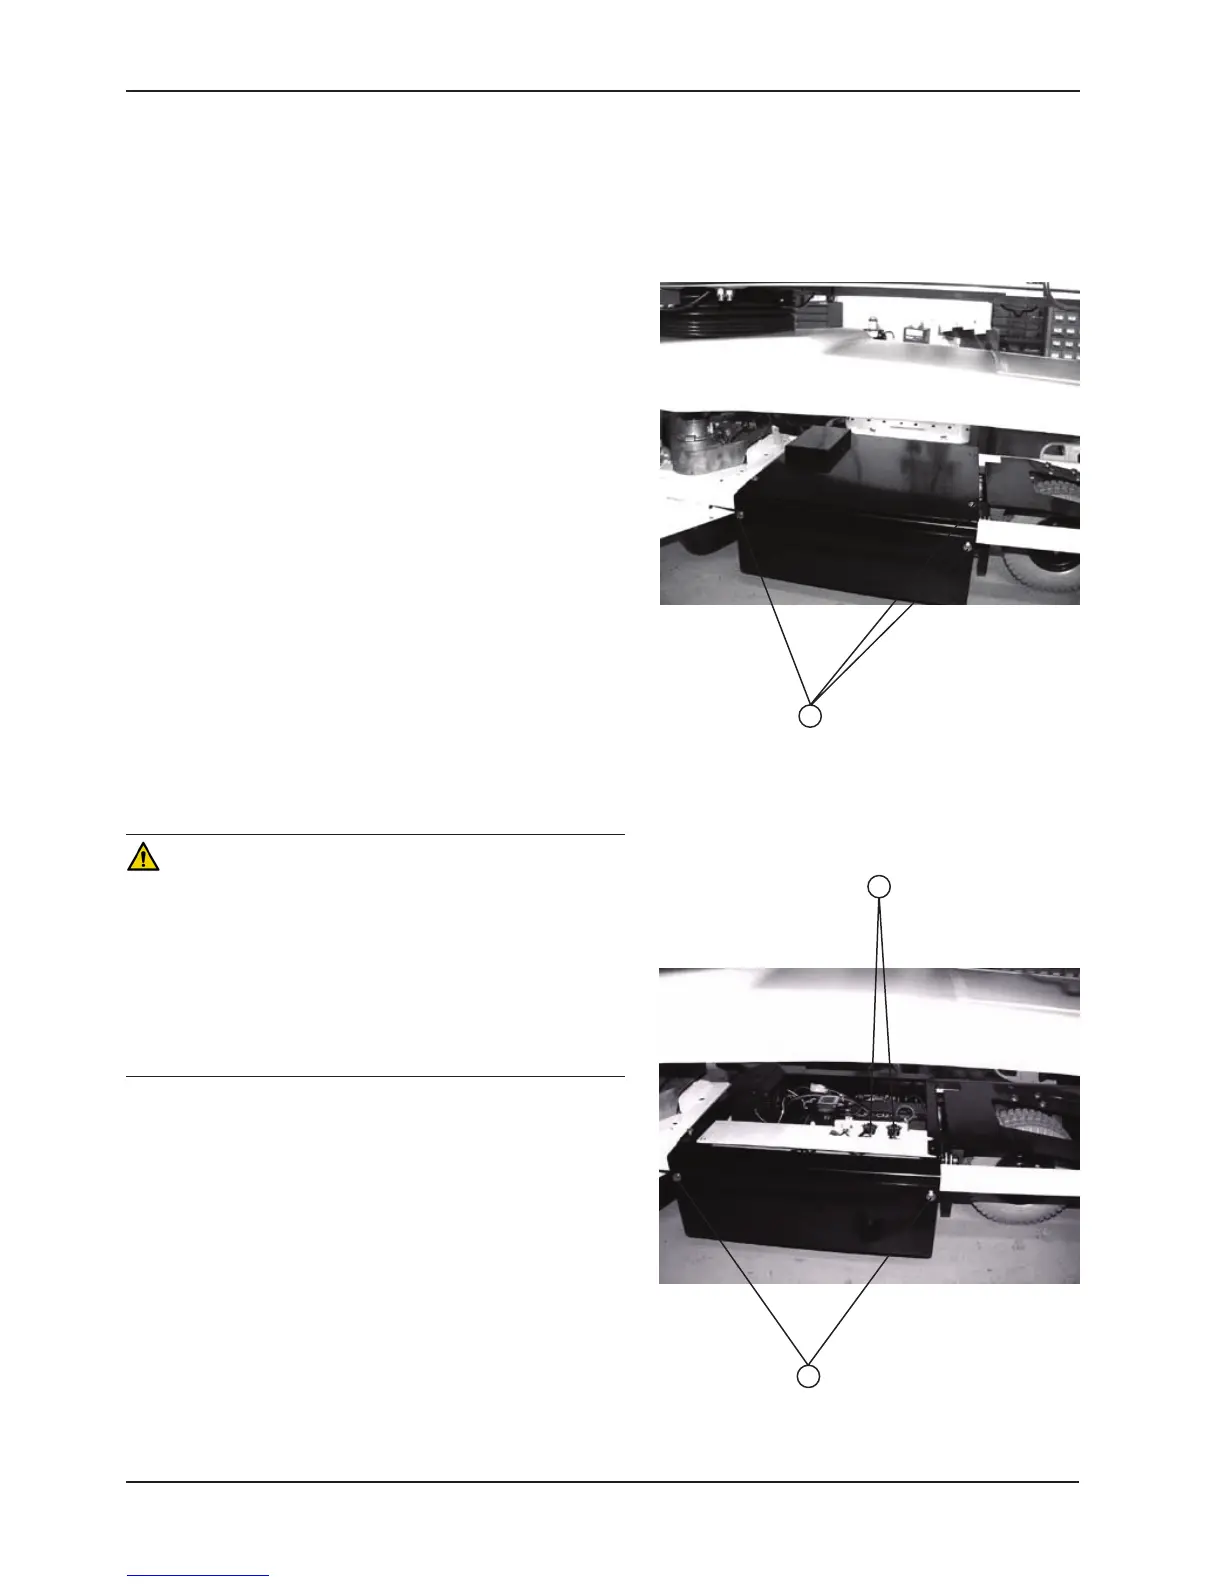
8. Support the battery tray assembly from the bottom. Using
a 7/16” hex socket or wrench, remove the two screws (C)
supporting the battery tray.
9. The back of the battery tray assembly has a lip which
catches on the electronics box. Lift up and out to remove
the battery tray assembly.
10. Using a Phillips screwdriver, remove the two screws
holding the battery terminal to the battery tray assembly.
11. Using a 5/32” Allen wrench and a 7/16” wrench, remove
the four screws and nuts holding the battery harness to
the battery terminals.
12. Reverse steps 1 - 11 to install the new batteries. Complete
the last four items of the setup procedures section.
A
B
C
Service Information