Return To Table of Contents
www.stryker.com 2030-809-002 REV D 41
LIFT MOTOR AND CAPACITOR REMOVAL AND REPLACEMENT
Tools Required:
• 3/8” Socket Wrench (with 6” extension)
• 5/16” Socket Wrench
• Floor Jack
• Side Cutters
• 7/16” Open End Wrench
• 2 x 4 (or equivalent)
Procedure:
Note
If you need more space to work under the base frame, place a 2 x 4 across the base frame rails and use a floor jack
to raise the base frame off the floor.
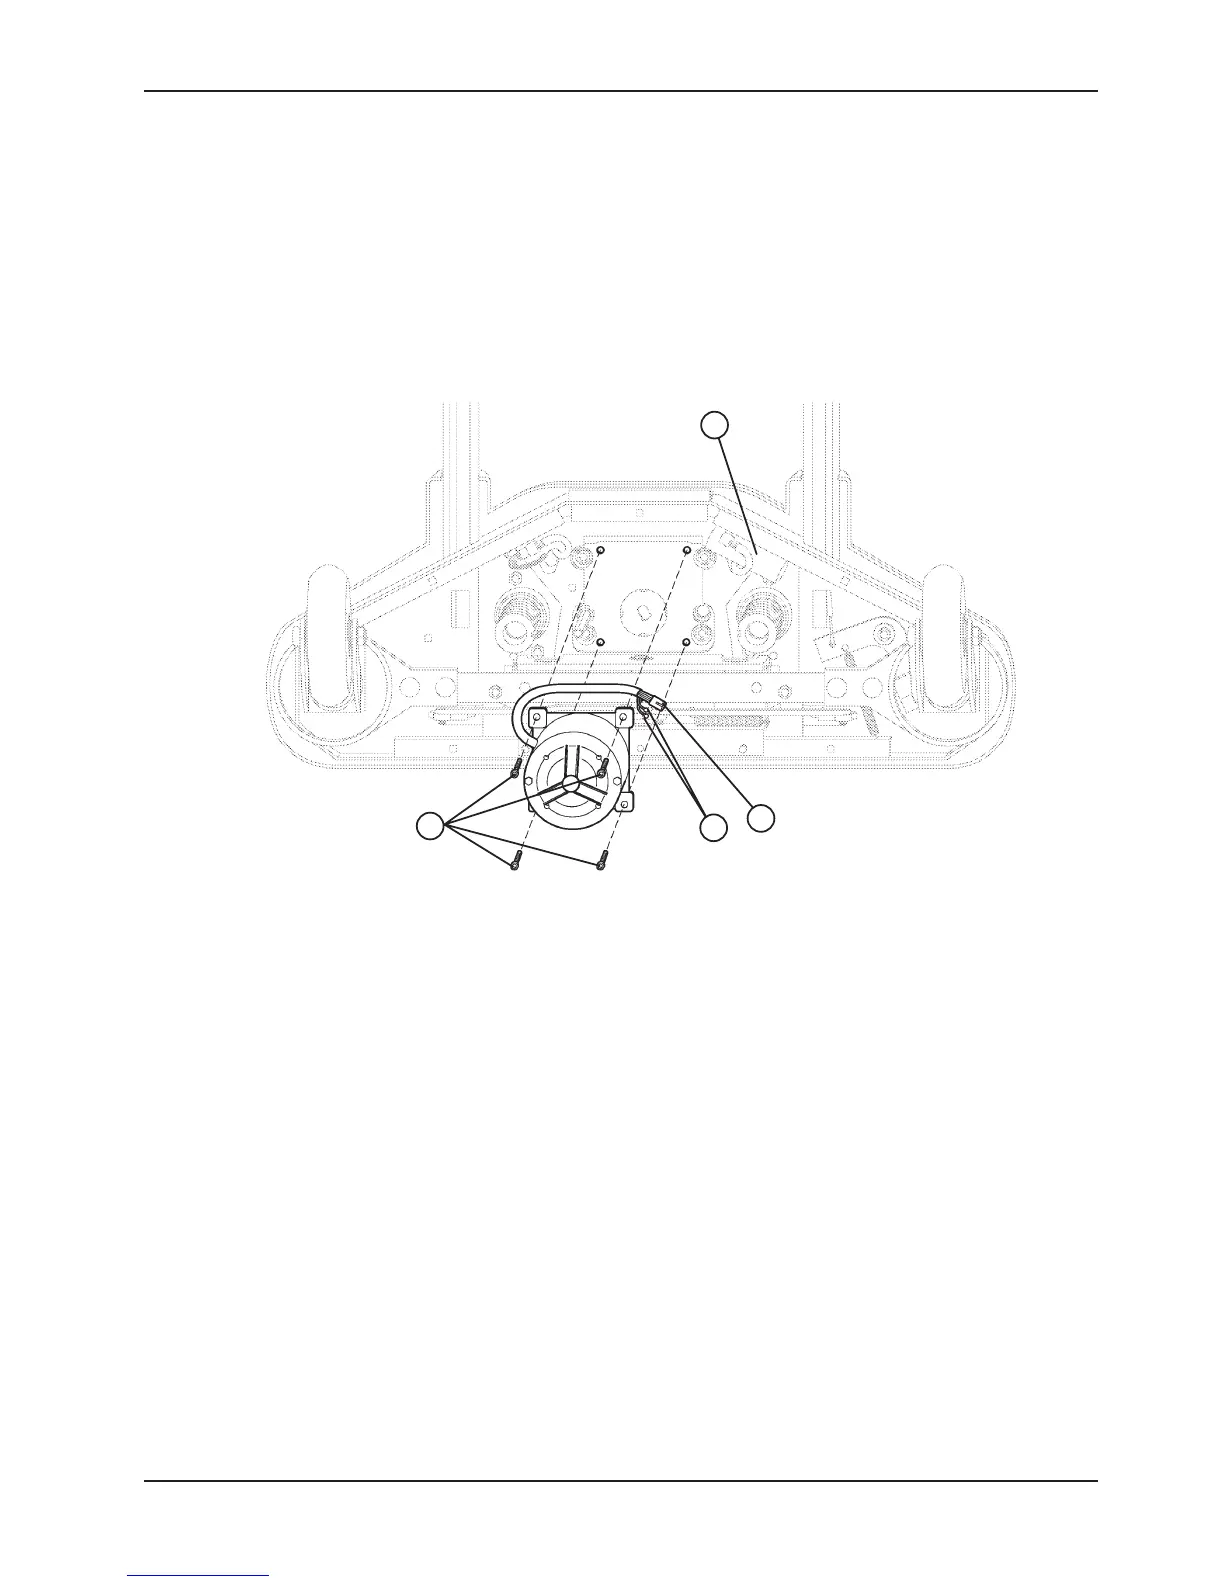
1. Unplug the bed power cord from the wall socket. Using a 5/16” socket wrench, remove the five bolts holding the
lower lift cover to the base and remove the cover.
2. Disconnect the two connectors (A) at the motor capacitor.
3. Disconnect the white connector (B) from the power cord.
4. Using side cutters, cut the cable ties holding the capacitor (C) to the base and remove the capacitor.
5. Using a 3/8” socket wrench, remove the four screws (D) holding the motor assembly in the lift housing and remove
the motor assembly.
6. Reverse the above steps to install the new motor.
Note
The drive shaft on the new motor probably will have to be turned to be aligned with the coupler. Use a 7/16” open end
wrench to turn the drive shaft of the motor.
The procedure for lift motor and capacitor removal and replacement is the same for both ends of the bed.
A
B
D
FOOT END
C
Service Information