Return To Table of Contents
www.stryker.com 2030-809-002 REV D 43
LIFT POTENTIOMETER REPLACEMENT AND ADJUSTMENT
Tools Required:
• #2 Phillips Screwdriver
• Bungee Cord (or equivalent)
• 5/16” Socket Wrench
• 3/8” Open End Wrench
• Side Cutters
Procedure:
1. Raise the litter to the full up position.
2. Unplug the bed power cord from the wall socket.
3. Using a 5/16” socket wrench, remove the five bolts holding the lower lift cover to the base and remove the cover.
4. Using a #2 Phillips screwdriver, remove the three screws holding the upper lift cover to the base. If you want, hold
the covers out of the way by using bungee cords (or the equivalent) to secure them to the litter top.
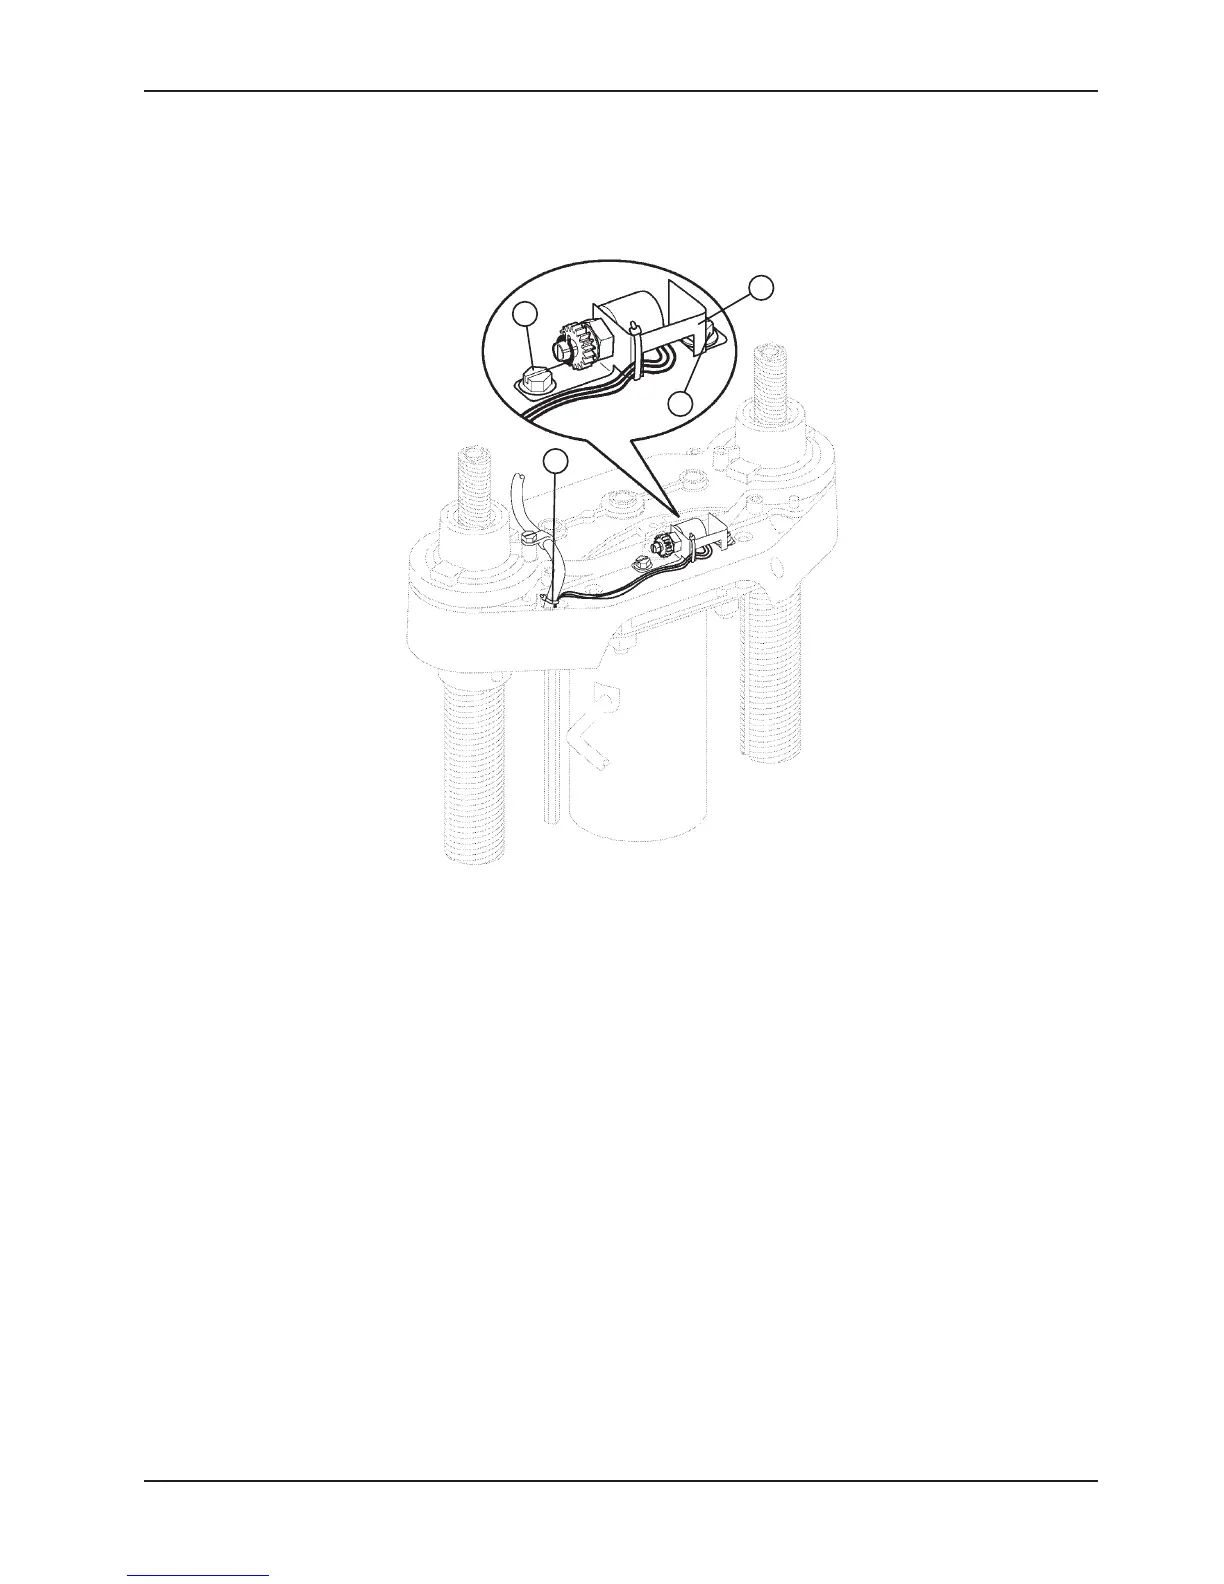
5. Using side cutters, cut the cable tie (A) holding the potentiometer cable to the coil cord.
6. Unplug the potentiometer cable from the sensor coil cord. If replacing a pot at the head end of the bed, unplug the
cables attached to the brake sensor switch.
7. Pull the potentiometer cable up through the base.
8. Using a 3/8” open end wrench, remove the two bolts (B) holding the pot housing (C) to the lift housing.
9. Lift up and out on the potentiometer housing assembly to remove it from the lift housing.
10. Before installing the new potentiometer on the bed, turn it clockwise until it stops. Turn it back counterclockwise
two full (360) revolutions. This allows a ”window” position for proper upper and lower limits.
11. Reverse steps 4 - 8 to install the new pot and pot housing assembly.
12. After installing the new potentiometer, the “burn-in” procedure must be followed.
Note
Be sure to maintain the potentiometer position while installing.
B
C
A
B
Service Information