EasyManua.ls Logo

Sungrow SH3K6 - Page 54

Sungrow SH3K6
118 pages
Print Icon
To Next Page IconTo Next Page
To Previous Page IconTo Previous Page
Loading...
6 Electrical Connection User Manual
46
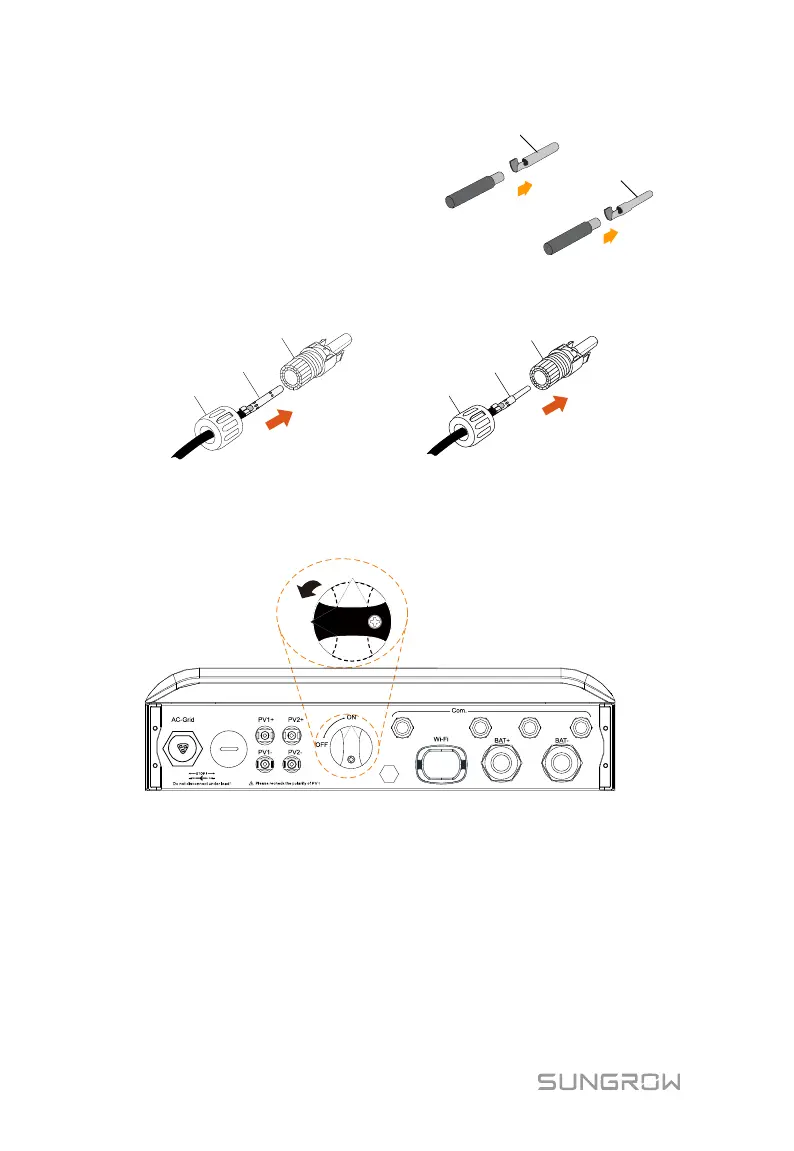
2. Assemble the cable ends by
crimping pliers.
Positive Crimp Contact
Negative Crimp Contact
3. Lead the cable through the cable gland to insert into the insulator until it
snaps into place. Then tighten the cable gland (torque 2.5 Nm3 Nm).
Crimp Contact
Positive Insulator
Cable Gland
Crimp Contact
Negative Insulator
Cable Gland
Installing the PV Connector
1. Rotate the DC switch at the bottom to the OFF position.
ON
OFF
Backup Ctrl
2. Check the cable connection of the PV strings for the correct polarity and
that the open circuit voltage does not exceed the inverter input limit of
600 V, even under the lowest operating temperature. Refer to the module
specification supplied by the module manufacturer for detailed
information.

Table of Contents