■ Wear an appropriately grounded wrist strap, ESD-compliant gloves, or
ESD-compliant clothing.
■ Place the components on which you are working on a properly grounded,
ESD-compliant surface.
■ Leave replacement components in the ESD-compliant shipping material until
you are ready to use them.
The effects of electrostatic damage are invisible and, often, do not appear
immediately. Nonetheless, electrostatic damage can affect the performance and
shorten the life of sensitive components.
See “Removing and replacing appliance hardware components” on page 100.
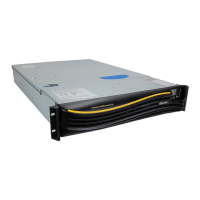
Removing and replacing the bezel
This section describes how to remove and replace the bezel on the front of the
media server.
To remove the bezel
1
Depress and push in the left side (the side nearest the Symantec logo) of the
bezel to dislodge the tabs that hold it in place.
2
Swing the dislodged side forward slightly and pull bezel out of the chassis.
To replace the bezel
1
Locate the notches in the inside edge of the bar that contains front panel LEDs
and buttons.
2
Align the tabs on the right side of the bezel (side farthest from the Symantec
logo) with the notches and insert.
3
Align the tabs on the left side of the bezel (side nearest the Symantec logo)
with the notches in the bar.
4
Press the bezel down until the tabs snap into place. You may need to flex the
bezel slightly.
See “Removing and replacing appliance hardware components” on page 100.
Removing and replacing NetBackup 5230 disk drives
The NetBackup 5230 appliance contains two system disk drives and eight storage
drives. The system drives are located in slots 0 and 1 and are mirrored to provide
redundancy. If one system drive fails, it can be replaced while the other provides
101Removing and replacing appliance hardware components
Removing and replacing the bezel