Removing and replacing NetBackup 5220 Appliance
storage drives
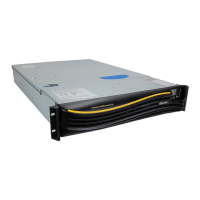
The NetBackup 5220 Appliance has eight disk drives that are used for storage. The
drives are located in slots behind the bezel in the front panel. The slots are identified
in numerical order Slot 0 through Slot 7 starting with Slot 0 in the left corner of the
appliance. Slot 7 is the designated hot spare. These drives are hot-swappable.
Proper air flow must be maintained within the chassis at all times. Drive slots must
be covered when the appliance is in operation. If you have a faulty disk drive, leave
it in the slot until you have a replacement.
Requirements
■ Replacement disk drive from Symantec. The drive must be compatible with the
other storage drives in the appliance.
■ Take ESD precautions.
To remove a storage disk drive:
1
Wear a grounded wrist strap or take other ESD precautions.
2
Locate the failed disk drive in the appliance. The drive status LED on the right
at the top of the drive is amber.
3
Press the green button at the top drive to release the black lever.
4
Pull down the black lever completely. This releases the drive from the slot.
5
Pull the drive forward slightly to ensure that it is disengaged, but do not remove
it from the slot.
6
Wait one or two minutes for the disk to spin down (stop spinning). You can
hear when it has stopped.
7
Completely remove the disk drive from the slot.
To install a storage disk drive:
1
Remove the replacement disk drive from Symantec from the ESD-protective
package.
2
Press the green button on the replacement disk drive to release the black lever.
in the fully open position and insert the disk drive into the slot.
3
Pull the lever down completely.
4
Orient the disk drive so that the green button is at the top of the appliance.
5
Insert the disk drive into the slot and carefully push the disk drive all of the way
into the slot. The disk drive clicks when it is in place.
107Removing and replacing appliance hardware components
Removing and replacing NetBackup 5220 Appliance storage drives