automatically collects data when a fault is detected and sends it to Symantec for
evaluation. LEDs located on the front panel of the storage system and on the
individual components also indicate fault conditions.
For instruction on replacing components in the Symantec Storage Shelf, see the
following:
See “Removing and replacing disk drives” on page 110.
See “Removing and replacing a storage shelf power supply” on page 111.
See “Removing and replacing an I/O module” on page 112.
Removing and replacing disk drives
This instruction describes how to replace a faulty disk drive in the Symantec Storage
Shelf.
To replace a faulty disk drive
1
Put on a grounded antistatic wrist strap or take other ESD precautions.
Warning: To ensure that the unit does not overheat, the drive slot should not
be empty for more than 3 minutes.
2
Remove the Symantec replacement drive from the box but leave it in the
antistatic bag until you are ready to use it.
3
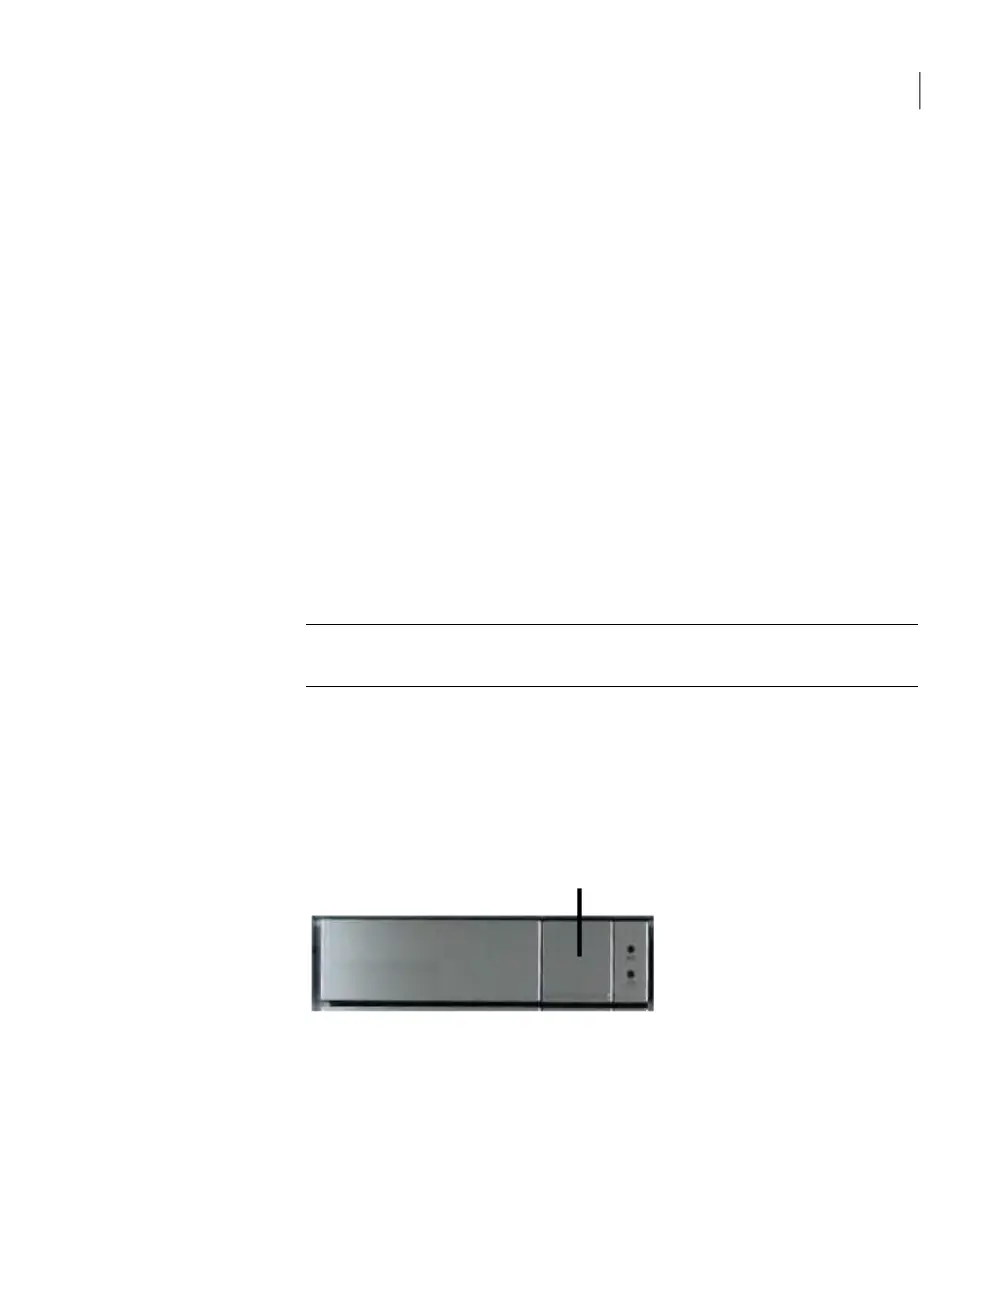
Locate the failed drive in the system. A red or amber LED on the front panel
identifies the faulty drive.
4
Push the drive release button that is shown in the following figure.
5
Remove the drive from the slot.
6
Slide the replacement drive into the drive slot until it clicks into place.
For instruction about replacing other Symantec Storage Shelf components, see the
following:
110Removing and replacing Symantec Storage Shelf hardware
Removing and replacing disk drives