EasyManua.ls Logo

TASKalfa 3500i - User Manual

TASKalfa 3500i
112 pages
Print Icon
To Next Page IconTo Next Page
Loading...
2012.3. 8 Revised
3.16Revised
3.19Revised
3.21Revised
4. 6 Revised
8.30 Revised
2013.11.18 3rd Edition
3500i/4500i/5500i/6500i/8000i
Troubleshooting Guide
1

Table of Contents

Question and Answer IconNeed help?

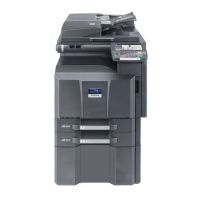
Do you have a question about the TASKalfa 3500i and is the answer not in the manual?

Summary

Black Dot; Black Marks

126 mm interval Black Dots (drum)

Troubleshooting for 126mm interval black dots appearing randomly.

Black Dot; Black Marks

38 mm interval black dots, black marks (Charger roller)

Troubleshooting for 38mm interval black dots/marks from charger roller.

45 mm interval Black dots

Troubleshooting for 45mm interval black dots appearing on paper.

Void Line; White Band (Horizontal White Streaks)

Leak Image 1 (3500 i, 4500 i)

Troubleshooting void image at solid parts for specific models.

Void Line; White Band (Horizontal White Streaks)

Leak Image 2 (5500 i, 6500 i, 8000 i)

Troubleshooting void image at solid parts for specific models.

Void Line; White Band

Horizontal white streaks (Image sample 1)

Troubleshooting horizontal white streaks on gray image.

Void Line; White Band

Vertical White streaks (Image sample 1)

Troubleshooting vertical white streaks appearing continuously.

Vertical White lines (void image) (Image sample 2)

Troubleshooting void images with wide width.

Void Line; Black Band

Vertical Black streaks (Image sample 1)

Troubleshooting vertical black streaks occurring linearly.

Image Smudges

Image Smudges (Image sample 1)

Troubleshooting intermittent smudges in paper conveyance.

Image Smudges (Image sample 2)

Troubleshooting smudges at the leading edge of ejected paper.

Image Smudges

Cleaning Procedure

Procedure for cleaning components related to image smudges.

Image Smudges

c. Clean the toner exhaust duct

Cleaning the toner exhaust duct inside the machine.

d. Check the machine’s production month

Checking production month for cleaning guidance.

Image Smudges

e. Clean the DUCT TONER UNIT

Cleaning the DUCT TONER UNIT for specific production dates.

Image Smudges

Procedure 2) DUCT FAN TONER Cleaning

Removing and cleaning DUCT FAN TONER.

Image Smudges

Procedure 3) DUCT FAN TONER Parts Replacement

Replacing DUCT FAN TONER parts.

Image Smudges

f. Clean the DUCT TONER UNIT

Cleaning DUCT TONER UNIT for later production dates.

Image Smudges

Procedure 2) LID TONER FAN Cleaning

Removing and cleaning LID TONER FAN.

Image Smudges

g. Replace the DISPOSAL TONER UNIT.

Replacing or cleaning the DISPOSAL TONER UNIT and filter.

Image Smudges

h. Clean the FILTER

Cleaning or replacing FILTER 2.

Image Smudges

i. Clean the developing unit

Cleaning the developing unit for toner stains.

Image Smudges

4. Image Smudges (Image sample 4)

Troubleshooting smudges at the 1st cassette.

Image Smudges

5. Toner stain (Image sample A)

Troubleshooting toner stain at specific positions.

2. Toner stain at 20 mm from bottom edge (Image sample B)

Troubleshooting toner stain at the paper bottom edge.

Light Image

1. Replace the ISU_LENS UNIT

Replacing the ISU_LENS UNIT for out-of-focus images.

2. Execute the scanner auto adjustment.

Performing scanner auto adjustment for image focus.

Edge Part Background

1. If Paper Edge Background occurs

Troubleshooting for paper edge background issues.

Measure for Condensation

Phenomenon

Flowing image occurs in cold conditions due to condensation.

Method of Measure

Steps to resolve condensation issues by firmware and settings.

DP-770 Character Blur

Phenomenon

Text character extension from leading and bottom edges.

Method of Measure

Adjusting nip pressure to resolve character blur.

DP-770 Character Blur

Procedure for Modification

Step-by-step modification procedure for character blur.

J0501 to 7; J0523 to 7 Misfeed JAM

If above code display, take action

Troubleshooting procedure for misfeed JAM codes.

Note: Check Roller Color Difference

Identifying roller differences for misfeed troubleshooting.

J0501 to 7; J0523 to 7 Misfeed

Procedures for Adjusting Retard Pulley Pressure

Flowchart for adjusting retard pulley pressure for misfeed.

J051 X Continuous Feeding JAM

If J051 X occurs, take action

Troubleshooting procedure for J051X continuous feeding JAM.

J05 x8;J44 xx JAM during Duplex Printing

JAM during Duplex Printing

Troubleshooting JAM during duplex printing for specific models.

J0545 Misfeeding JAM PF-770

J0545 (No Paper Feeding JAM PF-770)

Troubleshooting procedure for J0545 no paper feeding JAM.

PF-770 TRAY PAPER Slating Check & Recovery

Checking Procedure

Procedure to check for slating of TRAY PAPER.

Checking Method

Methods for checking TRAY PAPER slating condition.

J1313;J1314

If J1313;J1314 occurs, take the measure

Troubleshooting measures for J1313/J1314 errors.

J150 X;J1904

Phenomenon

Paper conveying actuator scraped, sensor detection failure.

How to Respond

Replacing the actuator for J150X/J1904 errors.

J1512

Phenomenon

Paper may not stop before feed sensor, sensor turns on.

Change

Changing paper waiting position and upgrading firmware.

J341 X

If J341 X occurs, take the measure

Troubleshooting measures for J341X errors.

J4103;4104

1. When J4103;4104 occur during A4 paper feed

Measures for J4103/4104 errors during A4 paper feed.

Abnormal Sound J42 XX;J40 XX

Phenomenon

Abnormal noise or JAM due to worn middle roller drive motor gear.

How to Respond

Adding a cover to prevent gear wear.

J42 XX Separation Claw Issues

J42 xx occurred frequently, replace new claws

Replacing separation claw parts for J42XX errors.

J421 X; J460 X; J470 X

1. In case of JAM at the shift guide of the exit unit

Troubleshooting JAM at the shift guide of the exit unit.

J421 X; J460 X; J470 X

b. When paper is not damaged at JAM

Replacing the sensor or eject unit when paper is not damaged.

J421 X Fuser Exit Sensor Stay Jam

In case of J421 X occurs, check fuser guide shape

Checking fuser guide shape and adding washers for J421X.

Paper Tear J430 X;431 X;440 X;471 X

1. Usage of 3-hole paper: tear;JAM & horizontal line

Measures for paper tear/JAM and horizontal line with 3-hole paper.

J49 XX; J50 XX; J51 XX; J600 X

1. Check positioning of bridge conveying-in unit

Checking positioning of bridge conveying-in unit.

2. Check positioning hole of bridge drive unit

Checking for damage to the bridge drive unit positioning hole.

J49 XX; J50 XX; J51 XX; J600 X

3. Check positioning cutout at bridge conveying unit slider

Checking positioning cutout at the bridge conveying unit slider.

4. Check leverage of upper conveying guide

Checking leverage of upper conveying guide on bridge conveying unit.

J49 XX; J50 XX; J51 XX; J600 X

The film attached procedure

Procedure for attaching film components.

J49 XX; J50 XX; J51 XX; J600 X

5. Check material of roller at bridge conveying-in unit

Checking material of roller at the bridge conveying-in unit.

J49 XX; J50 XX; J51 XX; J600 X

6. Check breakage at hook hang part

Checking for breakage at the hook hang part of the bridge relay exit unit.

7. Check broken screw fixed boss;positioning boss

Checking for broken screw fixed boss or positioning boss.

J49 XX; J50 XX; J51 XX; J600 X

8. Check the bushing of the Bridge Exit Unit

Checking the bushing of the Bridge Exit Unit.

J49 XX; J50 XX; J51 XX; J600 X

Replacement procedure for the bushing

Step-by-step replacement procedure for the bushing.

J49 XX; J50 XX; J51 XX; J600 X

9. Check paper conveying guide fulcrum separation

Checking paper conveying guide fulcrum separation.

J49 XX; J50 XX; J51 XX; J600 X

10. Check for broken ribs on conveying guide

Checking for broken ribs on the conveying guide of the bridge exit unit.

11. If JAM persists, replace conveying and relay exit units

Replacing conveying and relay exit units if JAM persists.

J6100; J6110 (DF)

1. Add films to holes on conveying unit

Adding films to holes on the conveying unit.

J6100; J6110 (DF)

2. Check leverage of upper conveying guide

Checking leverage of upper conveying guide on bridge unit.

J6100; J6110 (DF)

The film attached procedure

Procedure for attaching film components.

J6100; J6110 (DF)

2. Replace GUIDE FEED LOWER with ASSY

Replacing GUIDE FEED LOWER with specific ASSY.

3. Check paper corner folding or scratching at Punch unit

Checking for paper corner folding or scratching at the Punch unit.

J6100; J6110 (DF)

4. Check paper caught by STAY PUNCH

Checking if paper is caught by STAY PUNCH when stopping before roller.

J6100;J6110 (DF)

5. Select A4 paper size on manual bypass tray

Caution when selecting A4 paper size on manual bypass tray.

J631 X; J641 X; J650 X

1. Corner folding;curling JAM (Image sample 1)

Troubleshooting corner folding or curling JAM.

2. Paper trail end folding JAM (Image sample 2)

Troubleshooting paper trail end folding JAM.

J631 X; J641 X; J650 X

4. curling JAM at paper leading edge (Image sample 3)

Troubleshooting curling JAM at paper leading edge.

J631 X;J641 X;J650 X (DF)

Phenomenon

Paper may bound and next bundle caught up at paper guide.

How to Respond

Increasing spring tension to pull up paper holder guide.

J6510 DF-790 Manual Staple Caution

Notes

Caution regarding paper hold hand position during staple operation.

J6600 (DF-770;790)

1. JAM after paper stops at conveying path

Troubleshooting JAM after paper stops in conveying path.

J6710;J7710 (BF)

1. J6710;7710 occurs, take the following measure

Troubleshooting measures for J6710/7710 errors.

J9020;J9030

Treatment 1

Stopping function by setting OFF or performing maintenance mode U460.

Treatment 2

Reducing original damage or preventing missing pages.

J9010;J9011;J9110;J9300;J9310;J9400;J9600;J9610

2. J9010... occurs, take the following measure

Troubleshooting measures for specific JAM counter errors.

Corner Folding

1. If it occurs at lower tray ejecting

Troubleshooting lower tray ejecting corner folding.

Corner Folding

b. Check leverage of upper conveying guide on bridge conveying unit

Checking leverage of upper conveying guide on bridge unit.

Corner Folding

The film attached procedure

Procedure for attaching film components.

Corner Folding

2. Ejecting paper to upper tray

Replacing guide or relay exit unit for upper tray ejecting corner folding.

Corner Folding

Detaching the eject guide

Procedure for detaching the eject guide.

Corner Folding

Detaching the eject guide

Procedure for detaching the eject guide.

Paper Creasing

Check the image sample

Checking image sample for creased paper.

Add the modification guide

Adding modification guide for paper creasing.

Paper Creasing

The procedures to install the guide

Procedures for installing the guide.

BF-730;720;710 Paper Creasing after Middle Folding

Phenomenon

Paper center part creased or damaged after middle folding.

How to Respond

Adjusting guides, turning papers, or replacing CF blade.

C0640 HDD Error

C0640 display on panel

Troubleshooting HDD error displayed on panel.

C2101 Developing Motor Error

1. In case of abnormal sound

Replacing the DLP UNIT for abnormal sound.

2. In case of no abnormal sound

Checking CASS SHUTTER and replacing DLP UNIT.

C22 XX Drum Motor Error

If C22 XX occurs, take the following measure

Troubleshooting drum motor errors.

C510 X Main HVT Error

Check Firmware version and version up

Checking and upgrading firmware for C510X error.

Fuser Errors (C6000, C6030, C6050, C6200, C6230, C6250)

Check engine firmware version

Checking engine firmware version for fuser errors.

C6020;C6220 Fuser Thermistor High Temp

Check engine firmware version

Checking engine firmware version for high temperature errors.

Fuser Roller;Wire;Fusing Issues

1. Please upgrade firmware

Upgrading firmware for fuser roller/wire/fusing issues.

2. Replace fuser unit

Replacing the fuser unit for fuser roller/wire/fusing issues.

C6030;C6050 Fuser Thermistor Errors

Check engine firmware version

Checking engine firmware version for thermistor errors.

C6600;C6720 Fuser Belt Errors

Check whether the fuser belt is broken

Checking if the fuser belt is broken.

C6600; C6720 Fuser Belt Errors

b. Check machine’s serial number and adjust fuser position

Checking serial number and adjusting fuser position plate.

C6600;C6720 Fuser Belt Errors

Flow chart

Flowchart for diagnosing fuser belt edge failure.

C6600; C6720 Fuser Belt Errors

Step Checking contents

Checking flange keys of the fuser unit.

C6600; C6720 Fuser Belt Errors

C. Perform below checking.

Performing checks including firmware, PCB, and harness.

C6620 IH Core Motor Rotation Error

Check whether updated with measured engine firmware

Checking and updating engine firmware for motor rotation error.

C6730

Phenomenon

Cooling fan clogged by dust, reducing cooling efficiency.

How to Respond

Cleaning the cooling fan with a vacuum cleaner.

C6770 IH Fuser Low Power Error

Check whether Engine firmware version is after

Checking engine firmware version for low power error.

C6910 Engine Firmware Ready Error

Check the version of the firmware

Checking and upgrading machine firmware version.

C7101 Toner Control Sensor Error

1. In case of abnormal sound

Replacing the DLP UNIT for abnormal sound.

2. In case of no abnormal sound

Checking CASS SHUTTER and replacing DLP UNIT.

SATA Cable Contact Failure

The SATA cable may have contact failure

Troubleshooting SATA cable contact failures.

Welcome Screen Lock

Welcome Screen Lock (CF000 appears)

Troubleshooting welcome screen lock issues.

CF040 Communication Error Main PCB;Engine PCB

Whether aging drive is starts or not

Troubleshooting communication errors between Main and Engine PCB.

CF182;CF186

1. When CF182;CF186 occur after every printing.

Troubleshooting CF182/CF186 errors after printing.

Abnormal Sound from Developing Section

a. Replace the DLP UNIT.

Replacing the DLP UNIT for developing section abnormal sound.

Abnormal Sound from Fuser Section

Abnormal sound from fuser

Checking fuser motor sound and replacing the fuser unit.

Abnormal Sound from Fuser Section

Procedure: Replace Fuser Unit

Procedure for replacing the fuser unit.

Abnormal Sound from Fuser Section

Procedure: Adjust Frame and Guide

Procedures for checking and adjusting frame and guide.

Abnormal Sound from Fuser Section

Procedure: Adjust Guide and Spring

Procedures for checking and adjusting guide and spring.

Abnormal Sound from Fuser Section

23.Install Fuser Unit and Check Ticking Sound

Installing fuser unit and checking for ticking sound.

Reducing DP Motor Driving Sound

Measure 1

Reducing sound by changing motor drive control.

Measure 2

Reducing sound by changing driving gears.

DP Size Detection Error

When size detection error occurs at DP

Troubleshooting DP size detection errors.

Waste Toner Bottle

1. Waste toner bottle detected incorrectly

Checking waste toner bottle detection issues.

2. Waste toner bottle detection rubber peeling off

Checking waste toner bottle rubber for peeling and adhesion.

Time for maintenance.(T)

1. Time for maintenance.(T)

Performing maintenance reset and setting system time.

Cassette Rails Damage

Note on parts and installation for damaged rails

Note on parts and installation direction for damaged cassette rails.

Cassette Rails Damage

Note on parts and installation for damaged rails

Note on parts and installation direction for damaged cassette rails.

Cassette Rails Damage

For Strengthening the rail

Strengthening the rail by installing reinforcing parts.

TASKalfa 3500i Specifications

General IconGeneral
Print Speed35 ppm
Monthly Duty Cycle150, 000 pages
Warm-up Time23 seconds or less
DuplexStandard
Scan Resolution600 x 600 dpi
FunctionPrint, Copy, Scan
Memory2 GB RAM
Hard Disk Drive160 GB
Original SizeA3
InterfaceUSB 2.0
PDLPCL6
Dimensions594 x 738 x 683 mm
Resolution600 x 600 dpi, 9, 600 x 600 dpi (interpolated)

Videos

How To Clear Machine Failure C6940 Error in TASKalfa 5500i/4500i/3500i