Home
Teac
Voice Recorder
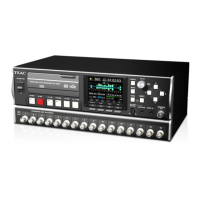
WX-7000
Teac WX-7000 Instruction Manual
4
of 1
of 1 rating
72 pages
Give review
Manual
Specs
To Previous Page
To Previous Page
Loading...
71
Copyright © 2013 TEAC C
orporation.
All rights reserved.
TEAC CORPORAT
ION
1-47 Ochiai, T
ama-shi,
T
o
kyo 206-8530, Japa
n
TEAC AMERICA, I
NC.
7733 T
elegraph R
oad, Mont
ebello, California 90640, U.S.A.
TEAC EUROPE Gm
bH
Bahnstraße 12, D6520
5 Wiesbaden-E
rbenheim, Germa
ny
71
Table of Contents
Table of Contents
4
Installing WX Navi
8
PC Requirement
8
Operating System
8
Installing WX Navi
9
Starting WX Navi
11
Initial Setting
11
About IP Address of Computer and WX-7000
11
Default Setting of WX-7000
11
About Security Software
11
Use the 1000BASE-T LAN Interface
11
About Firewall
12
Launching WX Navi with the Next Step
12
On the WX-7000 Recording Unit, Push up the Power Switch to Turn It on
12
Start WX Navi
13
Do Not Put the PC into Standby /Sleep Mode
13
Please Do Not Operate the Computer Background Tasks
13
WX-7000 Select Window
14
WX-7000 Network Configuration
14
Already Being Used WX-7000
15
Connecting to an WX-7000 Series that Exists in a Different Segment
15
Introduction to WX Navi
17
Main Window
17
Mode of WX Navi
18
Status Dialog Display Area
19
Display of Status Bar
20
Menu Bar
21
File Menu
21
Setup Menu
21
Operate Menu
22
Misc Menu
22
View Menu
23
Help Menu
23
Tool Bar
24
Overview of Steps in Recording and Playback
25
Conceptual Diagram for Recording, Playback
26
Settings
27
Notice for Settings
27
System and Channel Settings
27
Upper Left Part
27
Upper Right Part
28
Each Channels Settings List
29
Channel Property Window
30
System Setting
31
Basic Settings" / "Monitor Out" Groups
31
Clock" Group
31
IRIG/GPS" Group
32
Trigger Settings
33
Notice for Trigger Recording
33
Pre Trigger / Post Trigger
33
Repeat
34
Interval Mode Setting
34
Level Trigger
35
Property of TEDS
36
Reading and Preservation of a Setup
37
Operation
39
Selection of Media and File Name
39
Specification of a Playback Media and a File Name
40
Copy the Files
41
Select Files
41
Select Target Directory
41
Rename the File Name
42
Start of Copy
42
Format
42
Record and Playback
43
Stop
43
Record Standby
43
Playback
43
Pause
43
Event
43
Search(Rew)
43
Search (F FWD)
43
Search Property
43
Search Property Window
44
High Grade Search
45
When the Number of Event Marks Is Clicked
45
When Elapsed Time Is Clicked
45
When a Time Display Is Clicked
45
Reproductive Resumption
45
Other Settings
46
Fan
46
Listening Memo Voice or Data
46
Calibration
46
Displaying Waveform
47
Select the Channel to Display
48
Channel Selection Buttons
48
Unit Selection Buttons
49
All Channel Selection Button
49
Channel Alignment Button
49
Auto Height Adjustment Button
50
Scaling Change Slider
51
Cursor Property
52
Channel Property
53
Converting Units
53
Offset
54
Line Color
54
Background Color
54
Back to Default Settings for All Channels
54
Display Range
55
Channel Information
56
Changing to Display Channel Order
56
Overlapping Waveforms
57
Sub Window
58
Bar Display
58
Peak-Hold Reset Button
58
Unit Select Button
58
Red-Zone Adjustment Slider
59
Bar Graph Arrangement Button
59
Digital Display
60
Channel Select Drop-Down List
60
Additional Window Button
60
Digital 128Ch Display
60
Header Information
62
Irig/Gps
63
In Case of REC Mode
63
In Case of VIEW Mode
64
Synchronization
65
Remarks in Using WX Navi
65
The Two WX-7000 Recorders Which Operate in Synch Must be Connected to the same
65
Subnet
65
No Other WX-7000 Recorders than the Master and Slave Units Are to be Connected to
65
The Subnet
65
When You Run Two WX Navi Software for Two WX-7000S Recorders Operating in Synch
65
Each WX Navi Must be Run on the Another PC
65
Cable Connection
65
Synchronization Cable
65
Connection Check
66
Starting the Connection Check
66
Connecting WX Navi
67
Synchronized Recording
68
Step 1 Switch from VIEW Mode to REC Mode
68
Step 2 Setting Recording Media, Sampling Frequency and A/D Converter on Master Unit
68
Step 3 System/Channel Settings on each WX-7000
69
Step 4 Close All Setting Dialogs
69
Step 5 Start Synchronized Recording on Master Unit
69
Synchronized Playback
70
Step 1 Select Playback Mode and File on Slave Unit
70
Step 2 Select Playback Mode and File on Master Unit
70
Step 3 Control Play/Stop on Master Unit
71
Step 4 Switch from VIEW Mode to REC Mode on the Slave Unit
71
Step 5 Switch from VIEW Mode to REC Mode on Master Unit
71
Other manuals for Teac WX-7000
Owner's Manual
88 pages
Quick Start Guide
24 pages
4
Based on 1 rating
Ask a question
Give review
Questions and Answers:
Need help?
Do you have a question about the Teac WX-7000 and is the answer not in the manual?
Ask a question
Teac WX-7000 Specifications
General
Brand
Teac
Model
WX-7000
Category
Voice Recorder
Language
English
Related product manuals
Teac WX Navi
88 pages
Teac DR-100MKII
60 pages
Teac 80-8
25 pages
Teac VR-10
108 pages
 Loading...
