370
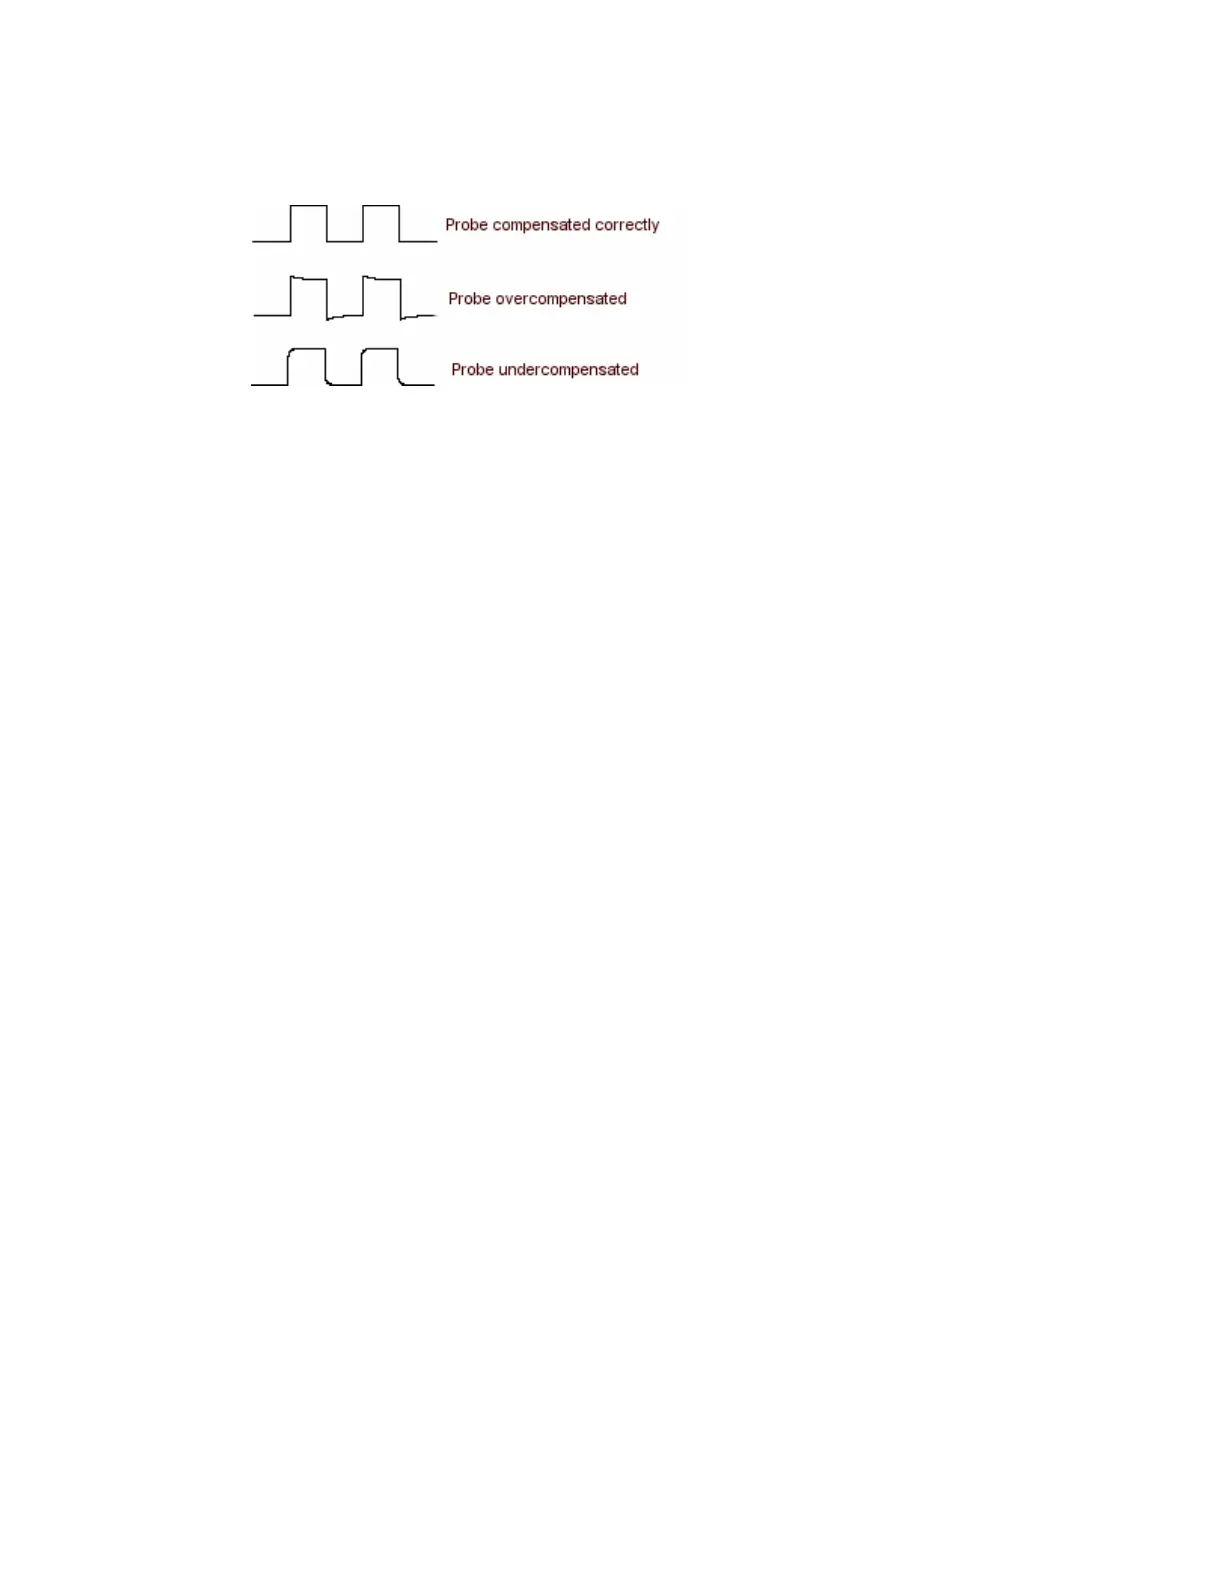
Probe Compensation
Printing Banners
Use the following steps to print banners. Banners can only be printed on the integrated thermal
printer.
1 Open the Print dialog box from the File menu Print command. From the Name drop-down
list, select Integrated Thermal Printer (the default). Click OK.
2 Open the File menu Page Setup dialog box. For the Type of printing, select Banner. This
locks in values for the Orientation, View, and Image controls.
3 For the Print Scale controls, select the Units you want to use to specify the horizontal scale,
either inches/division or centimeters/division. Select a value for the Length; these values
change according to the choice of Units.
4 Change the Summary Waveform selection if you want to add a screen shot to the
Beginning, End, or Both ends of the banner. The Summary Waveform is a screen shot that
gives you an overall view of what was originally on the screen before printing began. It
contains information that will not appear on the banner such as cursor and measurement
readouts, histograms, and any screen text or labels that you have added.
5 Select the Samples to Print to specify which portion of the waveform to print. If you select
Between cursors and no cursors are present, vertical cursors are activated in their most
recent position. You can use the multipurpose knobs to change the cursor positions.
6 Click Print to open the Print dialog box.
7 Click OK to begin printing. If the banner you produce is unreadable because it is too light,
open the printer cover and push the lever on the right side of the printer towards the back of
the instrument as far as it will go.
Note
Banner printing is not compatible with:
Fast Acquisition mode
Persistence display mode
XY or XYZ mode
Zoom mode
 Loading...


